Important
Processors must have export rights (Allow Processor Export) granted by the Administrator in Manage APFlow™ to access Admin.
Once in the Manage Export Batches window, Reset Selected Invoices for Edit ( ) and to Re-Export Selected Invoices (
 ).
).
1.From the ribbon toolbar, click APFlow™.
2.Click Invoice Entry,  .
.
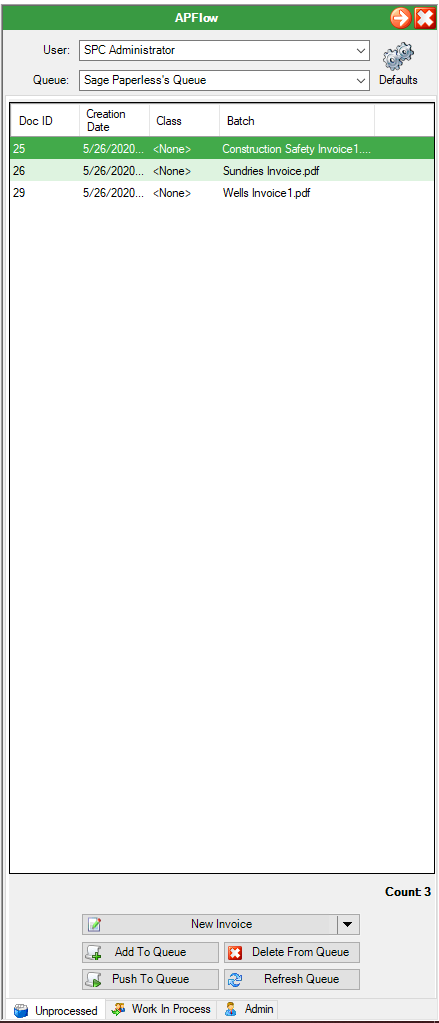
The APFlow™ sidebar similar to the following displays with the Unprocessed tab active:
3.Click the Admin tab.
The APFlow™ sidebar displays with the Export tab active similar to the following:
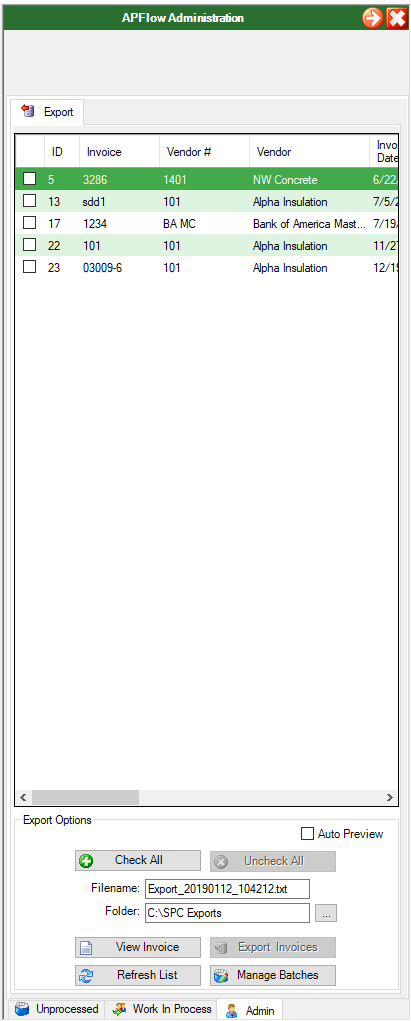
Listed in the grid are approved invoices that are ready for export. The columns that display in the grid are selectable.
4.Right click in the column heading for a dropdown list similar to the following:
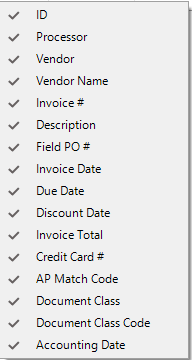
5.Click to select or deselect columns to display in the grid.
Note: Custom fields are included in the list.
6.Check the invoice(s) to export.
If all the invoices listed in the grid are to be exported, click Check All.
Note: Invoices can also be exported individually.
7.In the Filename field, Sage Paperless Construction systematically generates a filename where the export data will be written.:
Export_YYYYMMDD_HHMMSS.txt
(where YYYY is the year, MM is the month, DD is the day, HH is the hour, MM is the minute and SS is the second)
If necessary, click the Filename field to change the file name.
8.The folder in which the export data file will be stored is defaulted from the Advance settings on the Vault Bridge tab. If necessary, click the Folder field to change the name.
If the export folder does not exist, a dialog box displays asking if the export folder should be created.
9.To view the invoice before exporting, double click the actual invoice entry in the grid or click to highlight the invoice entry in the grid and then click View Invoice.
10.Click Export Invoices to perform the export.
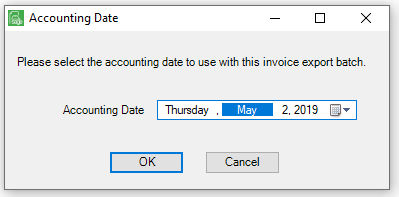
There may be a prompt for additional information, such as accounting month, based on specific accounting package details, similar to the following:
The export function performs the following in Sage Paperless Construction:
▪The details of the invoice header and lines are written to an export file.
▪The invoice header and line details are added as index values of the invoices.
▪The invoice records are flagged as “exported”.
9.Click OK.
Once the export is complete, the following dialog box will display:
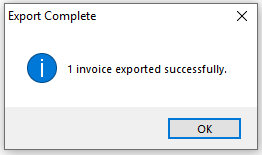
10.Click OK.
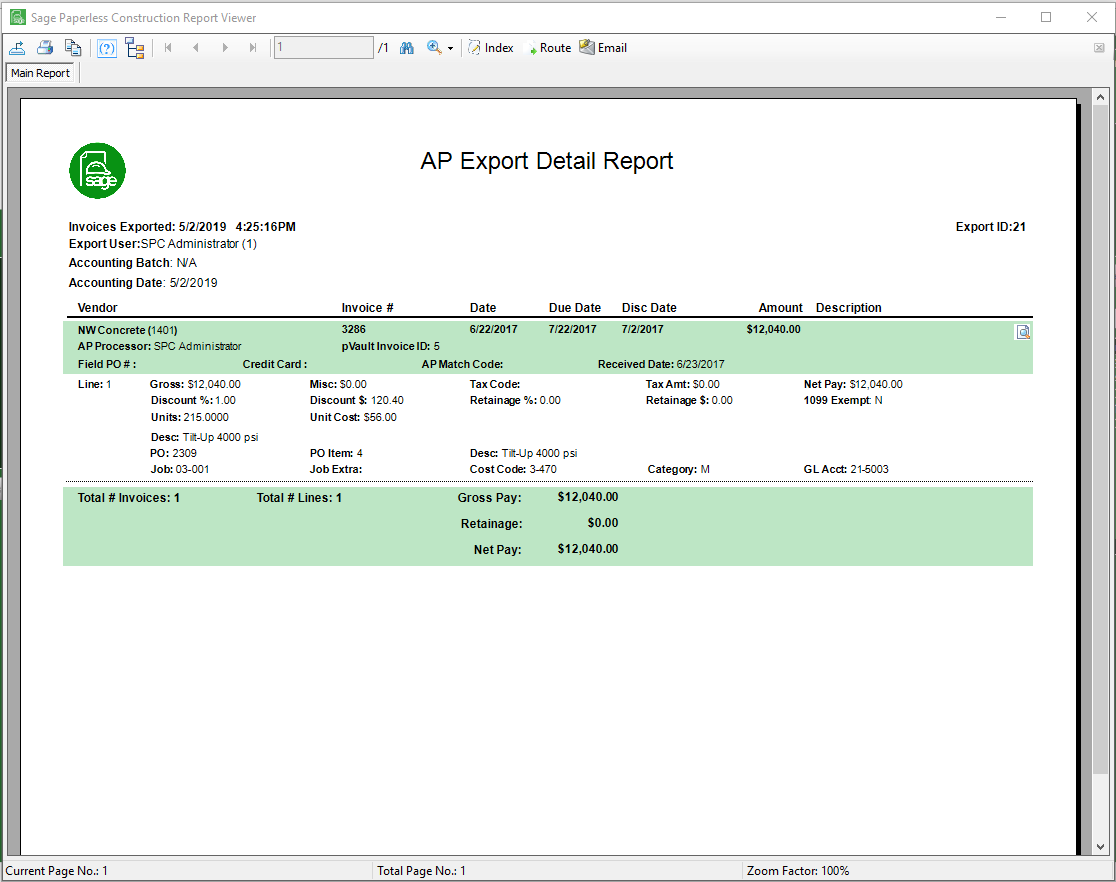
The AP Export Detail report will generate. This report details the information of all invoices exported in the current export batch and can be reviewed online or be printed.