If a user leave the company, go here to permanently transfer documents from that user to another.
1.From the ribbon toolbar, click Administration.
2.Click the dropdown Users arrow,  .
.
3.Click Reassign Users.
The Reassign Users screen will display:
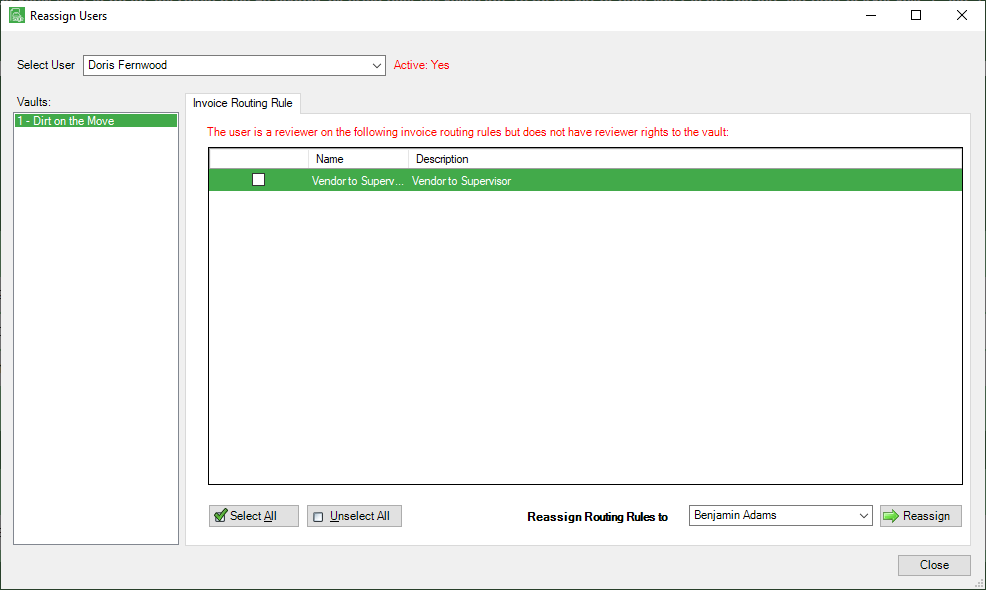
This form lists all orphaned or inaccessible items for users:
- who are no longer active
- who are still active but have had permissions to the vault removed
- who are still active but have had APFlow™ permissions removed
Possible tabs displaying can include:
Batch Owner |
The user is listed as the owner of one or more open batches but does not have access rights to the vault. |
Doc Route Recipient |
The user is a recipient on one or more open doc routes but does not have access rights to the vault. |
Email Owner |
The user is listed as the owner of one or more email addresses set up on import jobs but does not have access rights to the system. |
Index Routing Rule |
The user is a recipient on one or more document index routing rules but does not have access rights to the vault. |
Invoice Processor |
The user is the processor on one or more non-exported invoices but does not have processor rights to the vault. |
Invoice Reviewer |
The user is a reviewer on one or more non-exported invoices but does not have reviewer rights to the vault. |
Invoice Routing Rule |
The user is a reviewer on one or more invoice routing rules but does not have access rights to the vault. |
Queue Owner |
The user is listed as the owner of one or more queues but does not have any access rights to the system. |
User Role Owner |
The user is listed as the owner on one or more user roles but does not have access rights to the vault. |
4.In the Select User field, use the dropdown to select a user.
5.In the Vaults pane, click to highlight the appropriate vault, if necessary.
6.In the one of the tab panes, click to select some or all entries.
7.Select the individual to whom to assign the entries using the Reassign to dropdown list.
8.Click Reassign.
Important: The Reassign button only reassigns items on the current tab. To reassign items on multiple tabs, the user must access each tab and repeat steps 6 though 8 as many times as required to access all appropriate tabs.
9.Click Close.