View a document's history of snapshots.
The Document Snapshots screen displays all snapshots of the current document. The snapshots are listed in reverse chronological order with the most recent snapshot displaying first. Click on a snapshot in the list to display it in the viewer pane on the right. Any notes associated with that specific snapshot will display in the Notes section.
1.From the ribbon toolbar, click Retrieve.
2.Click View Snapshots,  .
.
The Document Snapshots window similar to the following displays:
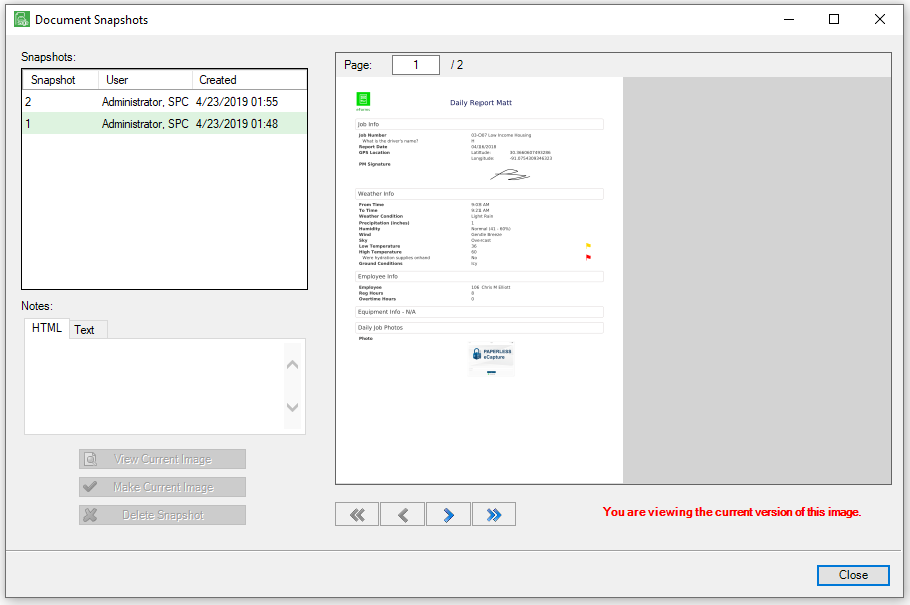
3.Click to highlight the snapshot listed in the Snapshots pane.
The Document Snapshots window updates to resemble the following:
4.Click View Current Image to display the most recent version of the image.
Note: If the current image was not saved, the version that displays could be different.
Snapshots and DocuSign
When routing documents through DocuSign, copies of both the original document and the executed document can be accessed through View Snapshots.
1.From the ribbon toolbar, click Retrieve.
2.Click View Snapshots,  .
.
The Document Snapshots screen similar to the following displays:
3.Click to select the highlighted Snapshot.
The copy of the original image displays in the right pane with the following text in the Note pane:
Snapshot before document signing.
4.To view the executed document, click View Current Image.
The executed document displays in the right pane.
The following message displays below the right pane:
You are viewing the current version of this image.
The Notes text field is available for archive purposes.
Reverting Back to a Snapshot
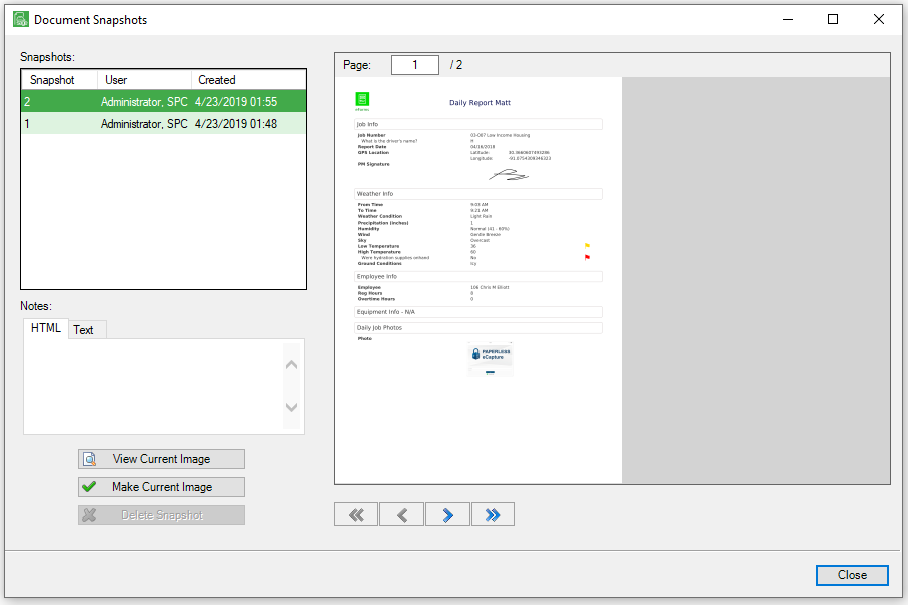
“Revert” back to a snapshot by selecting a snapshot and then clicking Make Current Image.
Two things will occur:
•A snapshot of the current document is made.
•The selected snapshot is copied into the current document’s position.
This way, there is always a history of the document and can revert to any point in time.
1.Click Make Current Image.
A dialog box similar to the following displays:
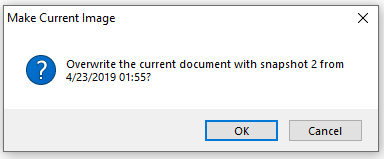
2.Click OK to overwrite the current document.
3.Click Cancel to leave the current document unchanged.
Deleting Snapshots
With the proper permissions**, a snapshot may be deleted by clicking Delete Snapshot.
Important: There is no prompt associated with this action. When Delete Snapshot is clicked, the snapshot is immediately deleted.
** Permission to delete snapshots is configured on the vault Security Group Properties screen. Click here to read more about setting up permission; specifically Allow Delete Snapshots.