Please enable JavaScript to view this site.

pVault® Help

1.From the ribbon toolbar, click Greenlight.

2.Click Greenlight, Greenlighticon-mh.
 
The main screen displays with the Dashboard tab active:
 
Greenlightmainscreenblank-mh
 

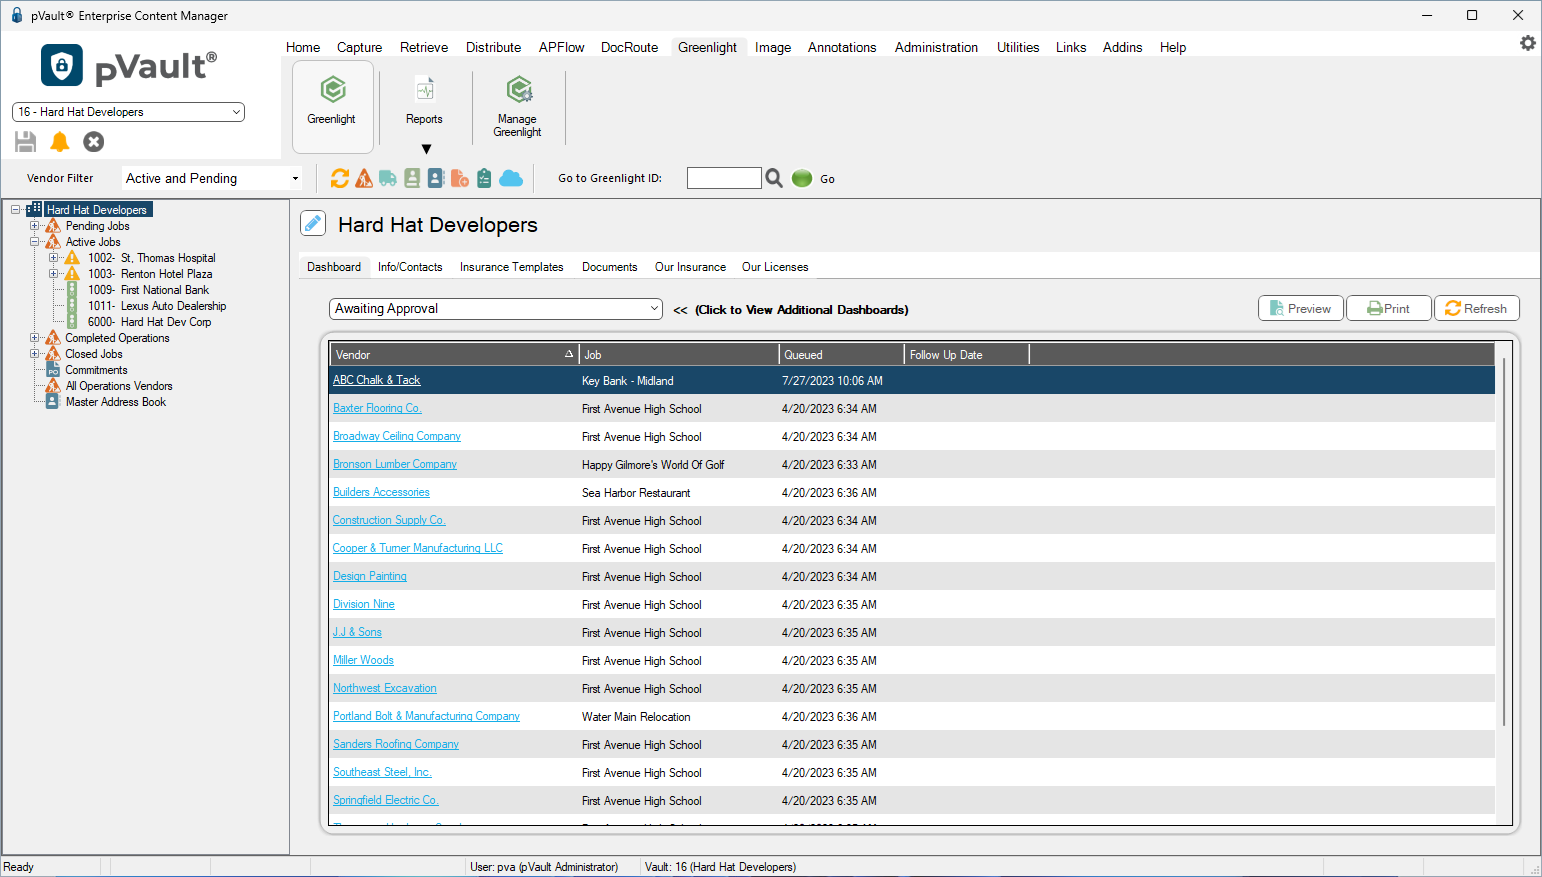
3.In the left navigation bar, click on a vendor.
 
The following screen displays with the Vendor Info tab active:
 
GreenlightCertifiedPayrollmainVendorscreen2-mh
 

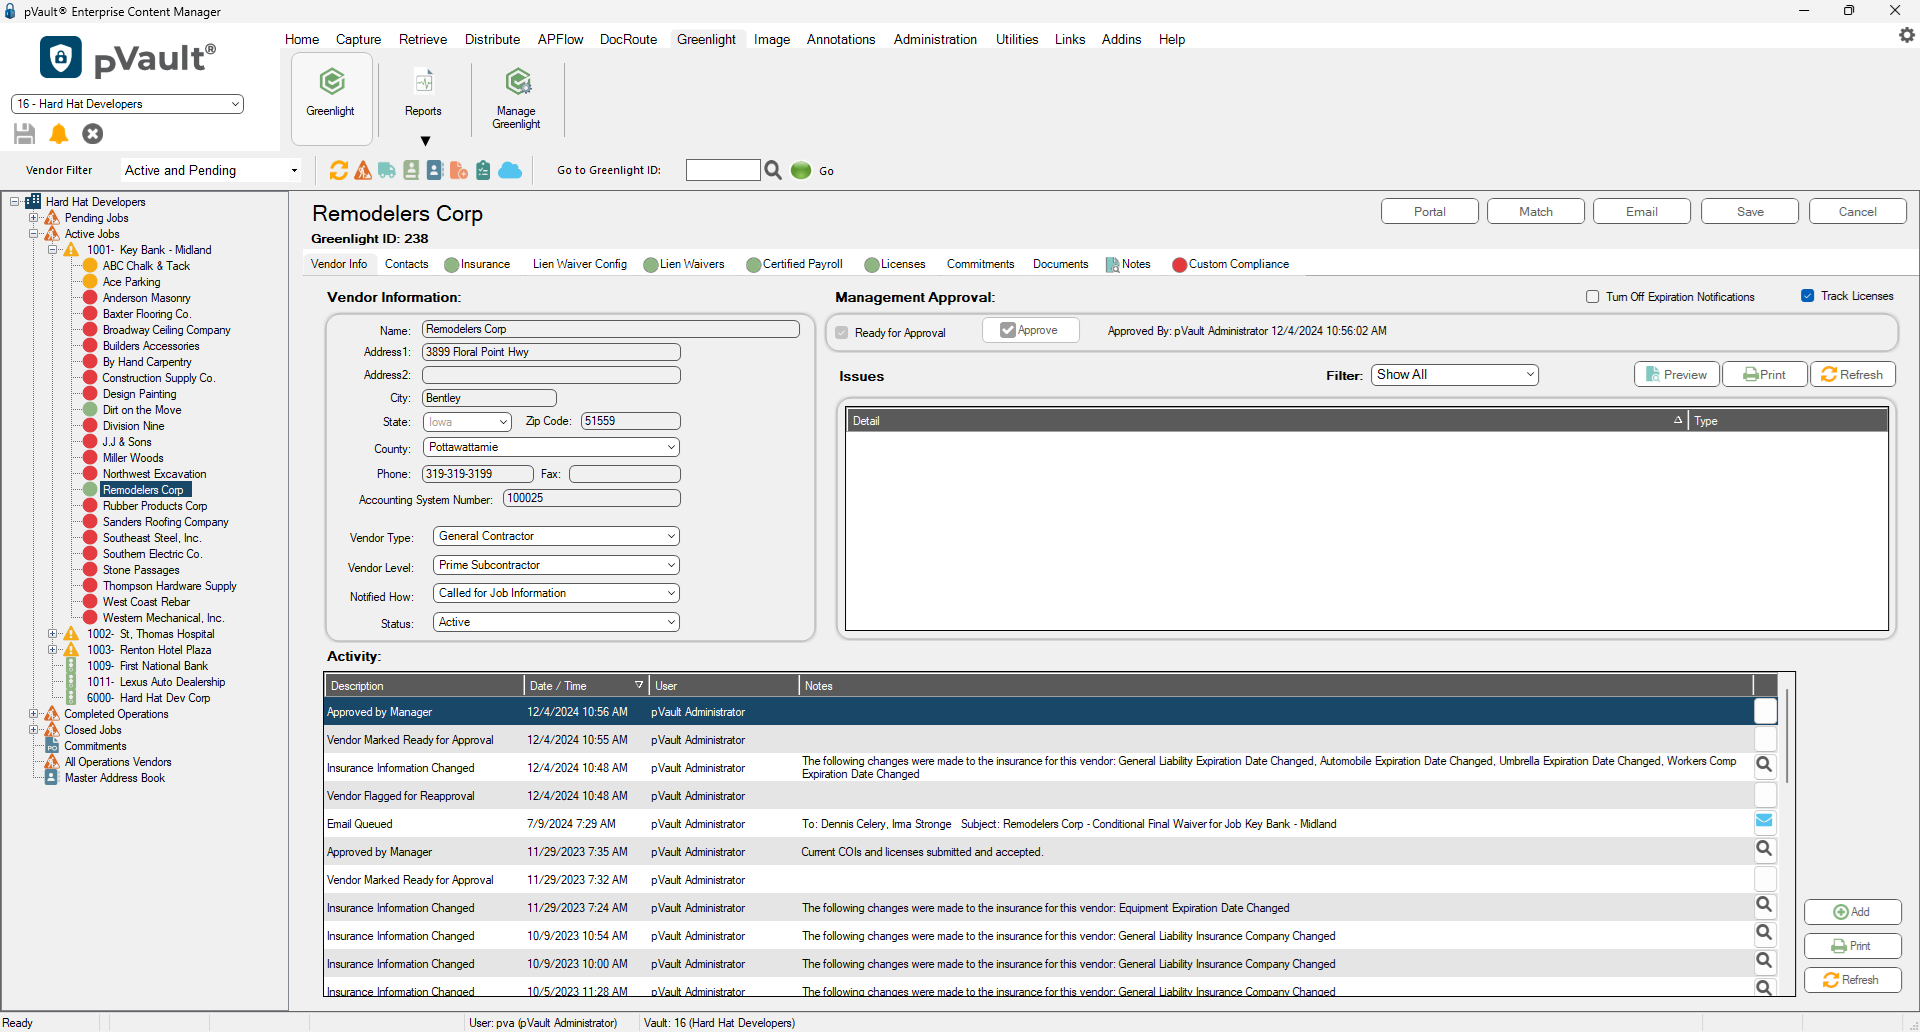
4.Click the Certified Payroll tab.
 
The following screen displays:
 
GreenlightCertifiedPayrollmainscreenCertifiedPayrolltabactive2-mh


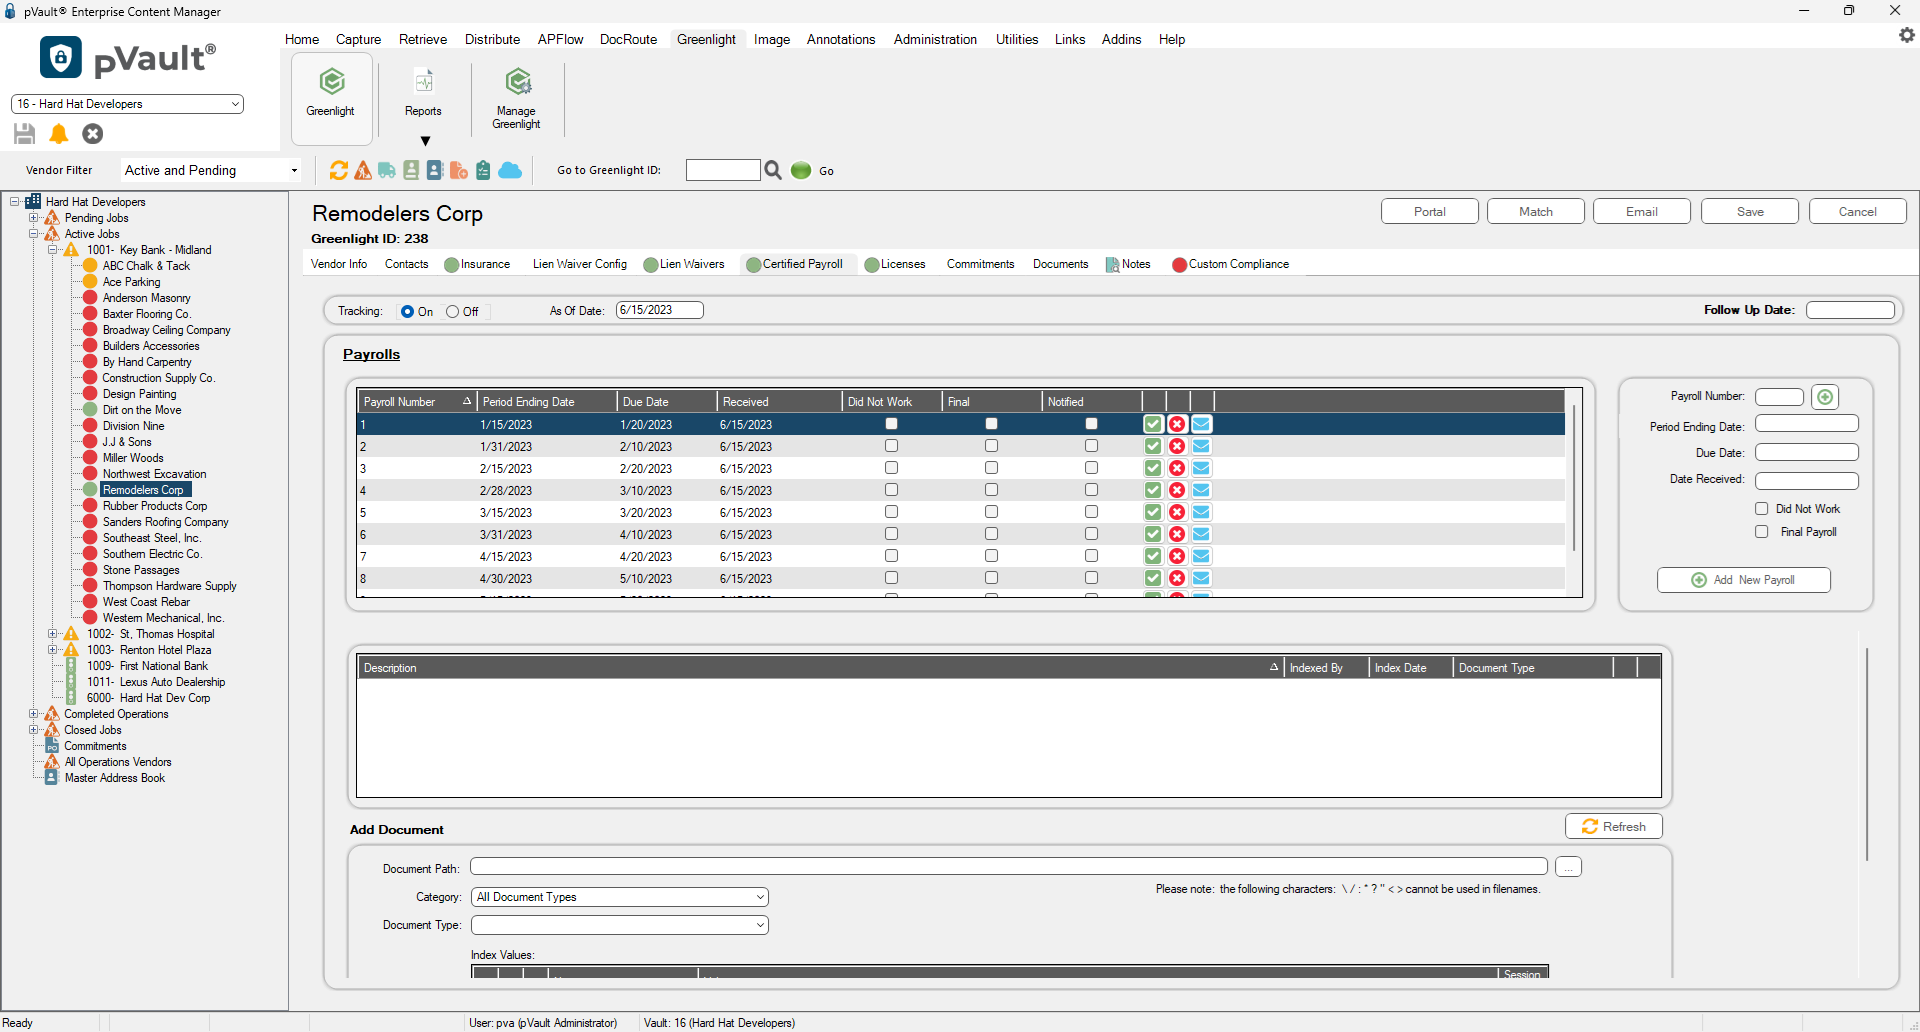
5.In the tracking record, click the checkmark, Greenlightgreencheckmarkicon-mh.
 
The Received column date displays. This is the current date.
Note that the checkmark icon is replaced by a refresh icon, Greenlightrefreshicon-mh.
 
GreenlightCertifiedPayrollVendorscreenPayrollpanewithtrackingrecord-mh
 

6.Click the remove icon, Greenlightredxicon-mh, to remove the tracking record, if appropriate.


Sending an Email

Click the email mailbox icon, Greenlightmailboxemailicon-mh, to generate a Greenlight Email Form:


GreenlightCertifiedPayrollVendorscreenPayrollpanewithtrackingrecordemailformdialog-mh


For the recipients (To, CC, Bcc), you can click the ellipsis icon, Ellipsisicon-mh, to generate a Email Contact Lookup dialog box listing relevant individuals:


GreenlightCertifiedPayrollVendorscreenPayrollpanewithtrackingrecordemailformdialogEmailContactLookupdialog-mh


Version 2024.01.36 1/30/2025
© 2025 Paperless Environments, LLC or its affiliates ("Paperless") or its licensors.  All trademarks mentioned are the property of their respective owners.  Use of non-Paperless trademarks is not an endorsement of any person or product.