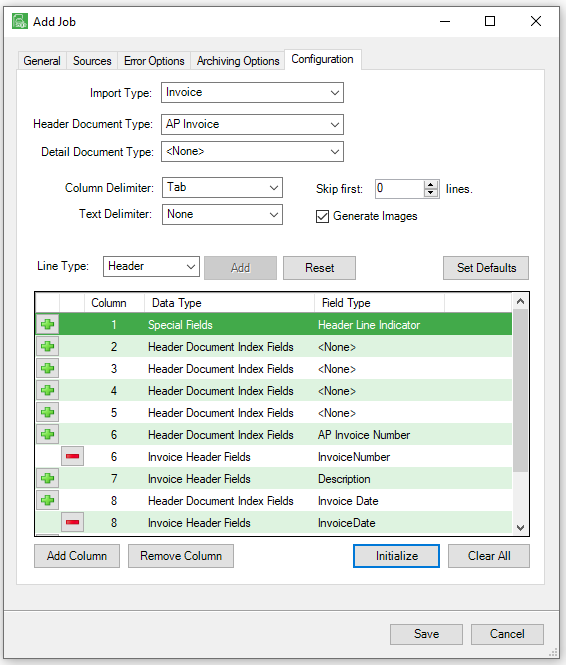
1.Click the Configuration tab.
The window similar to the following displays:
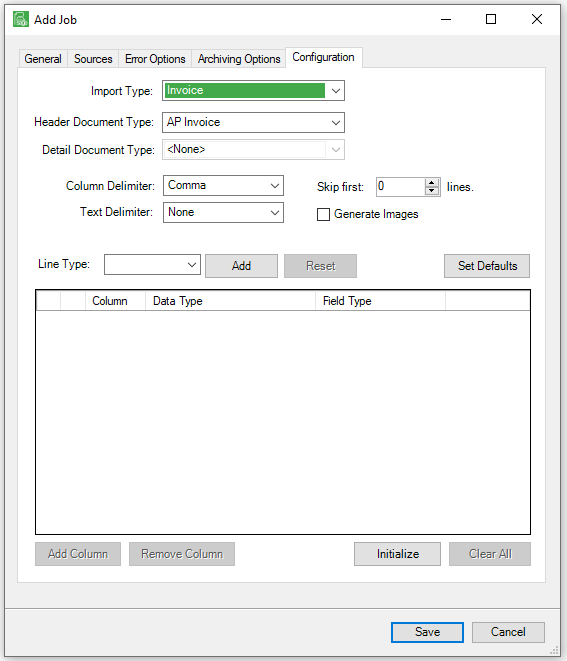
2.In the Import Type field, use the dropdown to select Invoice.
3.In the Header Document Type field, use the dropdown to select either AP Invoice or AP Invoice - Confidential as appropriate.
4.In the Detail Document Type field, use the dropdown to select a detail document types.
Note: This is based on selecting the appropriate line type options.
5.In the Column Delimiter field, use the dropdown to select one of the following, based on the CSV file being imported:
- Comma
- Tab
- Space
- Pipe
6.In the Text Delimiter field, use the dropdown to select one of the following, based on the CSV file being imported:
- None
- Single Quote
- Double Quote
7.In the Skip first field, use the arrows to indicate the number of lines considered to be the header lines, based on the CSV file being imported.
8.Click the Generate Images check box, if appropriate.
Note: If you do not have an actual image for the document, clicking this option generates an image that is basically a report with some of the invoice information on it. This is optional.
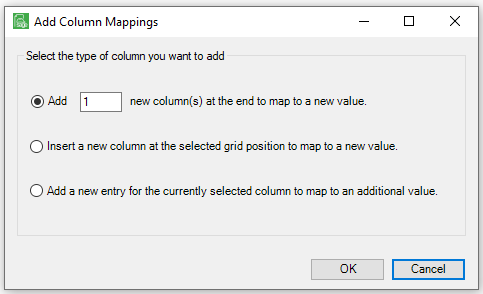
9.For the Line Type field, click Add.
The following Add Line Types dialog box displays:
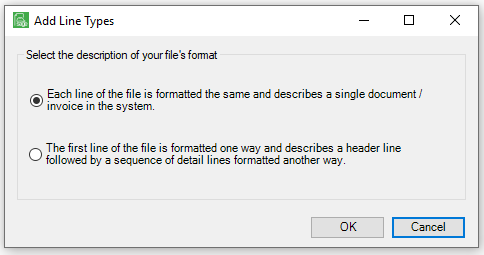
10. Choose the option that best describes the file.
11. Click OK.
General will display in the Line Type field.
12. If this is a CSV file, click Initialize.
The following dialog box displays:
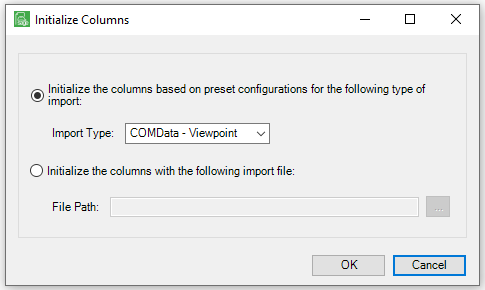
13. Keep the default (Initialize the columns based on preset configurations for the following type of import.
14. Click OK.
15. Click Add Column to bring up the Add Column Mappings dialog box similar to the following:
Based on the CSV file, this will generate column mapping similar to the following:
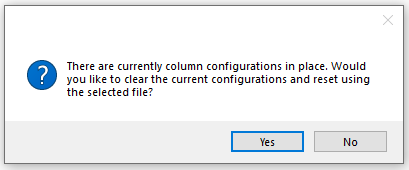
If you click Reset and line types with configurations already exist, the following prompt will display:
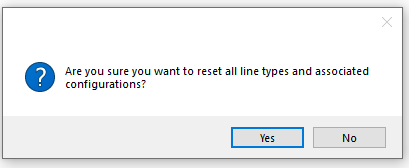
Click Yes or No, as appropriate.
Instead, if columns are predefined, click Initialize to bring up the Initialize Columns dialog box similar to the following:
16. Click OK.
Based on the CSV file, this will generate column mapping similar to the following:
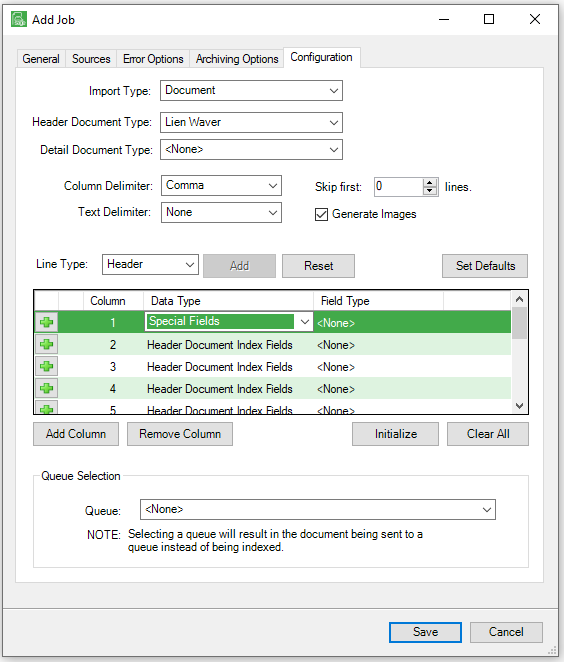
17. In the Queue field, use the dropdown to select the appropriate queue.
Note: This is optional.
18. Once all the job configuration tabs are filled out, click Save to save the CSV Import job template.
Additional Fields and Functionality
Field |
Description |
|
|---|---|---|
Generate Images |
Click the Generate Images check box only if document image(s); real image, exist in the CSV file.
|
|
Set Defaults |
See below this table for details concerning Set Defaults functionality.
|
|
Special Fields |
This is a Data Type associated with Field Types based on the selected Line Type. |
|
Origination Date |
In the file, document(s) with specific origination dates. |
|
Document Class |
Invoice only. |
|
Page Number |
In the file, single document housing all images on specific page numbers. |
|
Processor ID |
Invoice only.
|
|
Initialize |
Click Initialize if the columns should be based on a template--either on an import type or an import file. Click OK to close the dialog box.
|
|
Queue |
In the Queue field, use the dropdown to select the appropriate queue. |
|
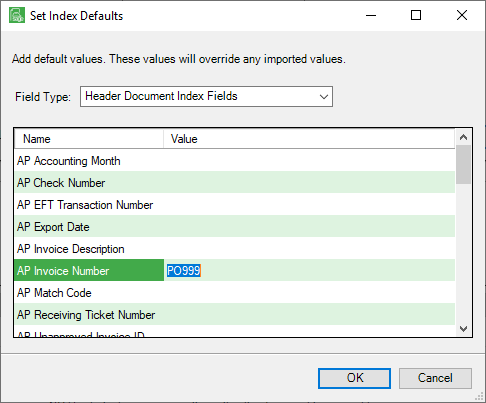
Set Defaults
If job specific values should be used, click Set Defaults.
The Set Index Defaults dialog box similar to the following displays:
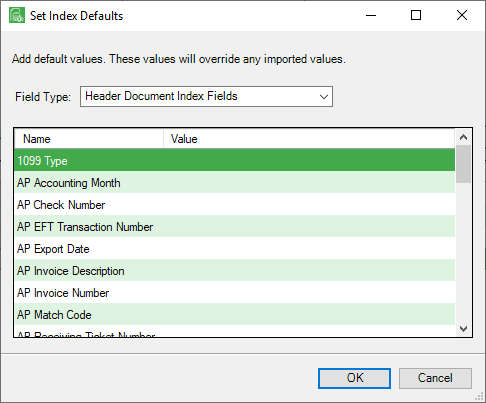
The value defaults are listed. An F4 lookup is associated with these default field type values listed in the grid.
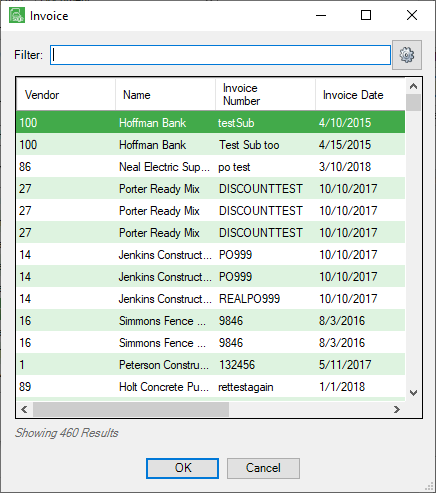
1.Highlight a row.
2.Click the cursor in the Value column.
3.Press F4.
The lookup dialog for that specific field type (in this instance AP Invoice Number) similar to the following displays:
4.Scroll through the list to highlight an entry or use the Filter functionality.
5.Click OK.
The Set Index Defaults dialog box redisplays with the default value similar to the following: