Note: eDocRoute follows the same functionality as DocRoute™.
Click DETAILS,  , to open a specific invoice.
The window similar to the following displays:
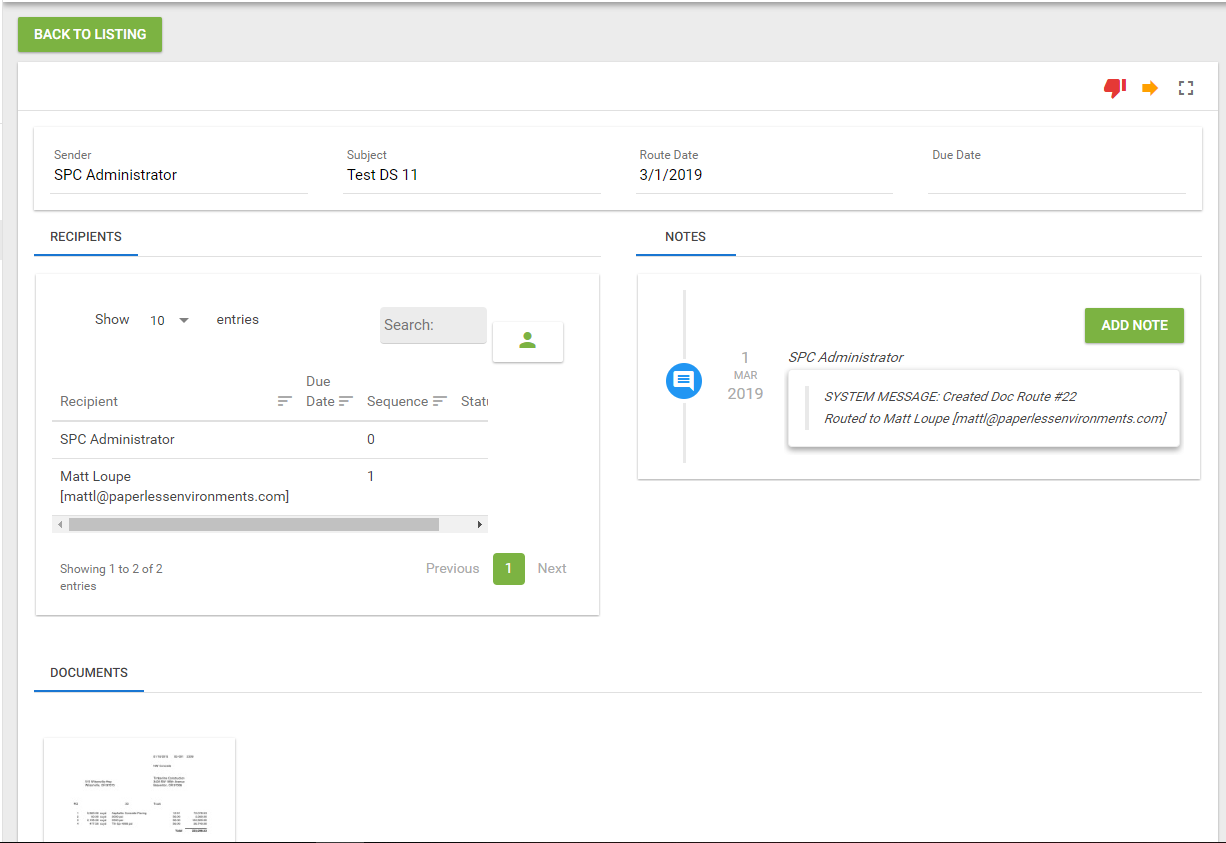
Top Grid
In the upper grid is the general document routing information. Fields consist of Sender, Subject, Route Date and Due Date (if the document is to be returned).
Task icons display in the DETAILS screen in the upper right corner. The icons that display depend on the status of the route.
|
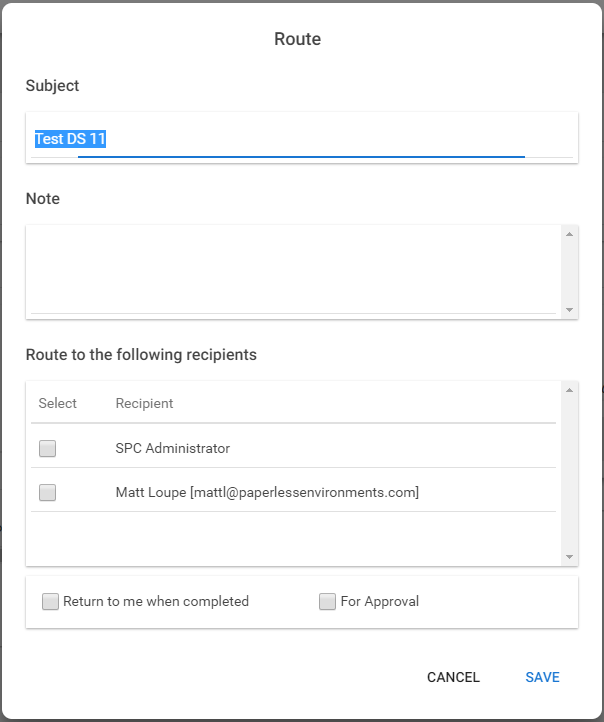
Route Click to start the routing process for a document. A route window similar to the following displays: In Notes, add any pertinent information for the recipient of the document being routed. In the Route to the following recipients pane, select any of the listed recipients who should receive the routed document. Select as applicable one or both of the following: •Return to me when completed •For Approval Click SAVE which will initiate the eDocRoute process. Note: To reroute line item(s), re-access the document and follow the steps for routing documents. |
|
Recall: Click if the document being routed should be recalled. |
|
Approve: Click if the document being routed should be approved. Release: This label displays for this icon if For Approval is not selected when routed. |
|
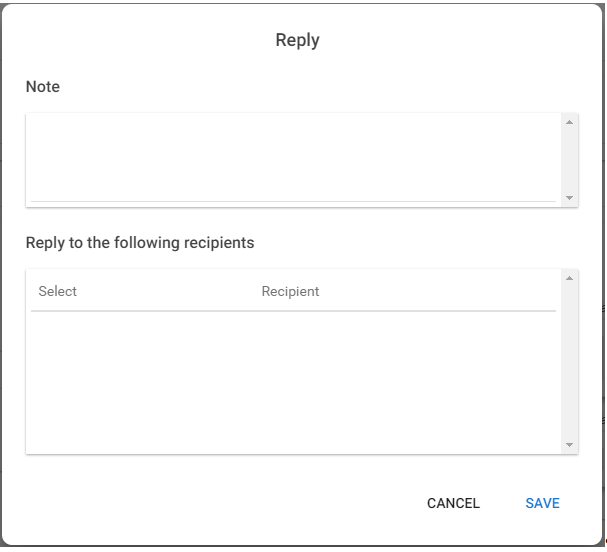
Reply: Click to access the following Reply dialog box:
|
|
Save: After adding a document (Add Documents grid), this icon will display. |
|
Delete: Click if the routed document should be deleted. |
|
View Fullscreen: Click to view the invoice as a larger screen display. |


Middle Grid
The middle section of the Detail page is divided into two specific sections:
•RECIPIENTS
•NOTES
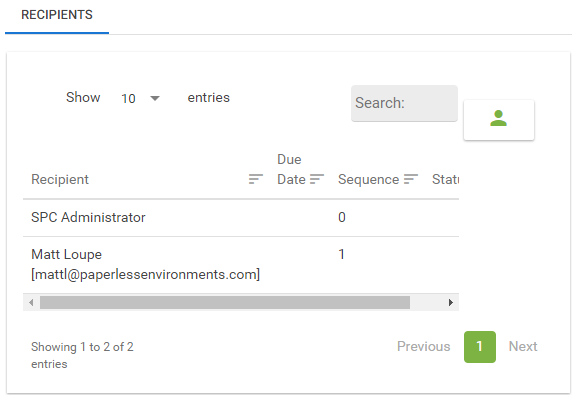
RECIPIENTS
The recipients for the document will be listed in this pane as well as the opportunity to add/delete recipients similar to the following:
To search for a specific recipient, click on the Search button, , and type the name of the desired recipient.
Click the Add Recipient button,  , to access the recipient list from which to select recipients. This is also how to add external recipients to the route.
Note: If sending a route to an external recipient on a rare or sporadic basis, continue to add through the Add Recipient button. However, if recipients will be receiving routed documents on a more consistent basis, add them as web users. Remember, if just receiving routed documents for review or for approval, no license is needed. A license is needed if a recipient will be creating routes.
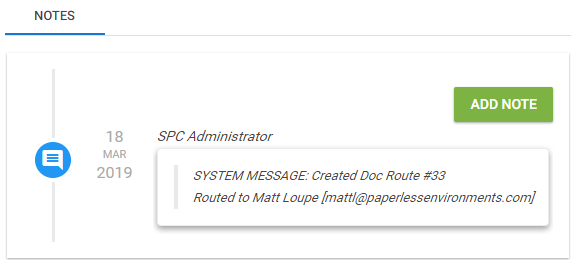
NOTES
Any notes either system-generated or specifically added to the route will resemble the following:
To add a new note, click  .
.
The following Add Note dialog box will display:
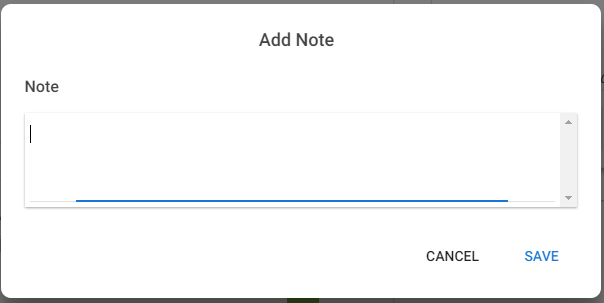
Click SAVE.
Bottom Grid
DOCUMENTS
Any attached supporting document images will display in a row in the DOCUMENTS space similar to the following:
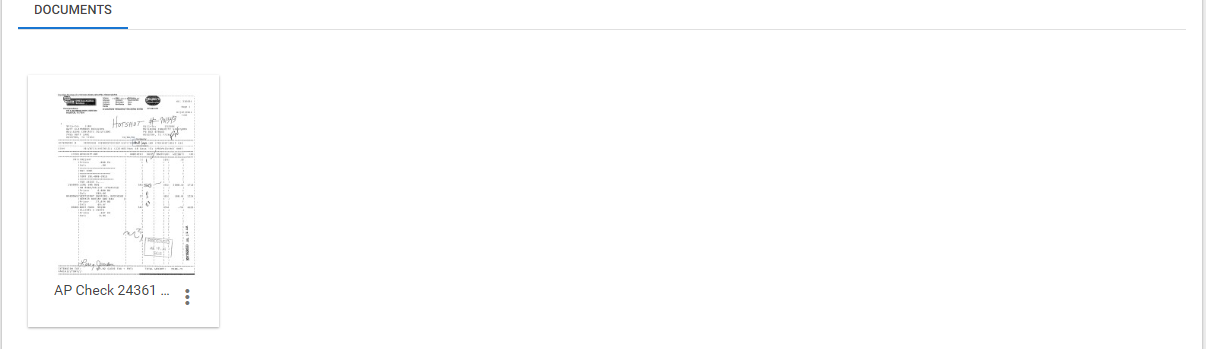
Note: Click the ellipsis located in the bottom right of the image to download it.