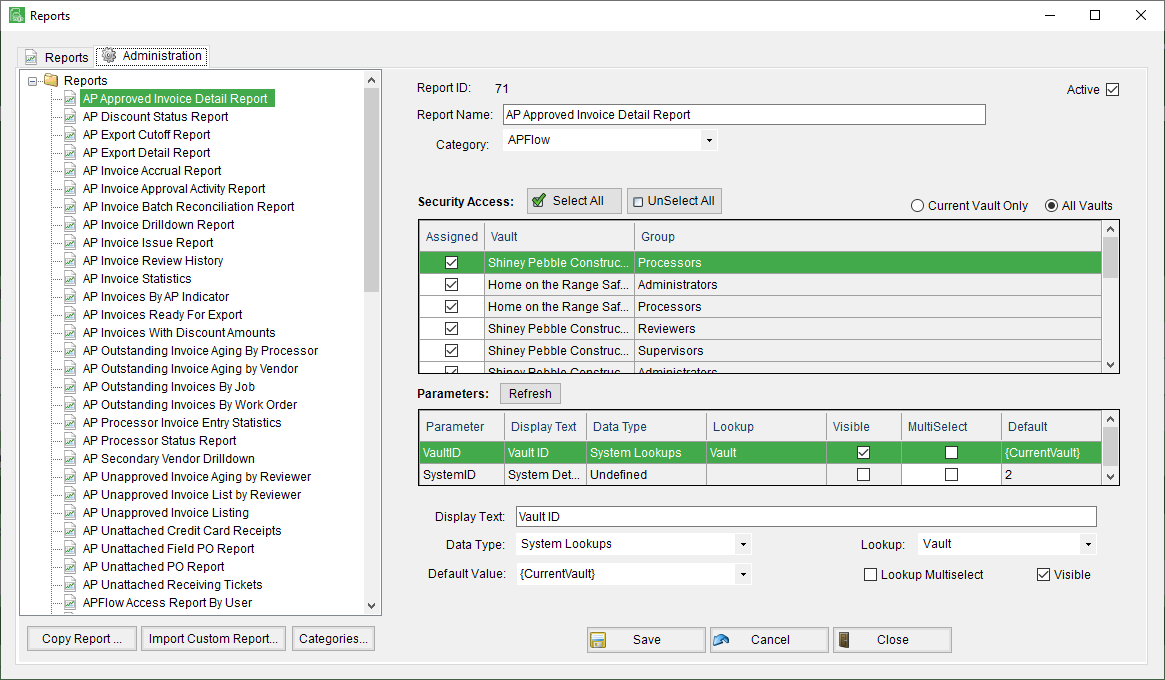
At the bottom of the Administration window is Import Custom Reports, 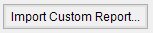 .
.
1.Below the pane listing available reports, click Import Custom Reports.
The following window displays:
2.In the Step 1: Select Crystal Report File field, enter the file location or click the  .
.
The user's desktop, or other folder destination based on the search, displays.
3.Browse to the .rpt file for the Crystal Report.
4.Double click the file name to select it or click the file name to highlight it and then click Open.
The file path populates the Step 1: Select Crystal Report File field.
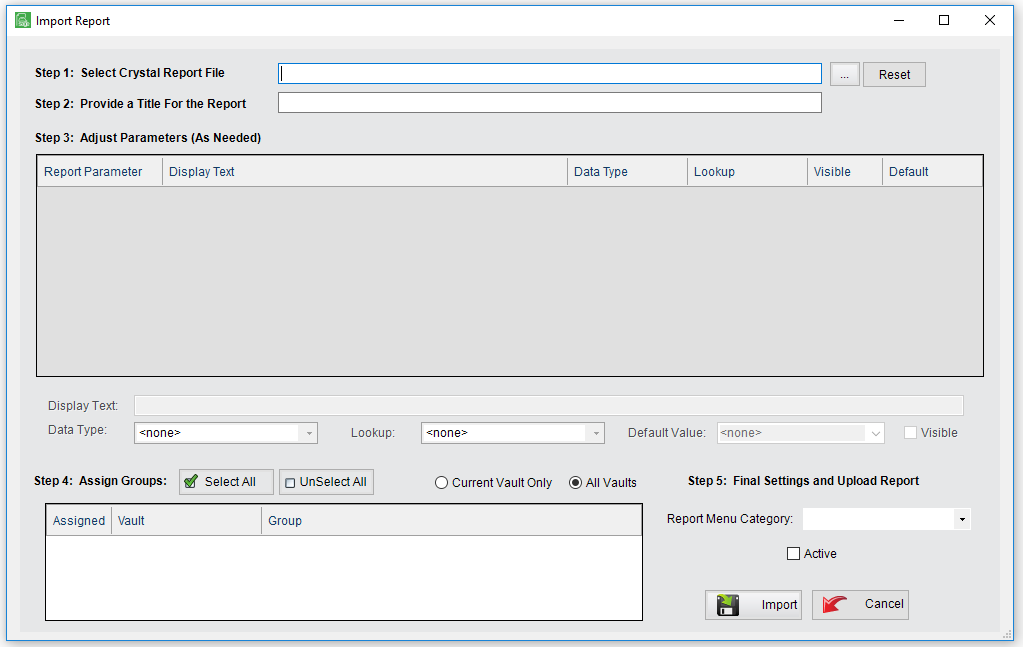
The file import occurs immediately after the report file is identified in the Step 1: Select Crystal Report File field. The system checks to make sure the file exists and is valid. If the file does not exist or is not valid, the following prompt displays:
If this prompt displays, click OK and repeat steps 3 and 4.
5.The system will make a friendly Report Name in the Step 2: Provide a Title For the Report field, based on the filename that it detects on the report. If necessary, revise the report name.
6.The system will read the parameters from the file and will autofill the Step 3: Adjust Parameters (As Needed) text box. While this field cannot be modified, the appearance can be changed in the Display Text field. Refer to step 7.
7.In the Display Text field, for each parameter on the report, the display text (what will display in the parameter window before the report is run) can be adjusted.
8.In the Data Type field, use the dropdown to define the data type. Of the selections included in the Data Type field dropdown, selecting one of the following four choices in the Data Type field requires a selection be made in the Lookup field:
List |
Select List to be able to tie user-defined lists which were created in Sage Paperless Construction as a lookup for this parameter.
|
Bridge Lookup |
Select Bridge Lookup to tie in one of the existing lookups from the accounting/ERP system which are available in Sage Paperless Construction, such as Vendor List, job List, GL Account List, etc.
|
Query List |
Select Query List to choose from the Sage Paperless Construction query lists (custom lookups against other systems or additional tables not supplied out of the box with Sage Paperless Construction). Not all query lists will be able to be used here. If they require additional parameters to execute, then they will not work for this purpose.
|
System Lookups |
Select System Lookups to provide some Sage Paperless Construction specific lists, such as Vaults, Users, Reviewers, Processors, Index Types, etc. |
In the Lookup field, the options in the dropdown vary, based specifically on the Data Type field selection.
Important: If selecting a "List" data type, a "Bridge Lookup" data type, a "Query List" data type or a "System Lookup" data type in the Data Type field, a Lookup field selection is required.
9.In the Default Value field, for the identified parameter, use the dropdown to determine what it should be set to when the Report Execution screen is accessed. There are some predefined defaults, but specific values can also be typed.
The predefined defaults, the text in the predefined options, will be replaced when the report parameter window displays before executing the report.
10. In the Step 4: Assign Groups pane, click to check the box next to the Security Groups allowed to access this custom report. This custom report will not be included in the list of available reports for any users who do not belong to a Security Group with this custom report access.
Important: All custom reports must be added to at least one Security Group because by default, custom reports cannot be accessed by any group until assigned. To view and edit the reports to which a Security Group has access, from the ribbon toolbar, click Administration, then click Vaults. In the Vaults window, click to highlight the vault (if multiple vaults are listed). Then click Edit Vault. In the Vault Properties window, click the Security Groups tab. Click to highlight the appropriate Security Group. Then click Edit Group. In the Security Group Properties window, click the Reports tab. This is where all the reports for the vault are listed and where the Security Group is assigned access to these reports.
Note: There is the option for filtering the list down to just the groups in the current vault or in the case of multiple vaults, to all of them.
11. In the Step 5: Final Settings and Upload Report fields, use the Report Menu Category field dropdown to determine which grouping in the report list will contain the report. By default, the category will be "Custom Reports", but the report may be placed directly in the list of Accounts Payable Reports, System Reports, etc.
12. Click Active to have the report available immediately. Otherwise, leave Active unchecked. While inactive, the report will only display in the Administration window.
13. Click Import to finalize the addition of the custom report. This copies the report into a "Custom" folder beneath the Sage Paperless Construction server's report folder. Reports in this "Custom" folder will not be overwritten during future Sage Paperless Construction updates.