The Sources tab contains the path of the folder.
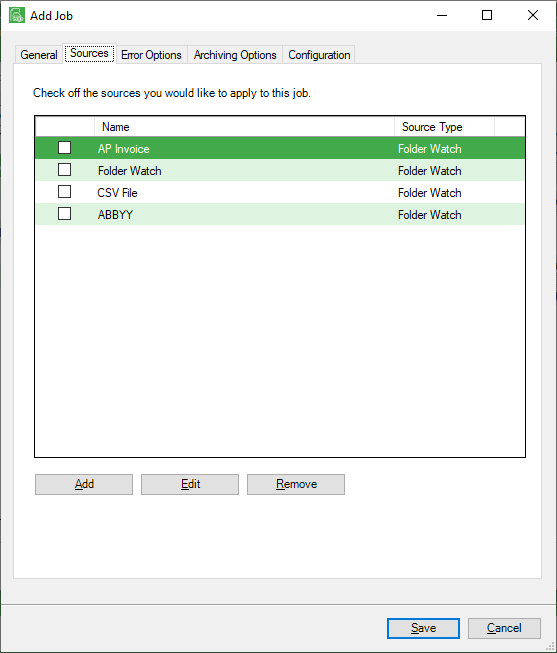
1.Click the Sources tab.
A window similar to the following displays:
2.Click Add.
The Source Properties window displays:
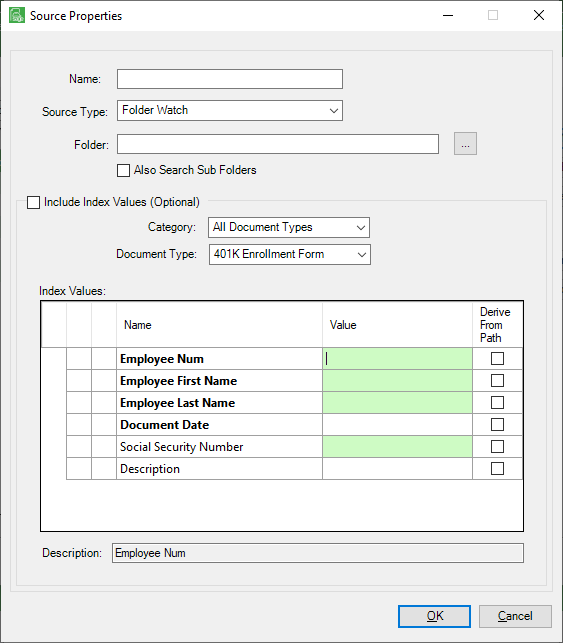
3.In the Name field, enter a meaningful name for the folder source.
4.In the Source Type field, use the dropdown to select one of the following, based on the location of the files being imported:
Folder Watch (Requires a network folder be identified. Browse to select the network folder to be watched.)
FTP (Requires an FTP site to import from be identified in the URL field.)
DropBox
5.If FTP is selected in the Source Type field dropdown, continue with step 6.
If DropBox is selected in the Source Type field dropdown, skip to DropBox.
If Folder Watch is selected in the Source Type field dropdown, skip to Error Options.
Refer to the following FTP window:
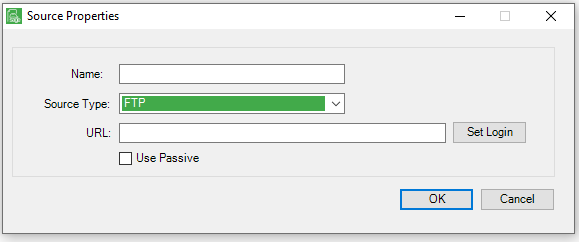
Important: If setting up an FTP source, the login information for access to the site must be entered.
6.Click the Use Passive check box to ensure proper connectivity if the server you are connecting to is configured to use Passive mode.
Note: An FTP server can be configured to transfer data in Active mode or Passive mode. Active mode is the default.
7.Click Set Login.
The following window displays:
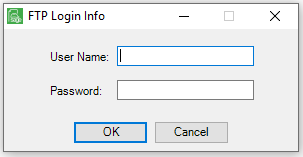
8.In the User Name field, type the appropriate name.
9.In the Password field, type the associated password.
10.Click OK.
The Sources tab window re-displays.
11.Click OK.
DropBox
If DropBox is selected in the Source Type field dropdown, the Source Properties dialog box will resemble the following:
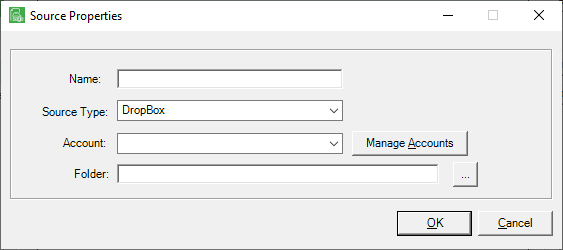
1.If the Name field is blank, enter a meaningful name.
2.In the Account field, use the dropdown to select the appropriate account.
Note: If an account needs to be added, edited, or removed, click Manage Accounts.
3.In the Folder field, click the  to browse for the correct folder.
4.Click OK.
5.Continue by clicking the Error Options tab.