In pVault®
Set up pVault® AP Accruals Defaults
1.From the ribbon toolbar, click APFlow™.
2.Click Manage APFlow™, 
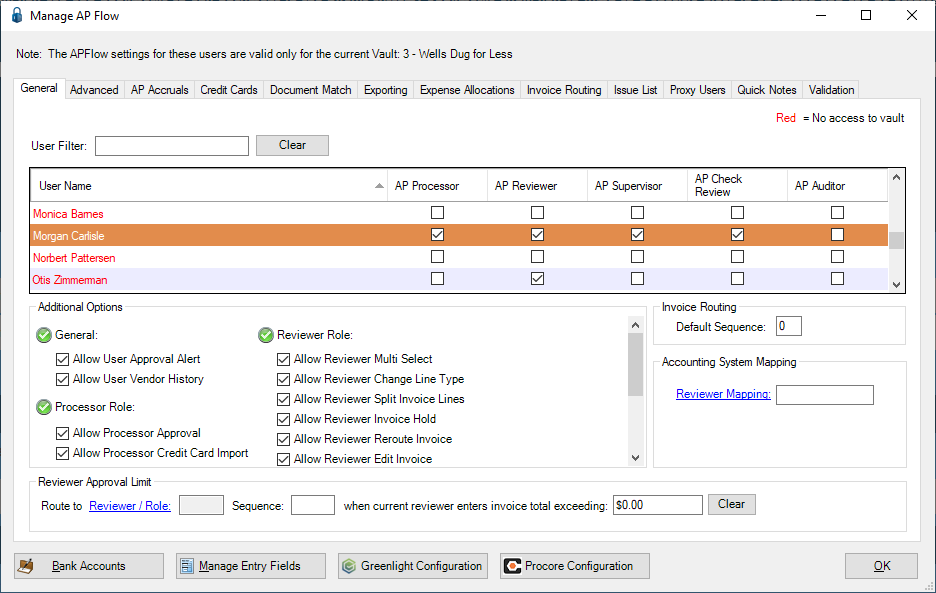
A window similar to the following displays with the General tab active:
3.Click the AP Accruals tab.
A window similar to the following displays:
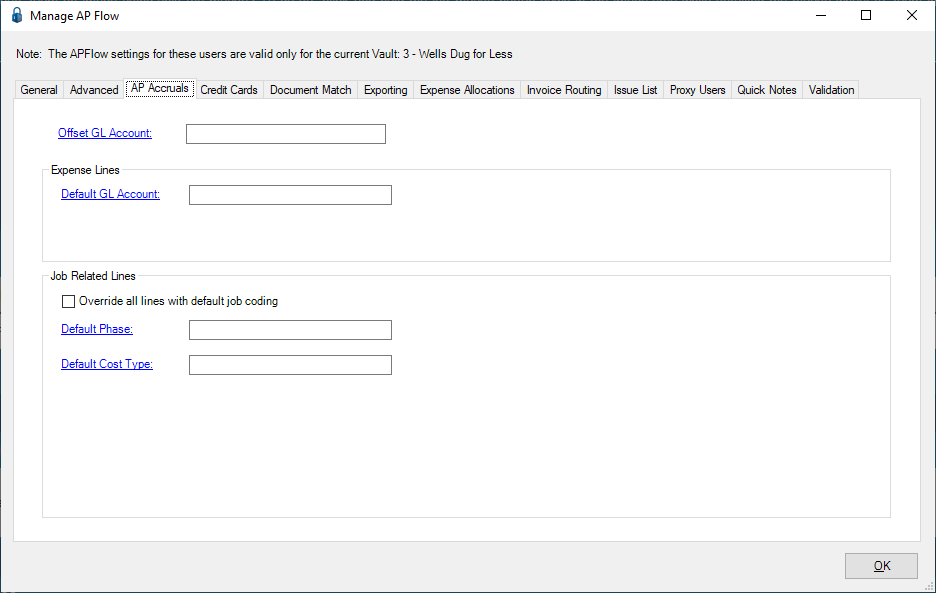
4.In the Offset GL Account field, click the field label to access the GL Account Lookup table.
5.Double click on the entry to select it and populate the field, or click the entry and then click OK in the lookup table to populate the field.
6.In the Default GL Account field, click the field label to access the GL Account Lookup table.
7.Double click on the entry to select it and populate the field, or click the entry and then click OK in the lookup table to populate the field.
8.In the Default Phase field, click the field label to access the Job and Cost Code Lookup table.
9.Double click on the entry to select it and populate the field, or click the entry and then click OK in the lookup table to populate the field.
10.In the Default Category field, click the field label to access the Job and Full Cost Code Lookup table.
11.Double click on the entry to select it and populate the field, or click the entry and then click OK in the lookup table to populate the field.
12.Click OK.
Launch the Invoice Accrual Settings
1.Click AP Accruals,  .
.
The following Invoice Accrual Settings dialog box displays:
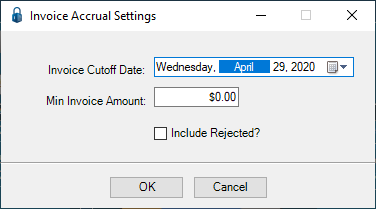
2.In the Invoice Cutoff Date, click the field arrow to access a calendar.
The current date is the field default.
3.In the Min Invoice Amount, enter a dollar amount if applicable.
A zero dollar amount is the field default.
4.If appropriate, click Include Rejected.
5.Click OK.
Launch the AP Invoice Accrual Details
The AP Invoice Accrual Details window displays after populating the Invoice Accrual Settings dialog box.
The AP Invoice Accrual Details window resembles the following with the Expense Lines tab active:

1.On the Expense Lines tab, click to select the invoices to include in the Accrual Entry.
2.Click the Job Related Lines tab.
A window similar to the following displays:
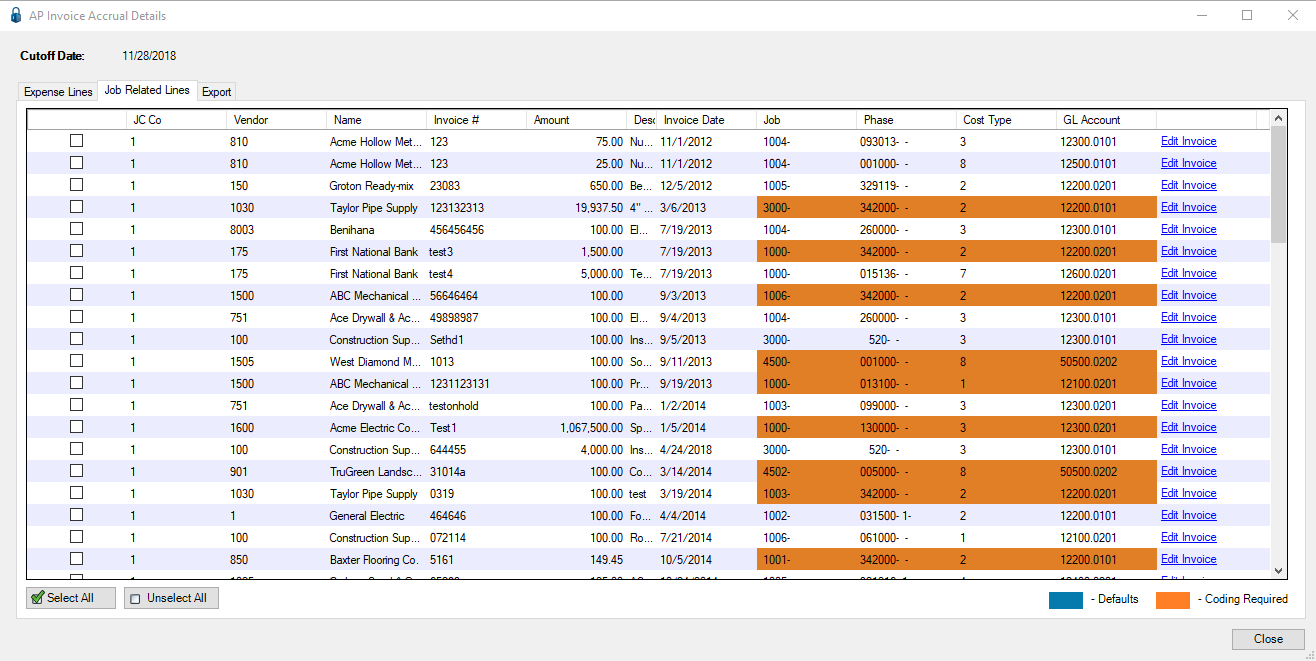
3.On the Job Related Lines tab, click to select the invoices to include in the Accrual Entry.
4.Click the Export tab.
A window similar to the following displays:
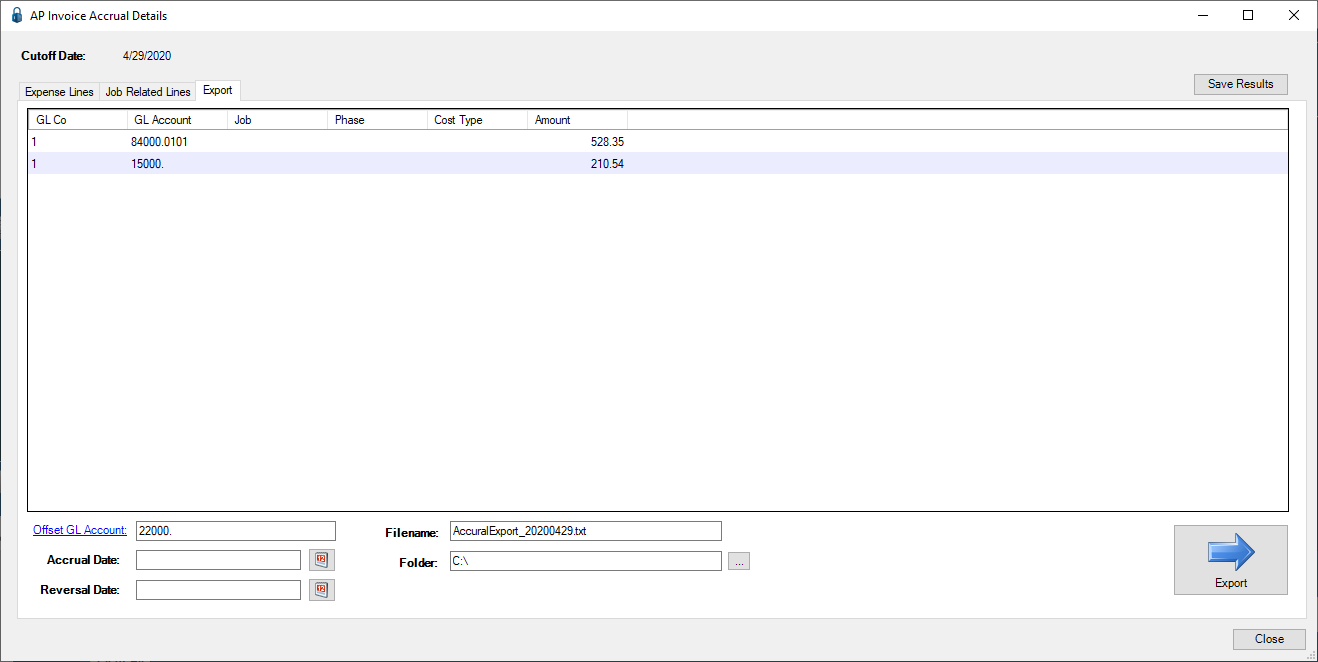
5.In the GL Account field, accept the default or click the field label to access the GL Account Lookup table.
Note: If the GL Account Lookup table was accessed, double click on the entry to select it and populate the field, or click the entry and then click OK in the lookup table to populate the field.
6.In the Accrual Date field, click the calendar icon to select the appropriate accrual date.
7.In the Reversal Date field, click the calendar icon to select the appropriate reversal date.
8.In the Filename field, keep the default name.
9.In the Folder field, enter the path where the accrual export files should be saved.
Click the ellipsis,  , to access the Browse For Folder dialog box.
10.Click Export.
An Export Successful prompt similar to the following will display.
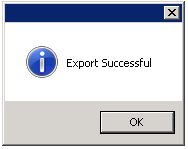
11.Click OK.
In Vista - PEGLAccrue Template
1.From the Main Menu navigation screen, click Imports in the left navigation bar.
2.Click Programs.
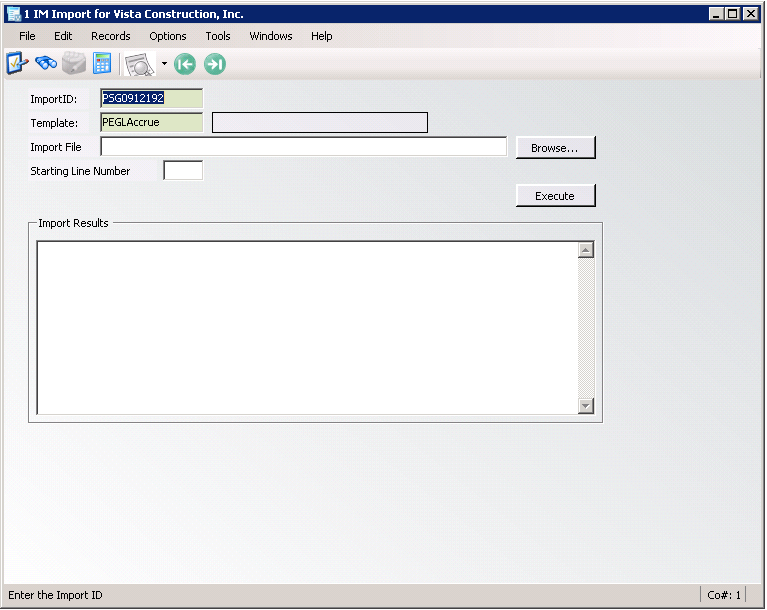
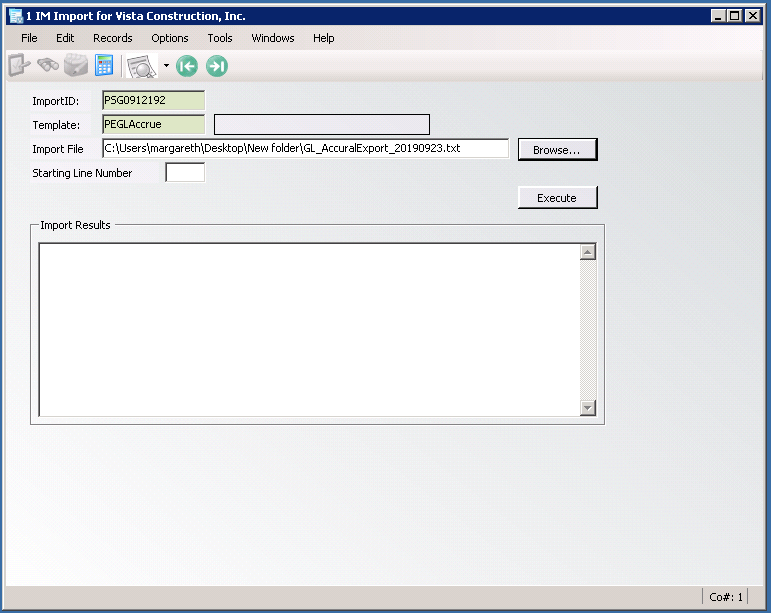
3.In the Forms listing, double click IM Import.
The IM Import window similar to the following displays:
These are the invoices selected on the Expense tab in pVault®. A separate GL Expense accrual export file is created.
4.In the Template field, type the following:
PEGLAccrue (this is for an Expense export file import)
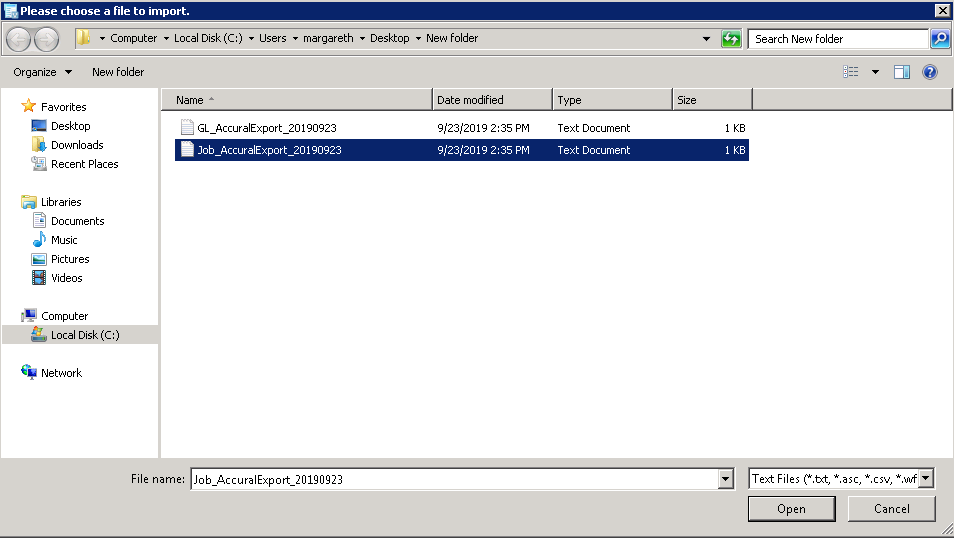
5.In the Import File field, click Browse to locate the file.
A Please choose a file to import window similar to the following displays:
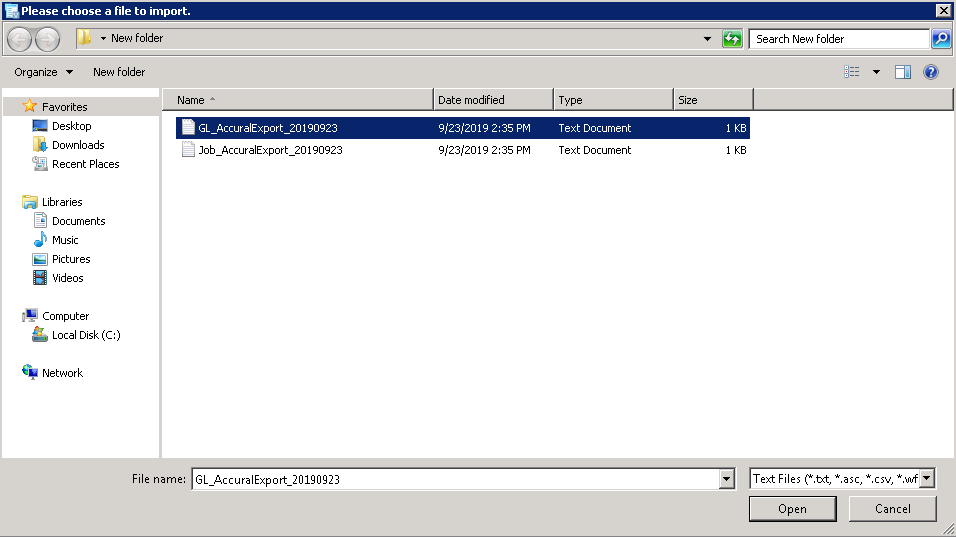
6.Click to highlight the appropriate file.
7.Click Open.
The IM Import window will redisplay similar to the following:
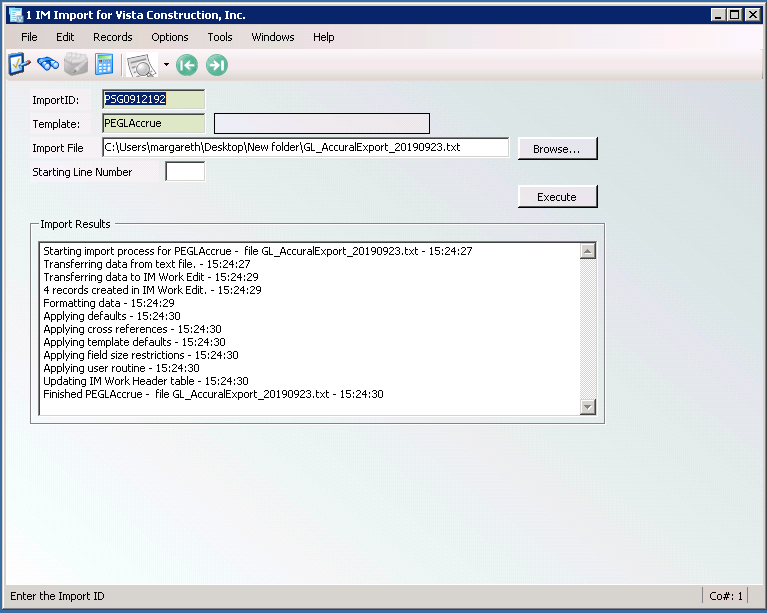
8.Click Execute.
The IM Import window Import Results box should resemble the following:
9.On the IM Import window toolbar, click File.
10.From the dropdown menu, click Close.
Import Upload
1.Click IM Upload.
The IM Upload window similar to the following displays:
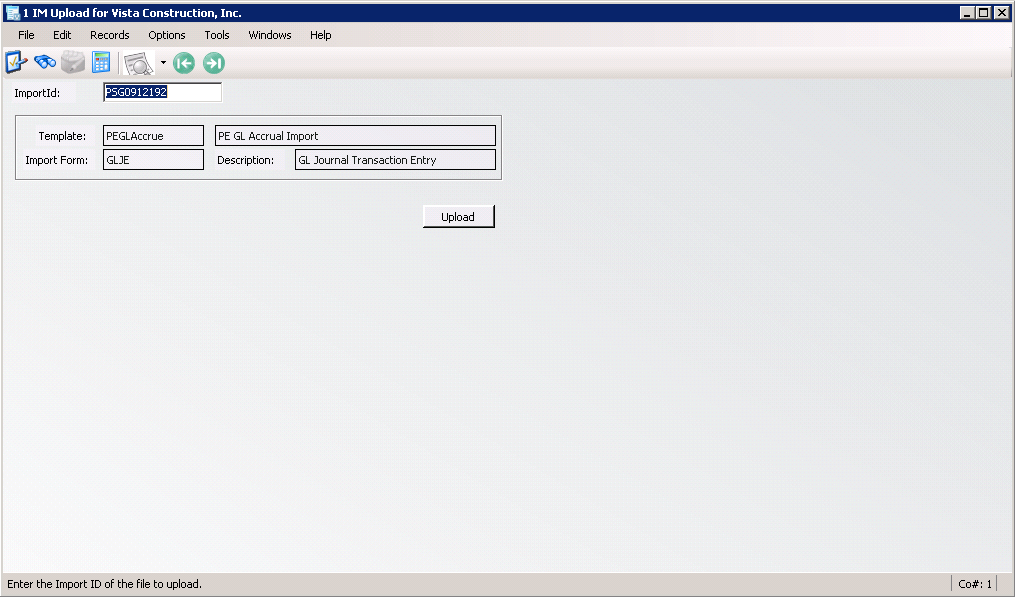
2.Click Upload.
This will create the GL Journal Transaction Entry Batch.
In Vista - PEJCAccrue Template
1.From the Main Menu navigation screen, click Imports in the left navigation bar.
2.Click Programs.
3.In the Forms listing, double click IM Import.
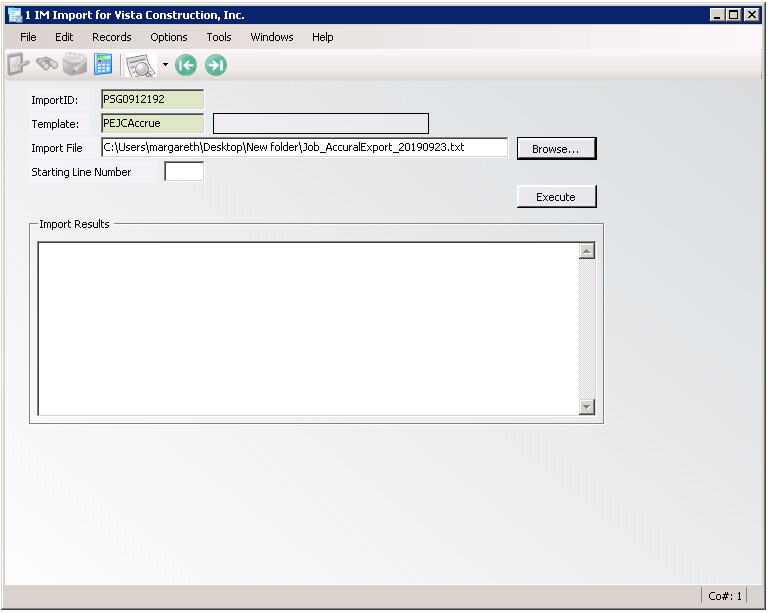
The IM Import window similar to the following displays:
These are the invoices selected on the Job tab in pVault®. A separate Job Cost accrual export file is created.
1.In the Template field, type the following:
PEJCAccrue
(this is for a Job related export file import)
2.In the Import File field, click Browse to locate the file.
A Please choose a file to import window similar to the following displays:
3.Click to highlight the appropriate file.
4.Click Open.
The IM Import window will redisplay similar to the following:
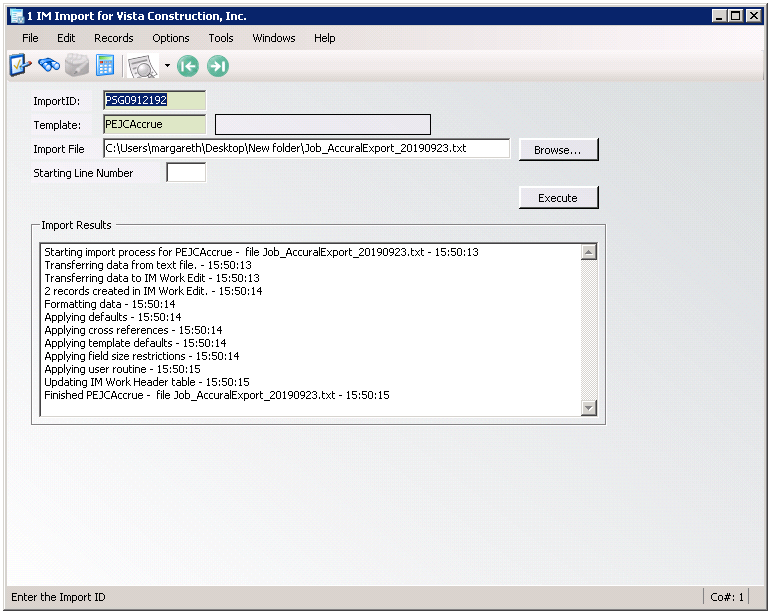
5.Click Execute.
The IM Import window Import Results box should resemble the following:
6.On the IM Import window toolbar, click File.
7.From the dropdown menu, click Close.
Import Upload
1.Click IM Upload.
The IM Upload window similar to the following displays:
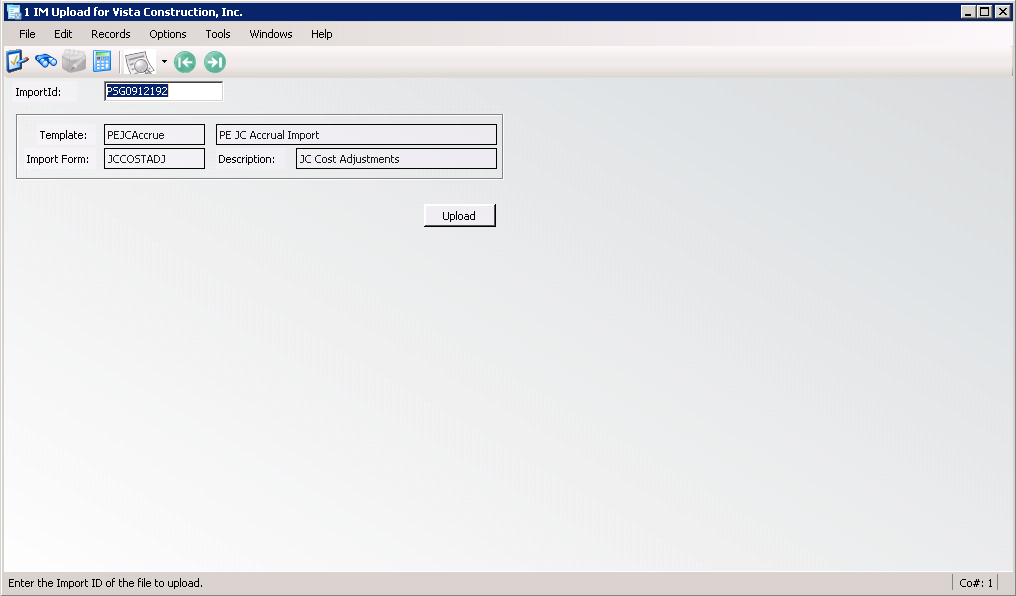
2.Click Upload.
This will create the Job Cost Adjustments Batch.