To add a custom document type that is not included in the imported list of document types, the Create Document Type wizard allows the Administrator to create pVault® document types very quickly.
Note: The Create Document Type wizard is also accessible from the second Create Security Group wizard window when you click Add Document Type,  .
.
1.From the ribbon toolbar, click Administration.
2.Click the Types dropdown, ![]() .
.
3.Click Document Types.

A Document Types window similar to the following displays:
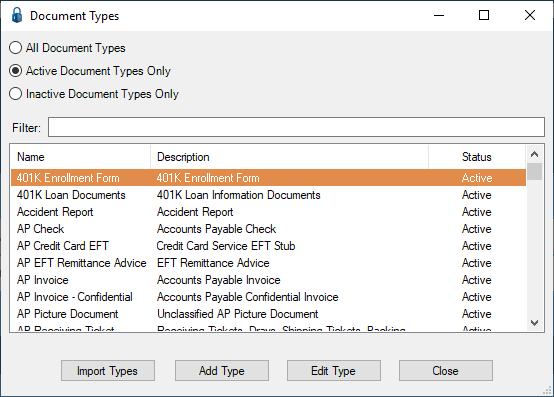
Note that there is a Filter text field where you can start to enter a document type to narrow the list.
4.Start typing in the Filter field to narrow the list similar to the following:
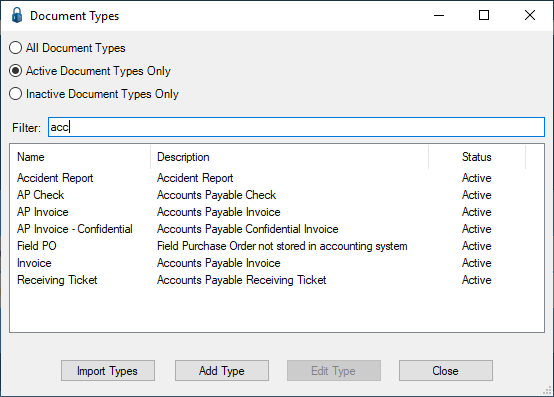
Not only can you filter on the Name column entries, but you can also filter on the Description column entries too.
5.Click Add Type.
The first Create Document Type wizard window displays:
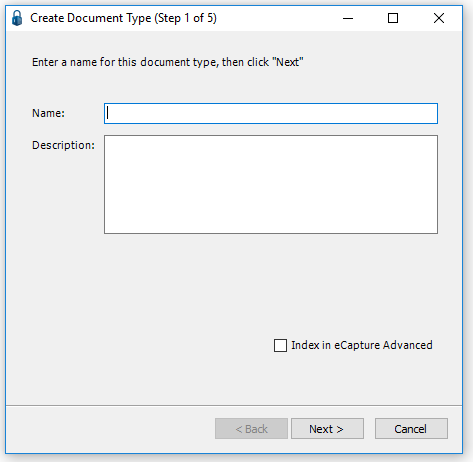
6.In the Name field, type the document type name.
Note: For this example, the document type AP Invoice is being manually added.
7.In the Description text box, type a description of the document type.
This is a required field.
8.If the document type should be indexed in eCapture™ Advanced, click the Index in eCapture™ Advanced check box.
The default is unchecked.
Note: This check box will only display if the client has an eCapture™ Advanced license.
9.Click Next.
The second Creating Document Type wizard window displays:
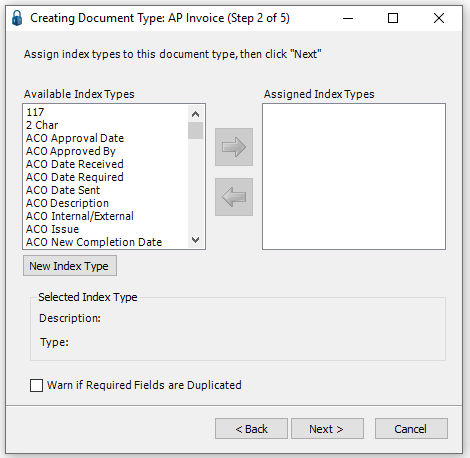
A document must be associated with at least one index type to be stored in the pVault® system.
When an index is selected in either list on this screen, the index type Description and Data Type display below the list panes.
10. Click to highlight index type(s) in the Available Index Types pane.
11. Click the  to move the highlighted item(s) to the Assigned Index Types pane.
Note: If the index type to which this document type should be assigned is not available, create a new index type. Click New Index Type to access the Create Index wizard.
12. To prevent duplicate documents being indexed, click the Warn if Required Fields are Duplicated check box.
Note: If this is selected, the system checks to see if there is a document in the system with the same required field values already indexed when any new document is indexed.
If one is found, the user will be presented with options.
13. Verify that the desired index value(s) are displayed in the Assigned Index Types pane.
14. Click Next.
The third Creating Document Type wizard window displays:
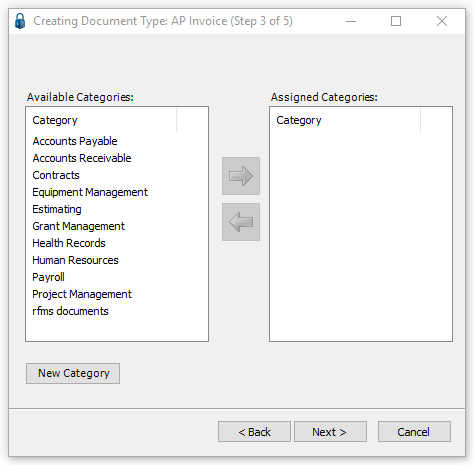
15. To assign the new document type to a document category, click to highlight a category in the Available Categories column.
16. Click the  icon to move it to the Assigned Categories column.
Note: Multiple document categories can be chosen.
17. Click Next.
The fourth Creating Document Type wizard window displays:
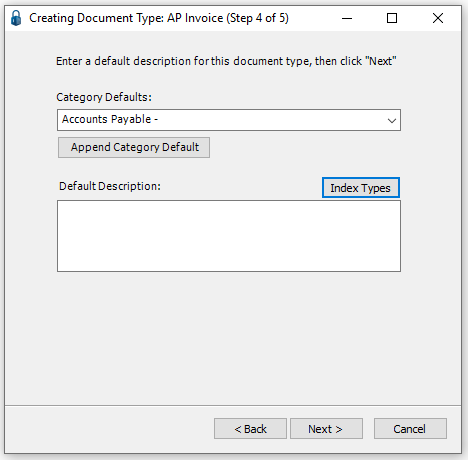
18.Assign a default description to the document type.
The default description is automatically assigned to the document when indexed and stored in pVault®. This ensures that all documents stored in pVault® are consistently named. The description can be built using static text, as well as values stored in index fields.
In this example, the default description of this document type is “AP Invoice + the index value "AP Invoice Number". The pVault® system enters the invoice number into the description from the Invoice Number Index field assigned to the document. “AP Invoice - “ was typed into the Default Description field, then Index Types was clicked to display the following window:
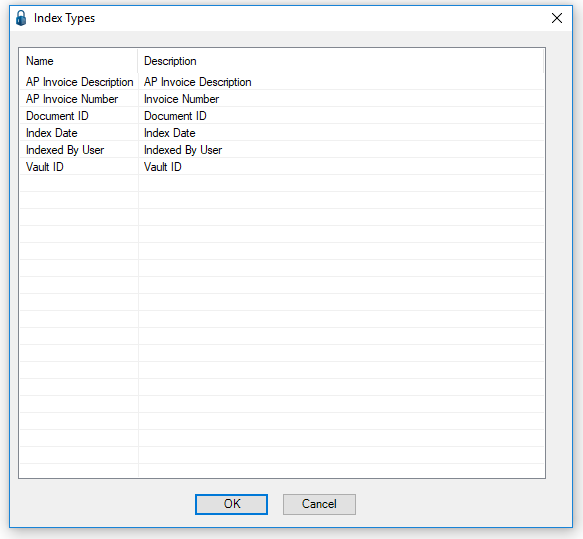
19. Select the Index Type variable.
20. Click OK to add it as a variable holder in the Default Description text field.
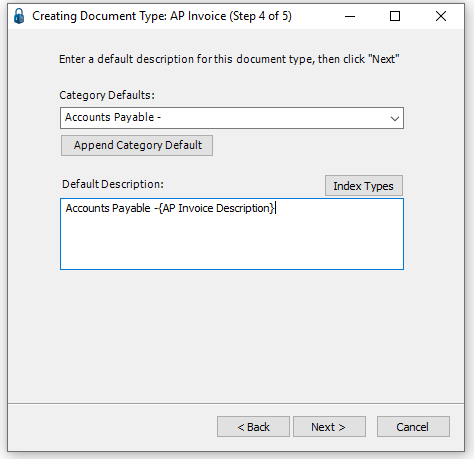
Note: A placeholder for the selected index type now displays in braces { } in the Default Description text box. This placeholder will be "filled in" by pVault® when an AP Invoice is indexed.
21. Verify that the information in the Default Description text box is correct.
22. Click Next.
The fifth Creating Document Type wizard window displays:
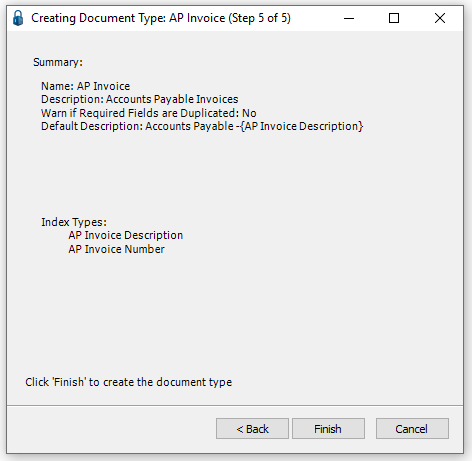
23. Review the summary information displayed for the new document type.
If any of the information is incorrect, click Back and revise the information accordingly.
24. Once the information on this screen is correct, click Finish.
25. Edit the vault security group(s) to give users access to the new document type.