Vendor routing is an optional way of routing invoices through Viewpoint. pVault® can be configured to use Viewpoint Vendor Routing if the bridge tab setting is selected in pVault® and vendor reviewers are identified in the appropriate Vista Viewpoint field.
Note: Vendor routing does not use route sequencing in pVault®.
In pVault®
1.From the ribbon toolbar, click Administration.
2.Click Vaults,  .
.
The Vaults window similar to the following displays:
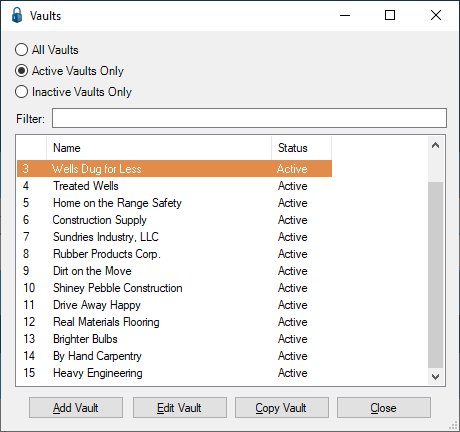
3.Click to highlight the Viewpoint vault, if necessary.
4.Click Edit Vault.
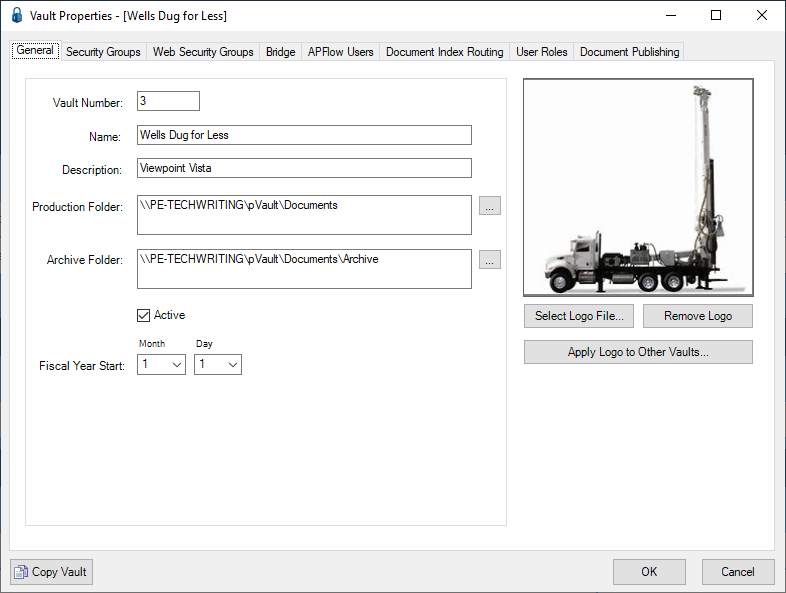
The Vault Properties window similar to the following displays with the General tab active:
5.Click the Bridge tab.
The window similar to the following displays:
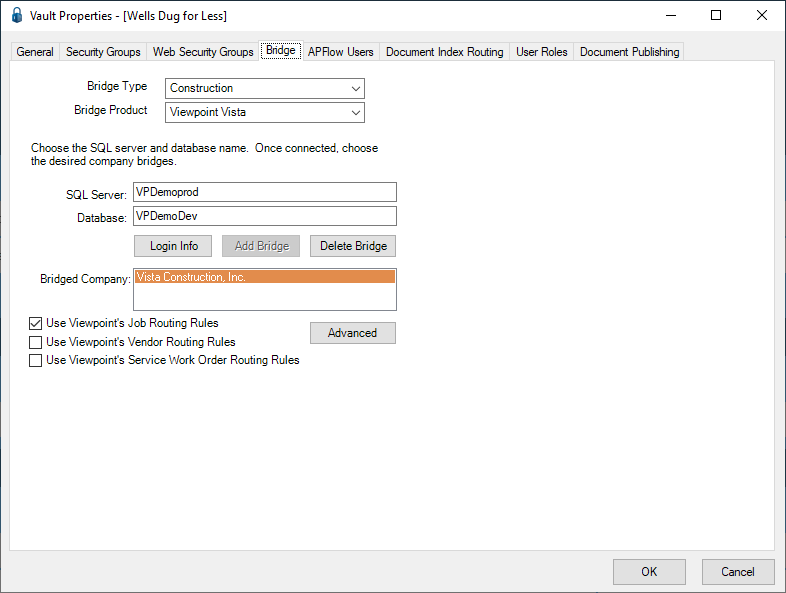
6.Click to select the Use Viewpoint's Vendor Routing Rules check box.
7.Click OK to close the Vault Properties window.
8.Click Close to close the Vaults window.
9.Minimize or close pVault®.
In Vista Viewpoint
1.Log in to Vista Viewpoint.
The Main Menu screen displays.
2.From the left navigation bar, click Accounts Payable.
3.From the dropdown, click to select Programs.

4.From the right pane, select AP Vendor Master.
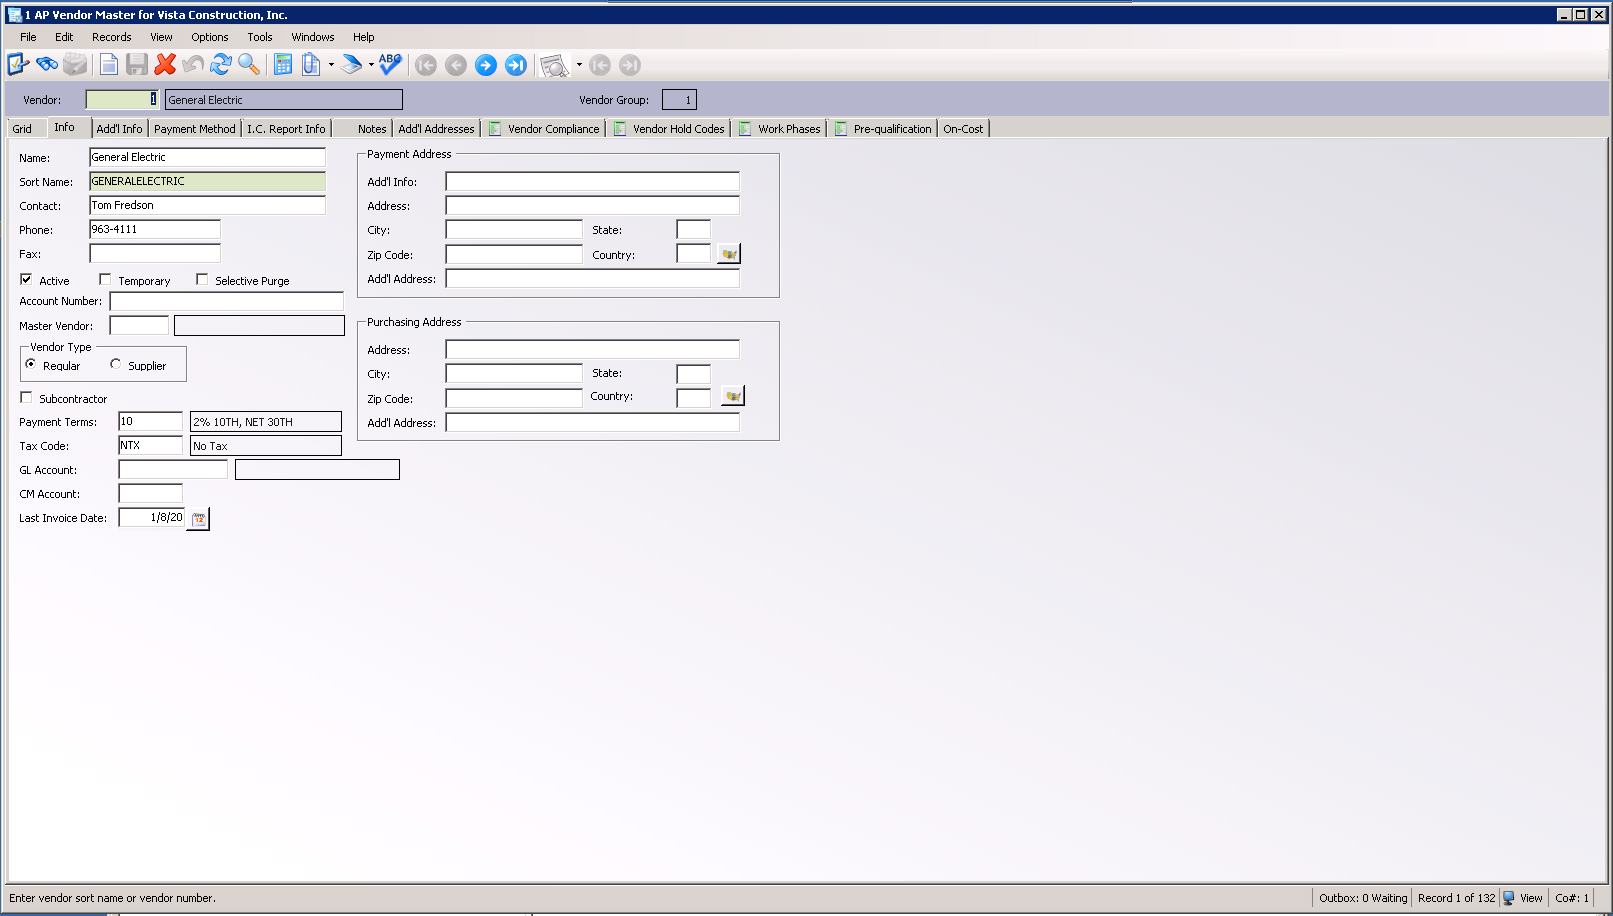
The AP Vendor Master window similar to the following displays with the Info tab active:
5.Click the Add'l Info tab.
The following window similar to the following displays:
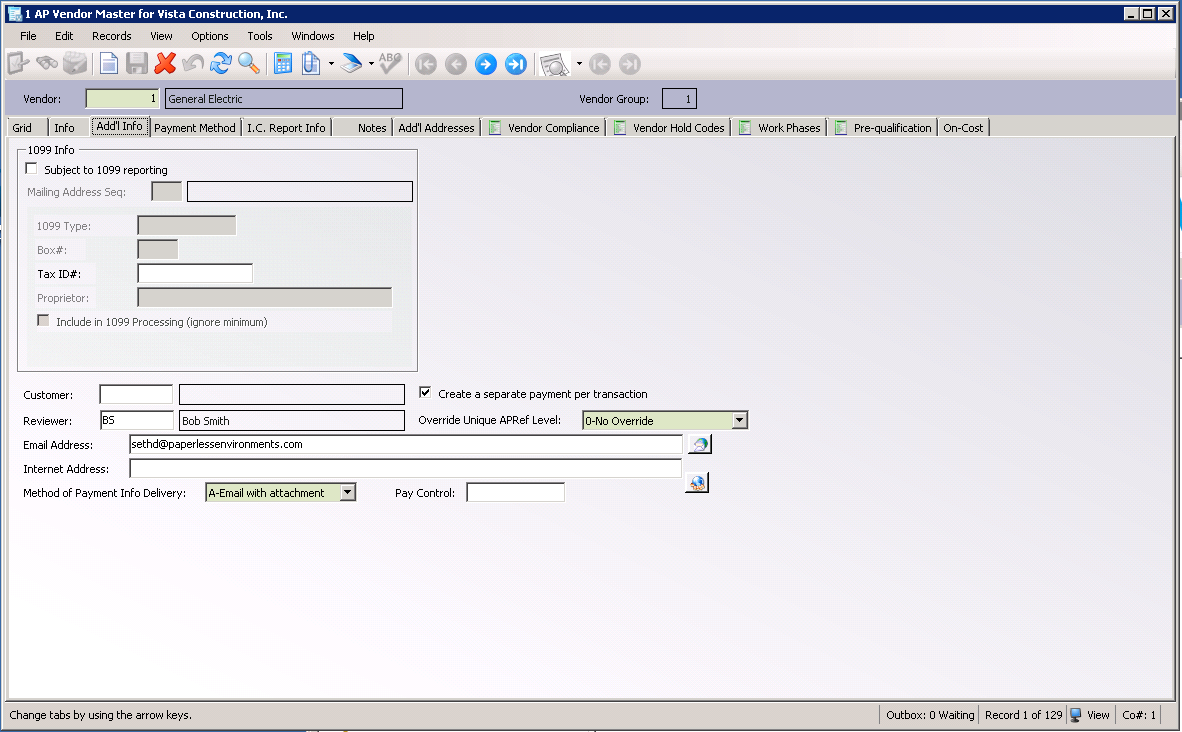
6.In the Reviewer field, enter the initials of a reviewer.
Important: This field is case sensitive. Enter uppercase letters only.
The reviewer's full name will display in the untitled field to the right of the Reviewer field.
7.From the ribbon toolbar, click File.
8.From the dropdown menu, click Close.
9.In the Main Menu screen toolbar, click File.
10.From the dropdown menu, click Log Off to exit Vista Viewpoint.
Where to Add Vendor Reviewers in Vista Viewpoint
1.From the left navigation bar, click Headquarters.
2.From the dropdown, click to select Programs.
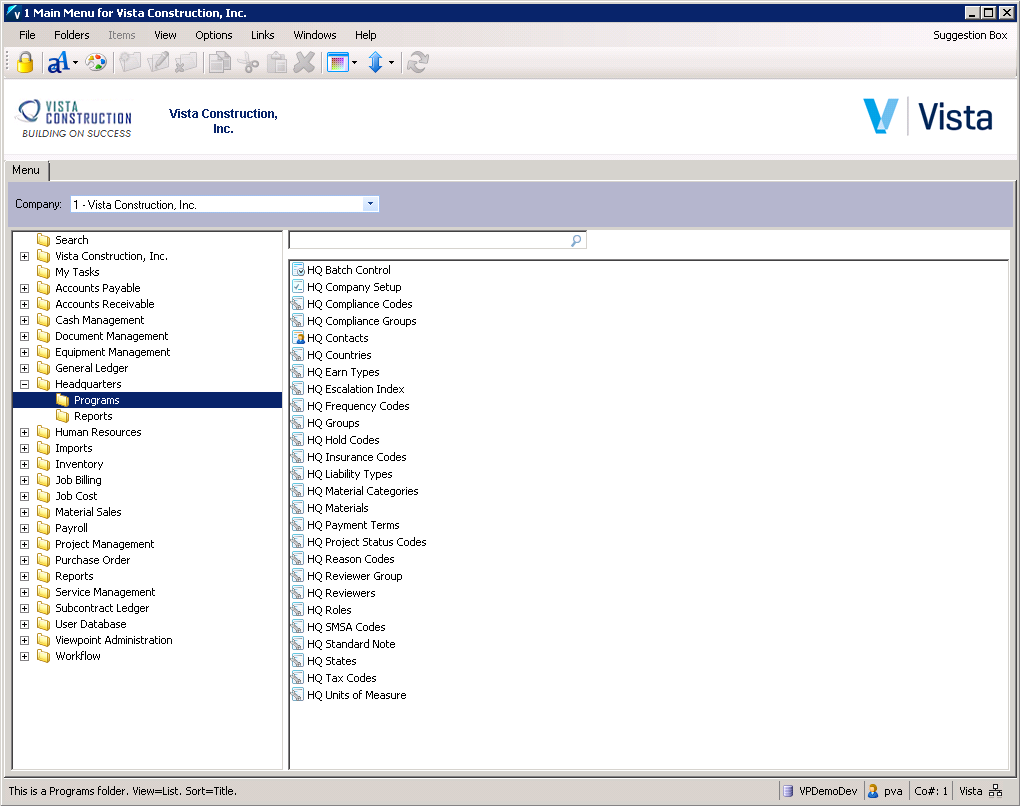
3.From the right pane, select HQ Reviewers.
The HQ Reviewers window similar to the following displays with the Info tab active:
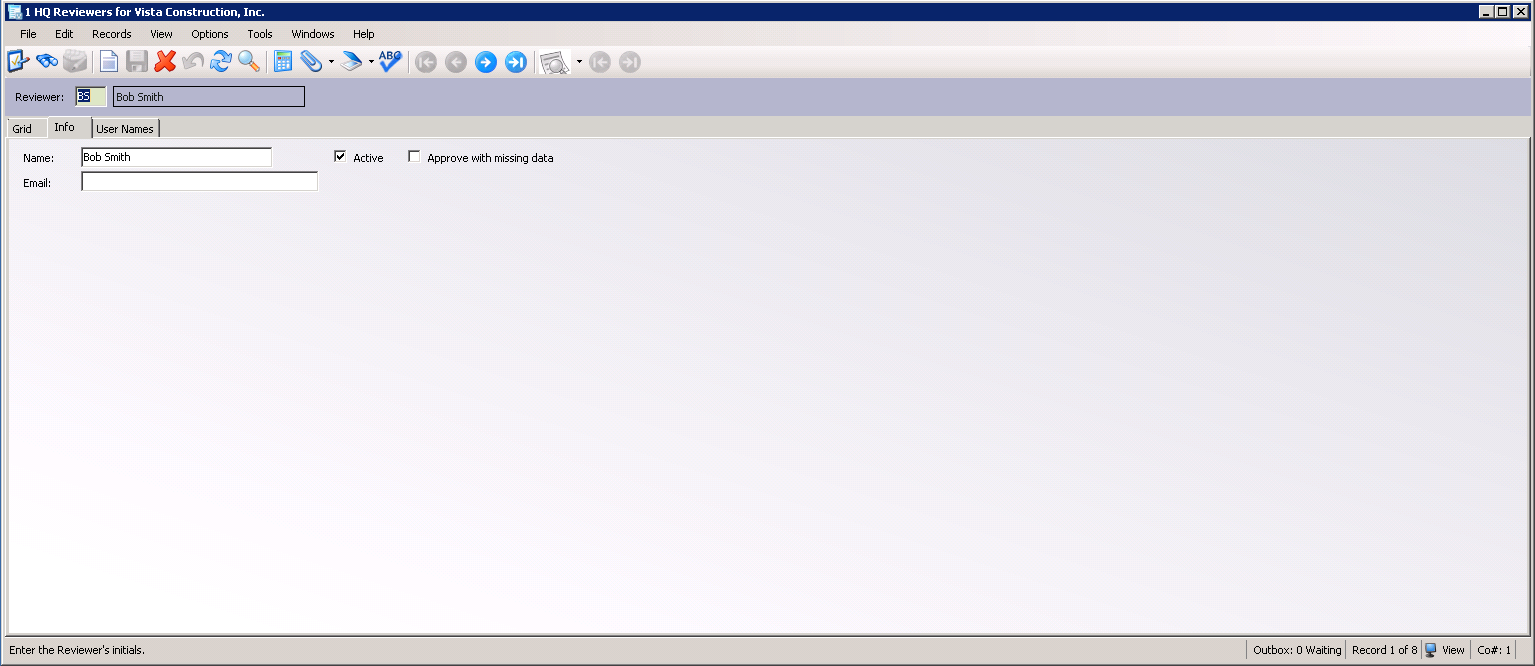
The reviewer name that displays in the Name field will be the one that displays in the AP Vendor Master screen, Add'l Info tab, Reviewer field.
4.Click the Grid tab to display a list of existing reviewers similar to the following:
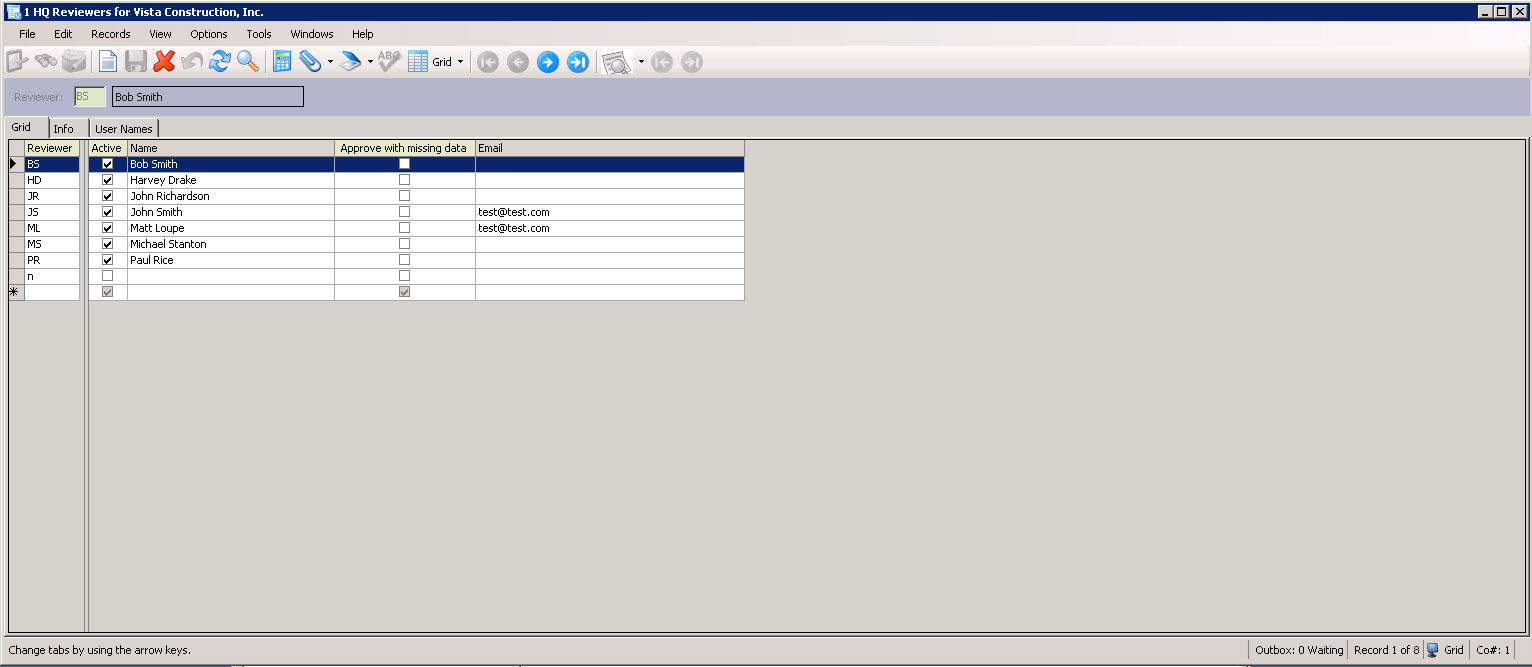
5.Add a new name in the blank row.
6.Click the Active check box if appropriate.