The Active Directory User Initialization is a utility for automating portions of the user setup process. This process determines what permissions and settings a new Active Directory user will have as a member of the identified group, matching an existing (template) user.
1.From the ribbon toolbar, click Administration.
2.Click AD User Initialization,  .
.
The Configure Active Directory User Initialization screen similar to the following displays:
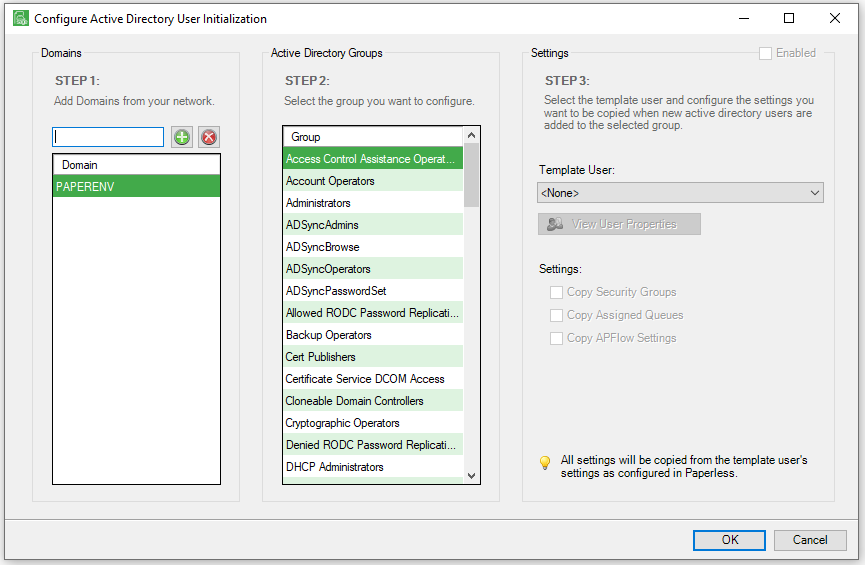
3.In the Domains pane, accept the active domain that is listed or enter a different domain and click  .
.
Note: Only domains configured to groups can be saved.
4.In the Active Directory Groups pane, scroll to locate the group to configure.
These are the groups set up in the customer's Windows Active Directory.
Note: Only one group can be configured at a time.
5.In the Settings pane, use the dropdown in the Template User field to select a user.
Base the template user on the group selected.
Once the Template User field is populated, the View User Properties box becomes active and the Settings currently assigned to the selected Template User display.
This is where the permissions and settings for a new Active Directory user are determined as a member of the identified group.
6.Click View User Properties,  , to verify the permissions of the Template User.
The following User Properties window similar to the following displays with the General tab active:
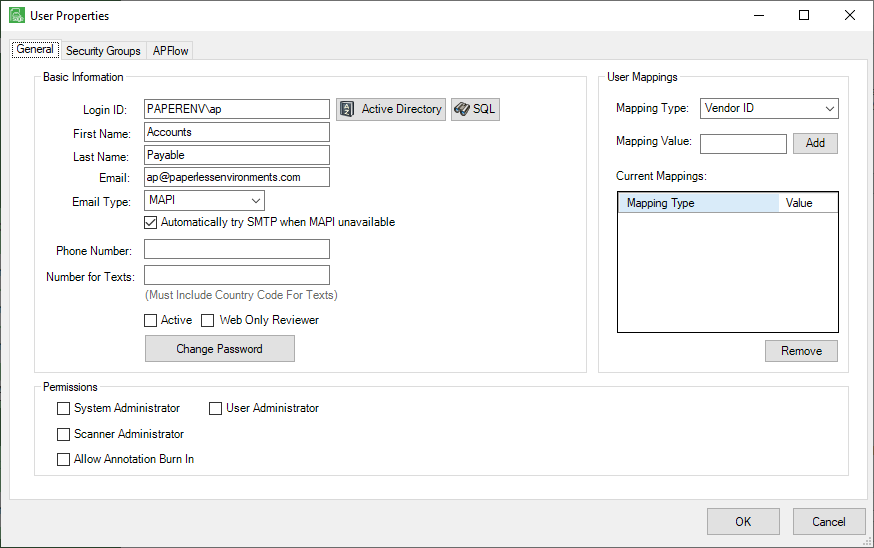
Note: This is the same User Properties window that can be accessed from Administration (on the ribbon toolbar), clicking the Users dropdown (from the Users icon,  ), and from the User Accounts dialog box that displays, selecting the user's name to highlight it and finally clicking Edit User. Click here for details.
7.If appropriate, click the special Settings:
-Copy Security Groups
-Copy Assigned Queues
-Copy APFlow™ Settings
8.Click OK.
The functionality of this utility is carried out by an AD Sync Job Poll job. It systematically checks active directory and Sage Paperless Construction users based on the Active Directory group configuration within Sage Paperless Construction.
Job Poll
Create a new Job Poll job.
1.From the ribbon toolbar, click Administration.
2.Click Job Poll,  .
.
The Job Poll Configuration window similar to the following displays:
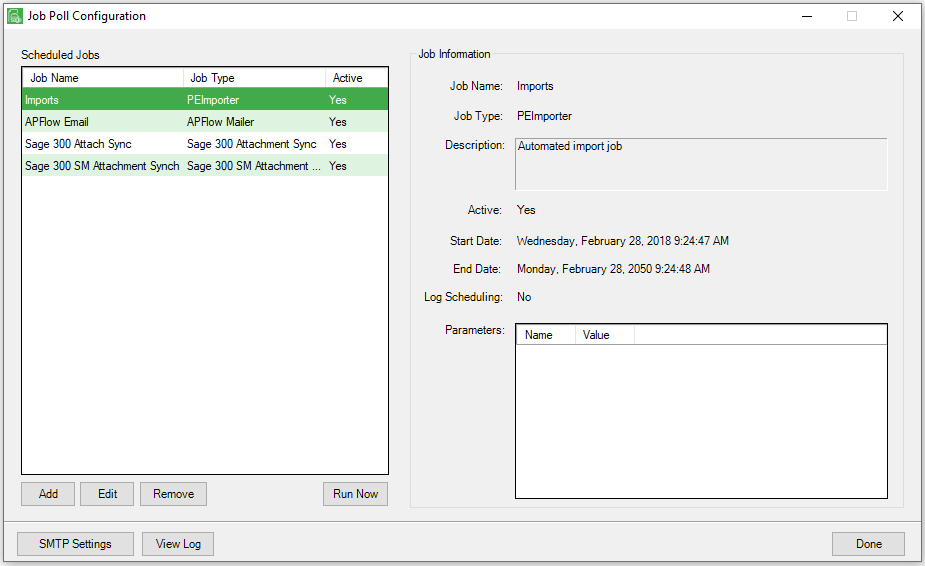
3.Click Add.
The Job Properties window displays:
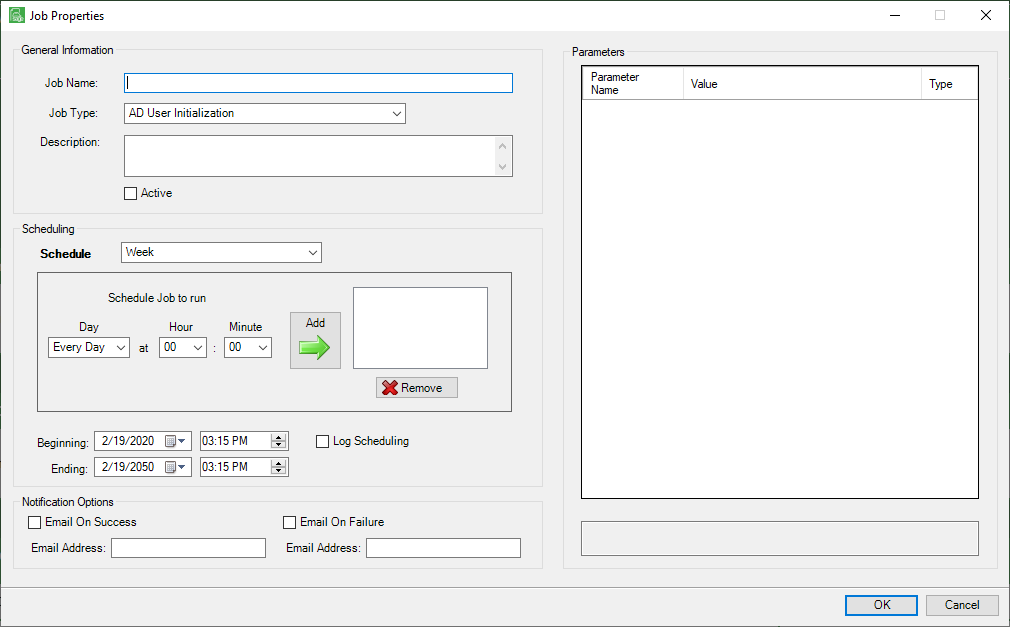
4.In the Job Name field, type AD User.
5.In the Job Type field, use the dropdown to select AD User Initialization, if it does not already display.
6.In the Description text box, type something similar to the following:
Configure settings when new active directory users are added to selected groups.
7.Click the Active check box.
8.Use the dropdown in the Schedule field to select frequency and time based on company requirements.
The Schedule field choice will impact the Schedule Job to run pane.
9.Use a calendar to enter the date for the first running of this job poll job in the Beginning field.
10.Determine what time the job should run for the first time.
A system end date will populate the Ending date and time fields.
11.Leave the Log Scheduling check box blank.
12.In the Notification Options pane, click if emails are to be system-generated for successful or failed jobs.
13.Click OK.
The Job Poll Configuration window similar to the following displays:
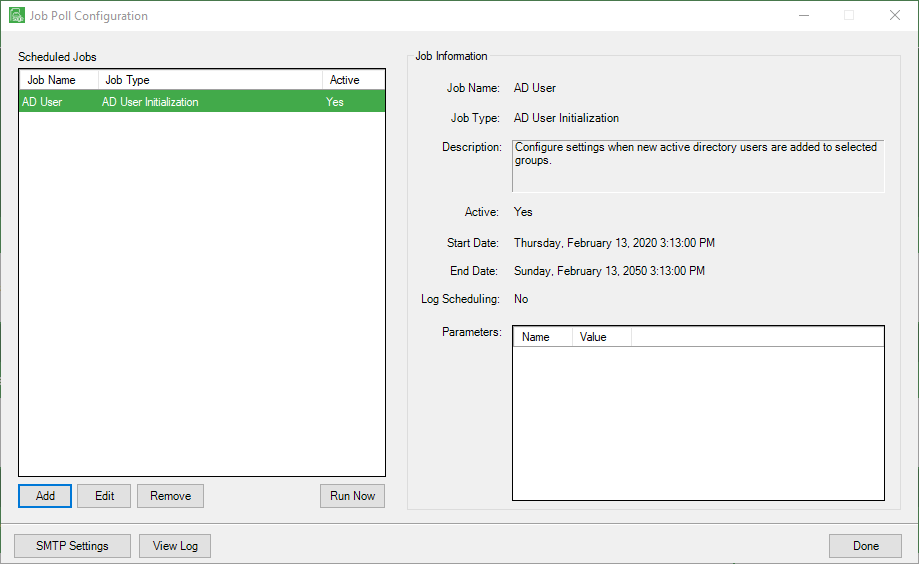
14.Click Done to close the window.
For details on creating Job Poll jobs, click here.