Overview
Web Users may have access to the web-enabled components of Sage Paperless Construction only. Web Users include employees, customers, subcontractors and others who need access to Sage Paperless Construction data and documents through web browsers and web applications.
Web Users may be Web Only Reviewers. These are individuals who are Web Users specifically assigned to a narrow list of reviewer permissions and who have no desktop access.
Ad Hoc users are external users with subscriptions. These subscription users pay for eForms™ and/or eCapture™ only. They are not Sage Paperless Construction users and can do nothing within Sage Paperless Construction.
The Web User menu displays when a Web Application license is added to the Sage Paperless Construction system.
1.From the ribbon toolbar, click Administration.
2.Click the Users dropdown,  .
.
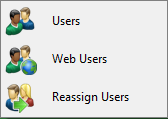
3.Click Web Users.
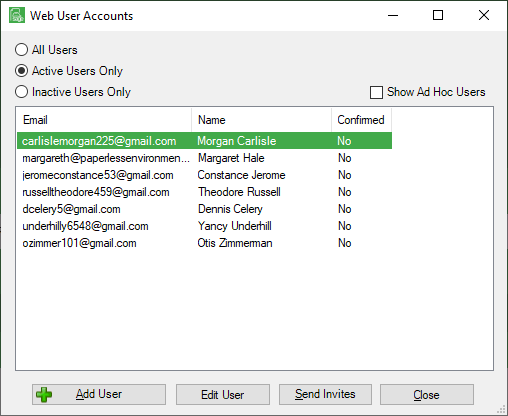
The Web User Accounts window similar to the following displays:
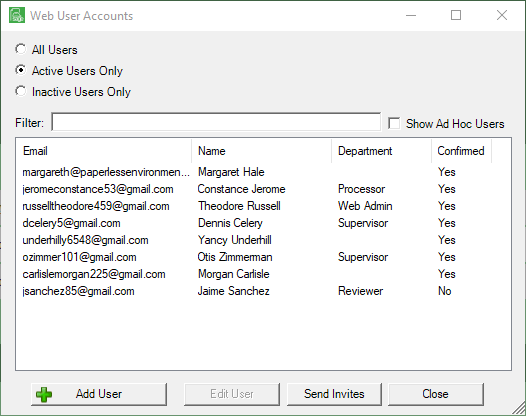
If looking to view Active and Ad Hoc Users, click the Show Ad Hoc Users check box.
Click here for instructions on adding an Ad Hoc User.
Note that there is a Filter text field where you can start to enter a user to narrow the list.
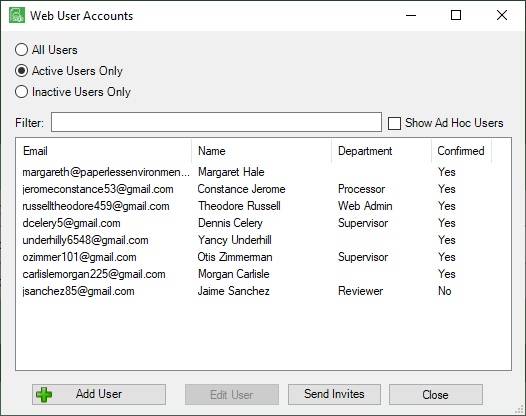
4.Start typing in the Filter field to narrow the list similar to the following:
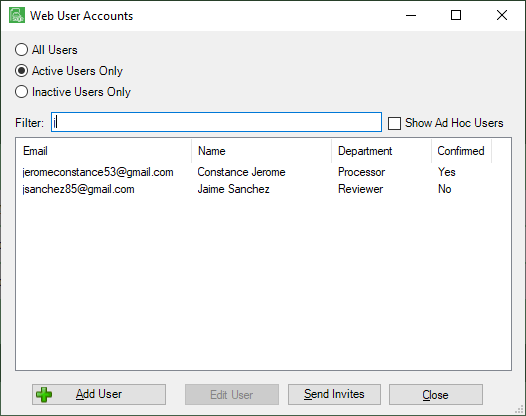
Not only can you filter on the Email column entries, but you can also filter on the Name column and Department column entries too.
Note: Department will display on the Web User Accounts window to allow for easier filtering.
5.Click Add User.
The first Add Web User Wizard window displays:
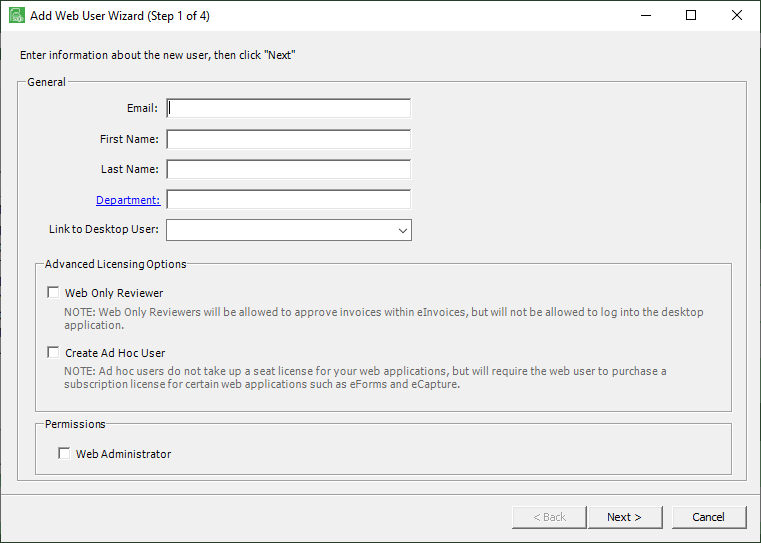
6.In the Email field, type the web user's email address.
Notes:
This will be the web user's login id.
This is a required field.
If the entered email already exists, a warning message will display.
If the entered email is invalid for any reason, an error message will display.
7.In the First Name field, type the web user's first name.
8.In the Last Name field, type the web user's last name.
9.Click the Department field label to display the Previous Department Values dialog box.
You can also use your lookup key (by default this is F4 but it can configured). This is where the list of departments you have previously added will display.
If you need to add a new department, you can enter it in the Department field. The new department that you added will display on the Previous Department Values dialog box after the user is created.
In this field, you can type any value that you want to filter on.
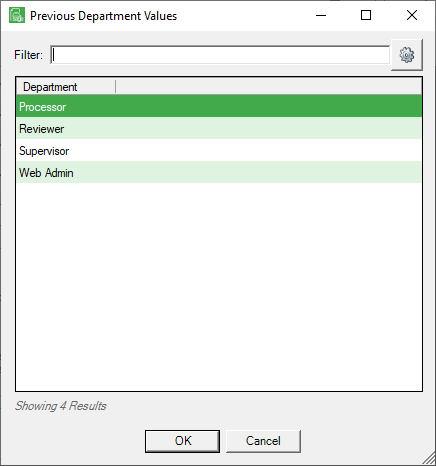
Note that there is a Filter text field where you start to enter a value to narrow the list if necessary.
Click in the Department column header to sort the values.
10.Click OK to choose a department.
11.In the Link to Desktop User field, the user name may system-generate. If it does not, use the dropdown to locate the user name.
12.Leave the Web Only Review check box blank.
Note: If creating a Web Only Reviewer, click here to read more.
13.Leave the Create Ad Hoc User check box blank.
Note: If creating an Ad Hoc User, click here to read more.
14.In the Permissions grid, if the individual is the Web Administrator, click this check box.
Important: For most individuals, this check box will remain unchecked.
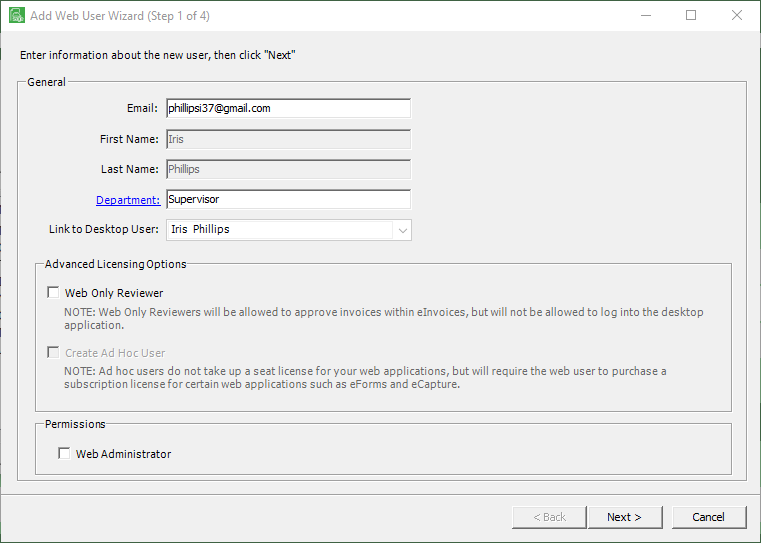
The completed window should resemble the following:
15.Click Next.
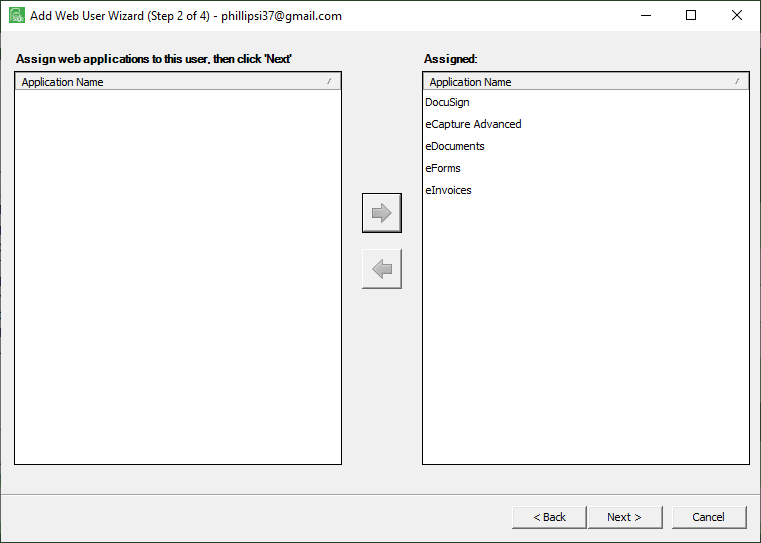
The second Add Web User Wizard window displays:
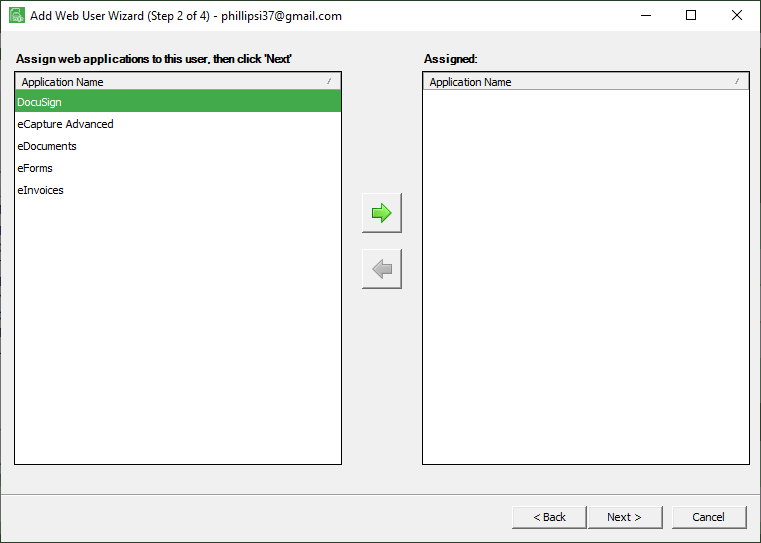
16.In the Assign web applications... pane, select the web application(s) to which web user access should be given.
17.Click the  icon to move the highlighted web application(s) to the Assigned column.
The completed window should resemble the following:
18.Click Next.
The third Add Web User Wizard window displays:
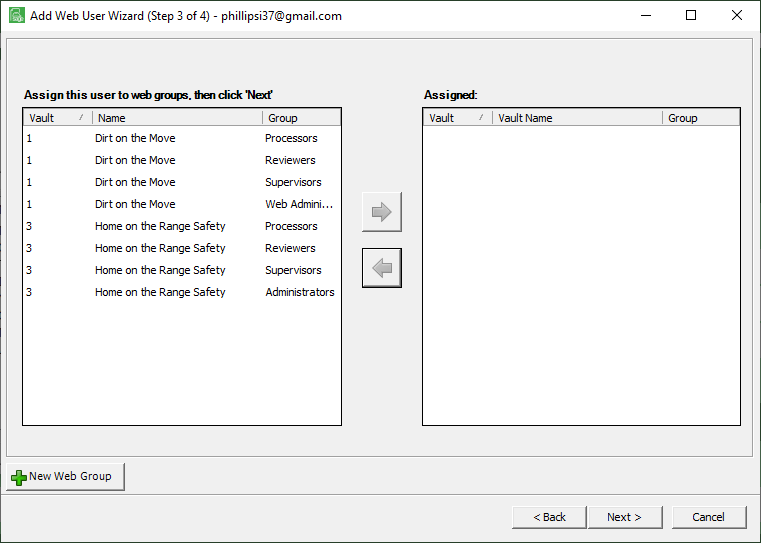
19.In the Assign this user to web groups pane, based on the web security group(s) listed, click to highlight the one(s) to which this web user should belong.
Note: The security groups determine the document types that are available to the web user within the Sage Paperless Construction web apps.
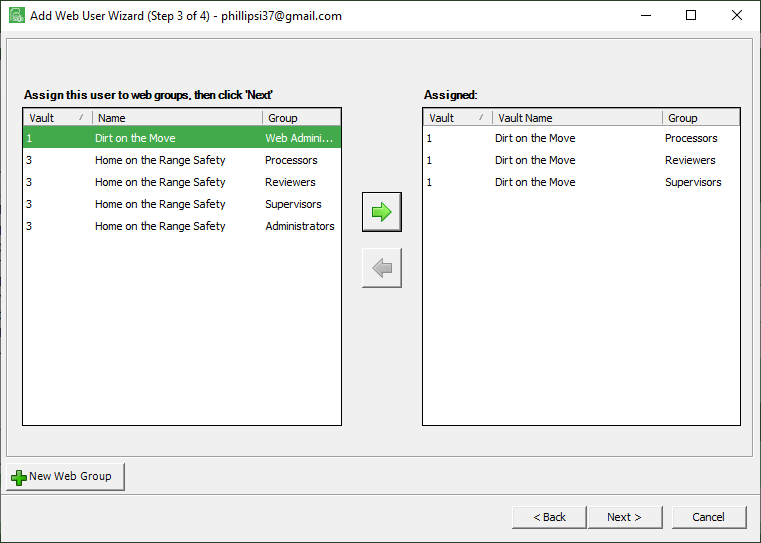
20.Click the icon to move the app(s) to the Assigned pane.
Note: To quickly add additional web security groups, click New Web Group. Refer to Web Security Groups for details.
The completed window should resemble the following:
21.Click Next.
The final Add Web User Wizard window displays:
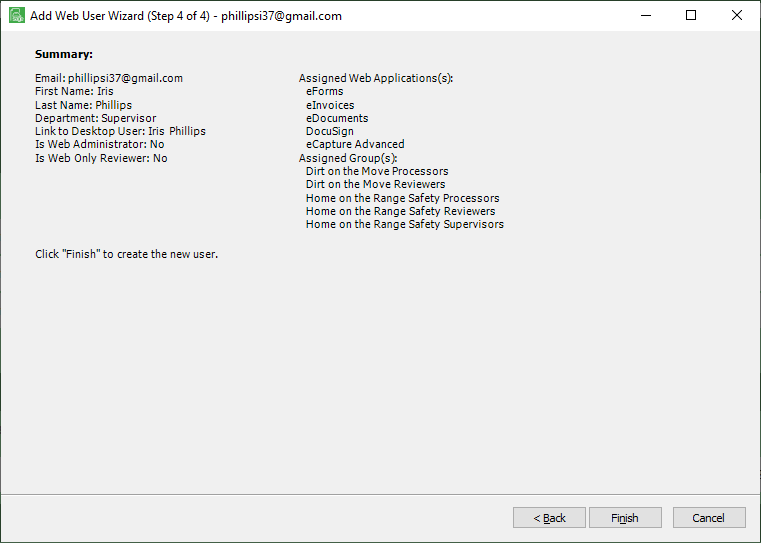
This is the Summary window where you can review all the selections made during the creation of this web user.
22.If satisfied that the information is correct on this Summary window click Finish.
Click Back to return to any of the previous Add Web User Wizard window to make necessary revisions.
Important: If changes are made, verify the changes in the modified Summary window before clicking Finish.
The Web User Accounts window similar to the following re-displays:
Edit User - General
1.Highlight the new web user's name that now displays in the list on the Web User Accounts window.
There is a Filter text field where you can start to enter a user to narrow the list.
Not only can you filter on the Email column entries, but you can also filter on the Name and Department column entries too.
2.Click Edit User.
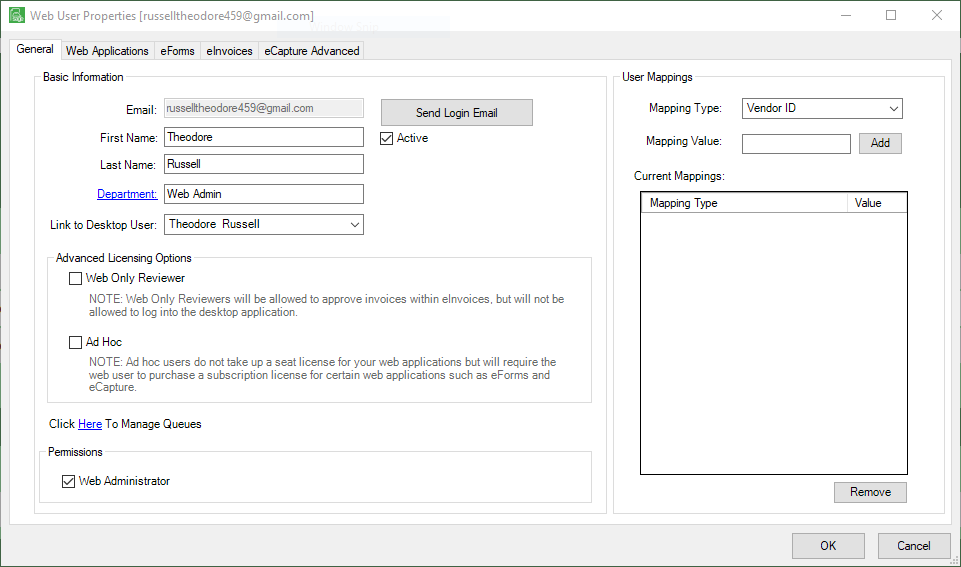
The following Web User Properties window displays with the General tab active:
Note: If  displays, click the link to Manage Queues. There you can assign queues to this web user, as necessary.
3.In the User Mappings section of the Web User Properties window, click the dropdown arrow of the Mapping Type field.
4.Select from one of the following:
Vendor ID
Customer ID
Employee ID
Important: The Employee ID choice will only display if a subscription to the HR module was purchased.
5.Click in the Mapping Value field.
6.Press F4.
The Lookup Utility will display with relevant choices based on the select made in step 4.
7.Scroll through the list to locate the appropriate ID.
8.Click to highlight the entry.
9.Click OK.
The ID systematically populates the Mapping Value field.
10.Click Add.
The Mapping Value information displays in the Current Mappings text box.
Edit User - Web Applications
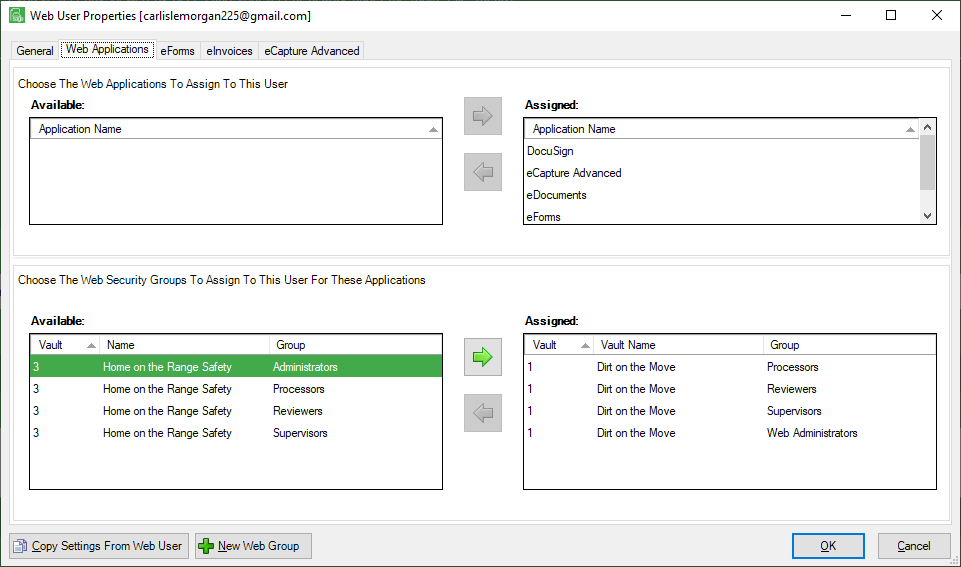
1.From the Web User Properties window, click to access the Web Applications tab.
A window similar to the following displays:
2.If the Web Applications and Web Security Group settings match another web user, click Copy Settings From Web User.
If the Web Applications and Web Security Group settings do not match another web user, skip to step 4.
3.In the Copy Web User from Web User dialog box, click to highlight the user to copy and then click OK.
4.In the Choose The Web Applications To Assign To This User pane, use the dropdown and click to highlight those applicable applications.
5.Click the  icon to move the selections from Available to Assigned.
6.In the Choose The Web Security Groups To Assign To This User For These Applications pane, use the dropdown and click to highlight those applicable web security groups.
7.Click the icon to move the selections from Available to Assigned.
8.Click OK.