Before using the Sage Paperless Construction APFlow™ module for the first time, access and security rights must be set up for any Sage Paperless Construction users who will be using the APFlow™ module. This includes the setup of APFlow™ queues.
Permissions and role responsibilities can be set up through Manage APFlow™, Vaults or Users.
➢Setting up permissions and role responsibilities through Manage APFlow™.
1.From the ribbon toolbar, click APFlow™.
2.Click Manage APFlow™,  .
.
The Manage APFlow™ window similar to the following displays with the General tab active:
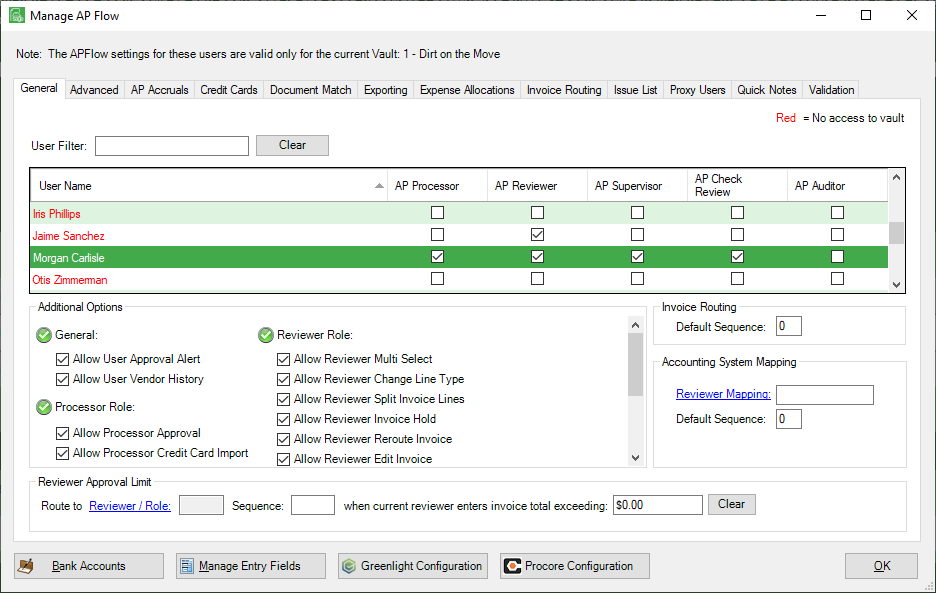
3.Click to select the role (AP Processor, AP Reviewer, AP Supervisor, AP Check Reviewer and AP Auditor) based on the selected vault(s).
4.Select the appropriate Additional Options.
Each Additional Options section heading includes this icon: 
If the user should have permission to perform all the options listed under a specific section, click the icon for that section. All options in that section will be selected.
If the user should have permission to perform some of the options listed under a specific section, you must click the desired options manually.
To remove options, you must manually click each option checkbox individually to remove the checkmark.
Note: A section, including the corresponding icon, will be disabled if the highlighted user does not have permission for the options displaying in that section.
For more information on the AP Processor, AP Reviewer, AP Supervisor, AP Check Reviewer and AP Auditor roles and permissions, refer to General Tab.
5.Click OK.
➢Setting up permissions and role responsibilities through Vaults.
Note: This is the more efficient way for the Administrator to set up a large number of first-time users.
1.From the ribbon toolbar, click Administration.
2.Click Vaults,  .
.
The Vaults window similar to the following displays:
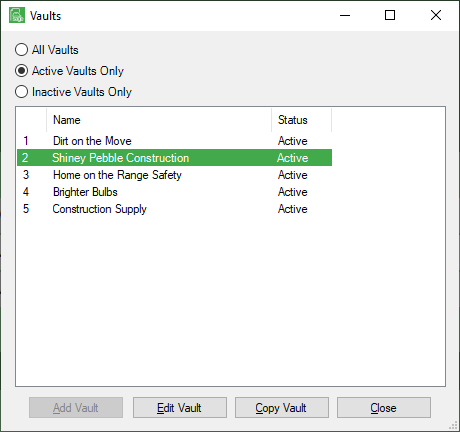
3.In the Vaults window, click Edit Vault.
The Vaults Properties window similar to the following displays, with the General tab active:
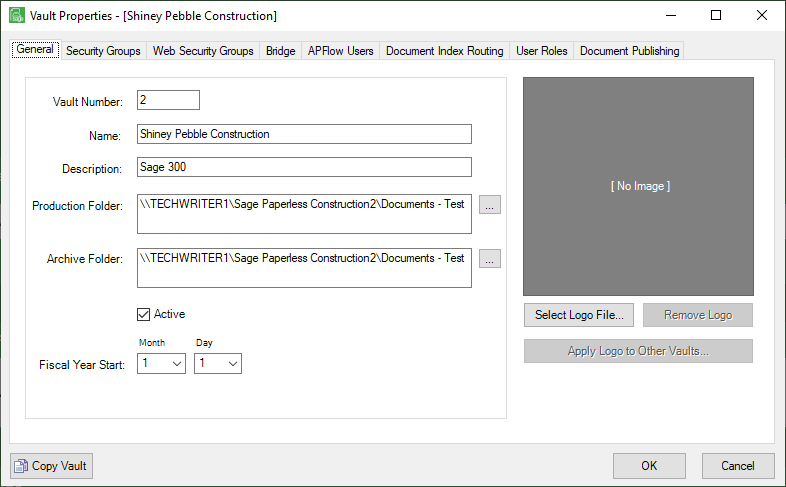
4.In the Vault Properties window, click the APFlow™ Users tab.
A window similar to the following displays:
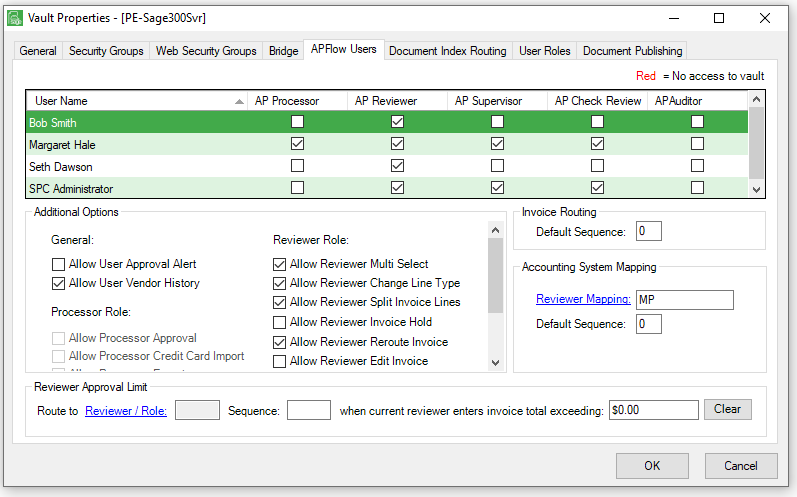
5.Click to select the role (AP Processor, AP Reviewer, AP Supervisor, AP Check Review, AP Auditor) based on the selected vault(s).
6.Select the appropriate Additional Options.
Note: For more information on the AP Processor, AP Reviewer, AP Supervisor, AP Check Reviewer and AP Auditor roles and permissions, refer to General Tab.
7.Click OK.
➢Setting up permissions and role responsibilities through Users.
1.To configure new or existing users, from the ribbon toolbar, click Administration.
Note: Requires Administrator permissions.
2.Click the Users dropdown arrow and click Users,  .
.
A User Accounts window similar to the following displays:
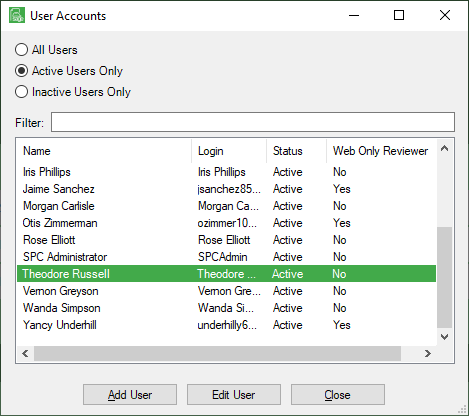
3.For a new user, click the link and follow the detailed steps: Adding Users
For an existing user, continue with step 4.
4.Click Edit User.
The User Properties window similar to the following displays, with the General tab active:
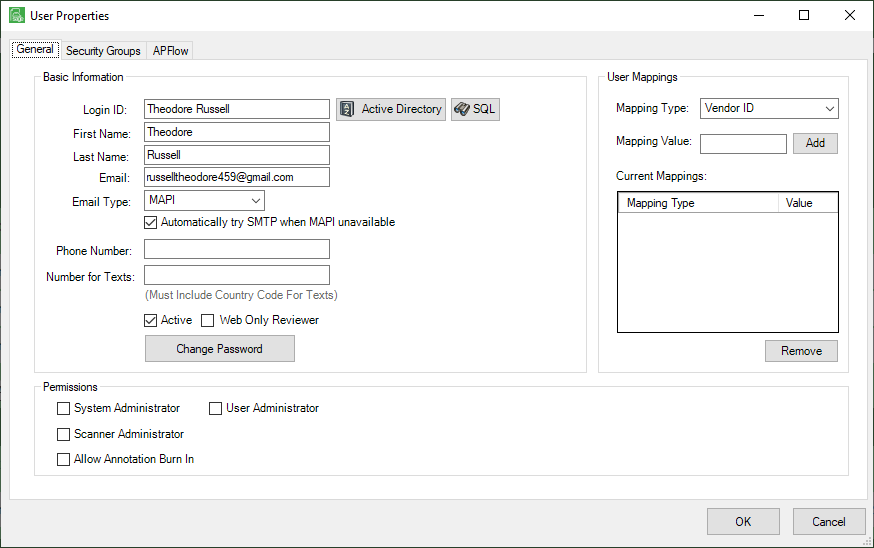
5.In the User Properties window, click the APFlow™ tab.
A window similar to the following displays:
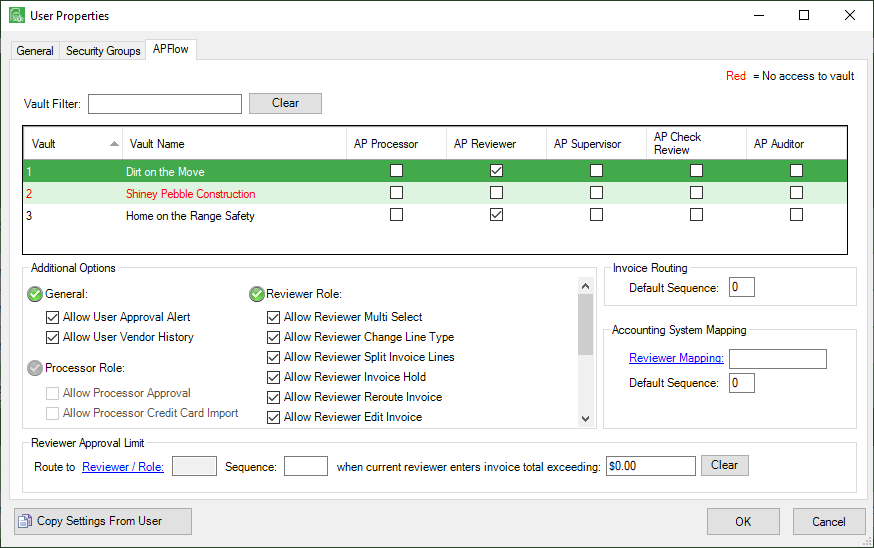
6.Click to select the role (AP Processor, AP Review, AP Supervisor, AP Check Review, AP Auditor) based on the selected vault(s).
7.Select the appropriate Additional Options.
Note: For more information on the AP Processor, AP Reviewer, AP Supervisor, AP Check Reviewer and AP Auditor roles and permissions, refer to General Tab.
8.Click OK.