1.From the ribbon toolbar, click APFlow™.
2.Click the Invoice Entry,  .
.
The APFlow™ sidebar opens on the right side of the window.
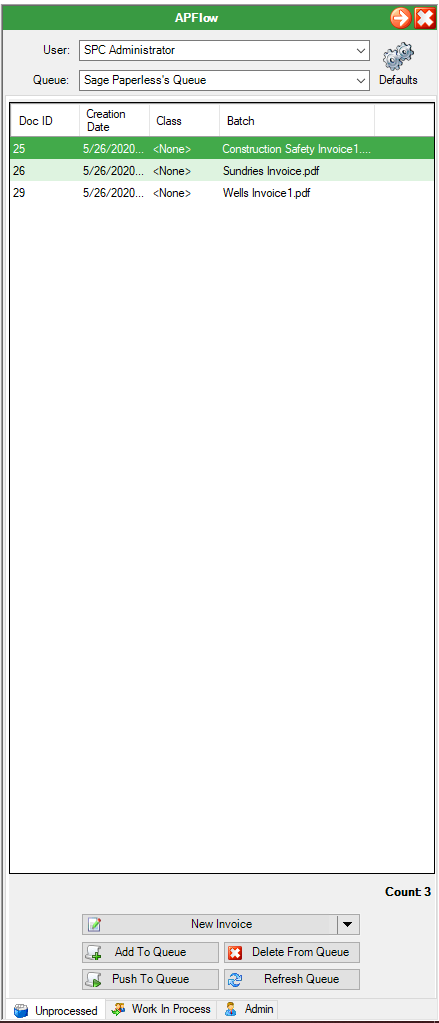
3.In the User field, use the default AP Processor or use the dropdown list to select a different individual.
The User field remembers the last selected user when returning to this module.
Note: On the first run, or if the last selected user is no longer available, the system should default to the current user.
If that user is not listed, the system will default to the first user name on the list.
4.In the Queue field, use the default AP Processor's queue or use the dropdown list to select a queue if a different user is selected in the User field.
|
Important: Only APFlow™ Queues display in the list. From the ribbon toolbar, click Administration. |
The main pane of the sidebar displays the list of documents in the queue. This list is based on the active tab selected at the bottom of the sidebar.
As an invoice is selected in the APFlow™ sidebar, it displays on the left side of the main window of the Export tab if Auto Preview Options is checked.
Tabs at the bottom of the APFlow™ sidebar are Unprocessed, Work In Progress and Admin.
Note: The Admin tab only displays if the user is assigned a Supervisor role or a Processor role with Allow Export Invoices permission.
When the APFlow™ sidebar opens, the Unprocessed tab is the active tab.
The APFlow™ sidebar can be re-sized by dragging the separator. The modified size will be remembered each time the user returns to the sidebar.
To close the sidebar, click the X located at the top right.
•For details on the APFlow™ User Defaults window, click here.
•For details on the Unprocessed tab, click here.
•For details on the Work In Process tab, click here.
•For details on the Admin tab, click here.
Viewer Window Tray
Below the invoice window pane is the Viewer window tray. The window tray is visible when the APFlow™ sidebar, Unprocessed tab or Work in Process tab is active.

For details on the Viewer Window Tray, click here.
You can edit the batch name that displays in the APFlow™ Sidebar.
1.Click on a name that displays in the Batch column.
The following icon will display:

This will activate the icon.
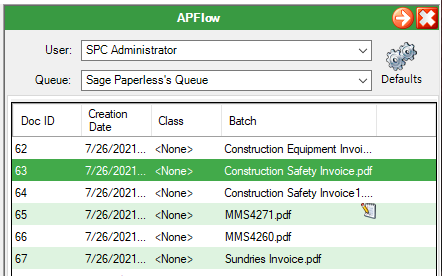
2.Click the icon.
The following dialog box displays:

3.In the Description field, change the name of the batch to whatever is appropriate.
4.Click OK.
Important: The batch name that displays in the dialog box Description field may or may not be the batch name you highlighted. This is because the location of the icon determines which batch name displays in the dialog box.
Minimizing the APFlow™ Sidebar
1.To minimize the APFlow™ sidebar while keeping the main screen visible, click the arrow,  located in the APFlow™ sidebar title bar.
When the APFlow™ sidebar is minimized, only the red and green arrows display.
2.To reopen the APFlow™ sidebar, click the arrow,  .
.