At the top right of the Invoice Entry screen, above the toolbar:
|
Configure user level hot key settings |
Refer to Configure Invoice Entry Hot Keys for details. |
|
Configure user level invoice entry settings |
Refer to Configure Invoice Entry Fields for details. |
|
Pin form on top of all other forms |
Refer to Pin Form for details. |


At the top left of the Invoice Entry screen, within the toolbar:
|
unlabeled |
This is the change processor field. |
|
Save |
Click to save the current invoice. |
|
Next Invoice |
Click to save the current invoice and move to the next invoice in the Unprocessed queue. |
|
Exit |
Click to exit Invoice Entry. |


Remaining ribbon toolbar icons:
|
New Line |
For detailed information, click Invoice Entry - New Line. |
|
Approve Invoice |
Click Approve Invoice to approve the active invoice which will bypass routing the invoice for approval. After clicking Approve Invoice, the following dialog box displays: Click Yes or No, as appropriate. |
|
Route Invoice |
Starts the routing process. Check routing rules first to see people and sequencing. If no routing rules, then the Route To Reviewers dialog box is blank and the invoice will need to be routed manually. |
|
Document Match |
Click this icon to open the Match Documents window. To read more about Document Matching, click here. |
|
DocRoute™ |
Click this icon to open the Document Route Configuration dialog box. Routes an invoice with Processor notes in DocRoute™ into the DocRoute™ module. On the Document Route Configuration dialog box, notes can be added, and DocuSign can be selected. |
|
Export Invoice |
Exports invoices into the bridged accounting system. |
|
Procore Import Invoice |
Procore integrates with the following accounting systems: Sage 100, Sage 300 From within the Invoice Entry screen, if the invoice is still in an Unprocessed status, click this icon to access the Import Invoice from Procore window. Use this screen to reconcile your Procore Invoices with their Sage Paperless Construction statuses, check for processing errors that occurred during the auto import process or request an invoice that failed import to be reprocessed. Important: A license for Procore is required. Click here for details on the Procore Integration. |
|
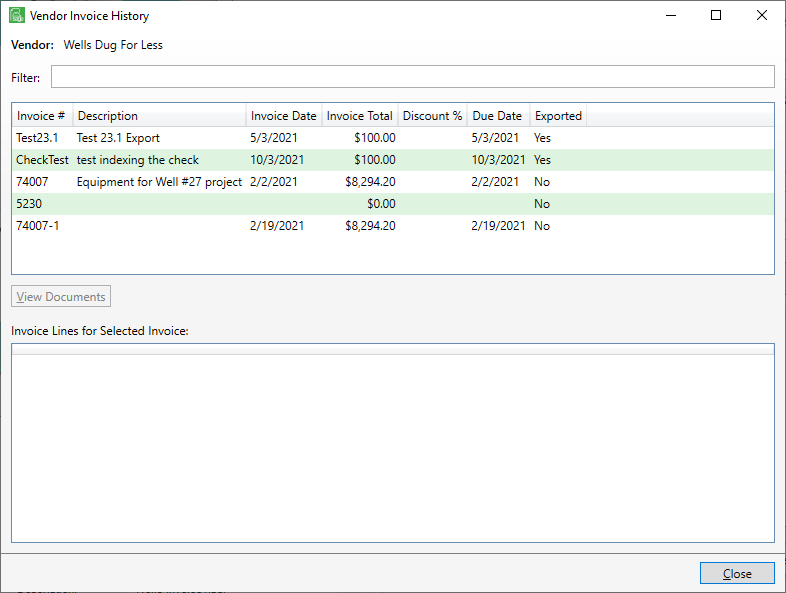
Vendor History |
Click this icon to open the Vendor Invoice History dialog box. Past invoices for the vendor will display. Click View Documents to open the old invoices in Sage Paperless Construction. Processors can copy coding from lines on previously entered invoices to new lines on current invoices. In the Vendor Invoice History window, click to highlight the line(s) to copy. |
|
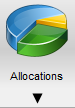
Allocations |
Once the Administrator sets up the allocation for reoccurring invoices, and the Processor accesses Invoice Entry for that invoice, the Allocations icon will be visible in the toolbar. The Allocations icon is only visible in the toolbar if allocations are supported and configured for the vault. The icon will only be enabled once lines can be added (by filling out the Vendor and Invoice Number fields). For more information on Allocations, refer to Expense Allocation in Invoice Entry. |
|
Add Vendor |
This icon displays if the Administrator clicked Allow Processor Add Vendor in the General tab on the Manage APFlow™ screen to give the Processor permission. Click this icon to add a new vendor that does not already exist in the bridged accounting system. Not all systems support this functionality. |
|
Manage Secondary Vendors |
Click this icon to open the Manage Secondary Vendors dialog box. This creates a database list for reporting purposes. |
|
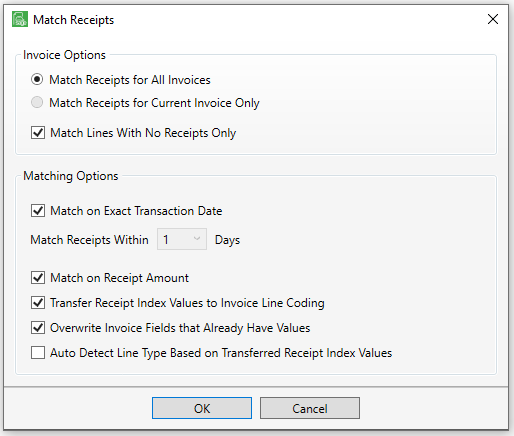
Match Receipts |
Click this icon to display the Match Receipts dialog box similar to the following:
For detailed information on the Match Receipts options, click here. |
|
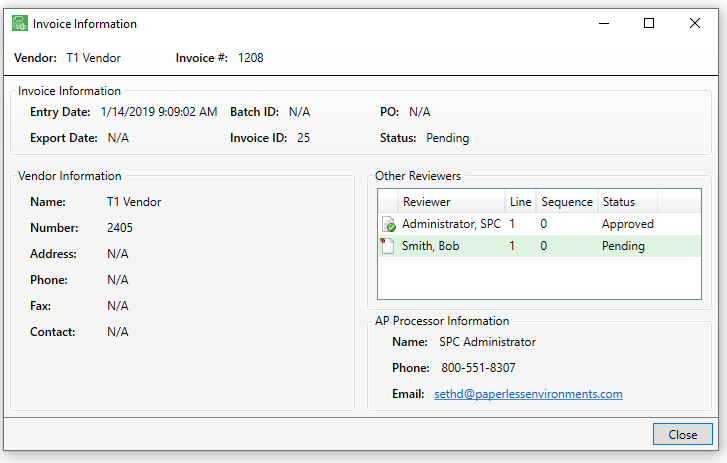
Invoice Info |
1.Click this icon to display additional information about the invoice and the vendor. 2.Click Close. Important: For this icon to be active, the invoice must be saved. |


At the bottom of the Invoice Entry screen:
Approval Alert |
Invoices marked with this flag will display differently in Approve Invoices and the APFlow™ sidebar. |
Confidential Invoice |
Changes the document type of the invoice to Confidential. |
Do Not Pay |
Takes the invoice out of routing without losing the information. |
Lock Coding |
Generally, Processors enter the available information on an invoice which typically is the header, and then send the invoice off to Reviewers to finish coding it. |
Lock Taxes |
Instead of locking all line fields (Lock Coding), there may be times when those fields defined in each accounting system relating to taxes in Approve Invoices need to remain unchanged. |
Auto Fill Unallocated on New Line |
If you click this check box, the next line you add to the invoice will include whatever unallocated monies remain. If you click this check box before you enter any lines, the first line of the invoice you enter will include the entire invoice total. |
Status |
The status indicator of the invoice systematically displays here. For a new invoice, the status is Unknown. |