1.From the ribbon toolbar, click Administration.
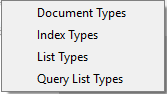
2.Click the Types dropdown,  .
.
3.Click List Types.
The List Types dialog box similar to the following displays:
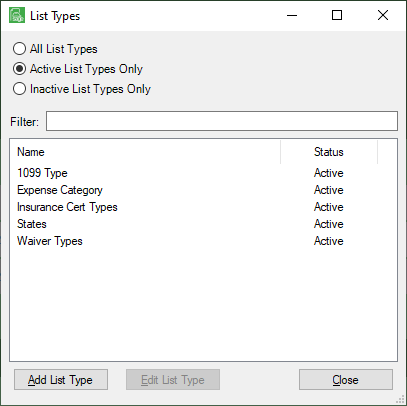
There is a Filter text field where you can start to enter a list type to narrow the list.
4.Start typing in the Filter field to narrow the list similar to the following:
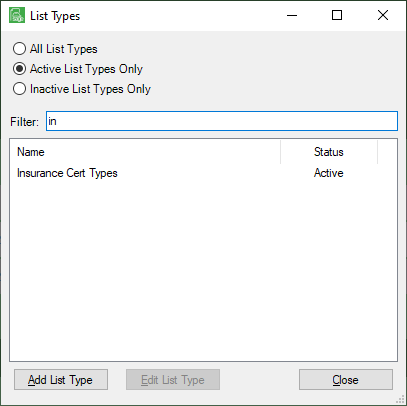
Not only can you filter on the Name column entries, but you can also filter on the Status column entries too.
5.Click Edit List Type.
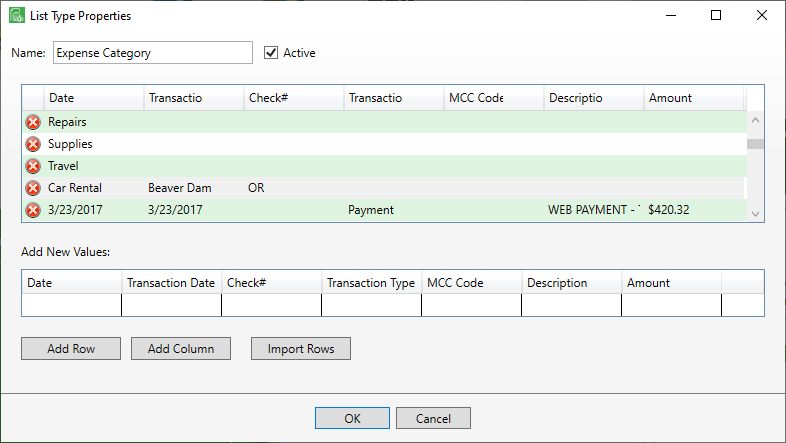
The List Type Properties window may resemble the following.
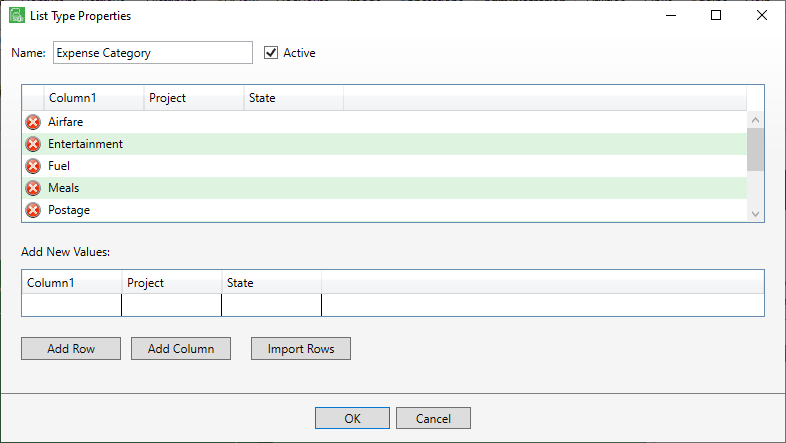
This is where you can add rows and add columns. When you click Import Rows, these are "CSV Importer" style where column headers from the first line of the CSV file are read; where comma delimiter and double quotes are the defaults.
6.After all changes are made, click OK.
Editing a List Type
After highlighting an existing List Type that displays in the List Types dialog box, click Edit List Type.
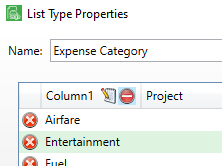
The List Type Properties for an existing List Type displays similar to the following:
This is where you can add, edit or delete the existing column values.
Adding a New Value
1.Click in the appropriate column row.
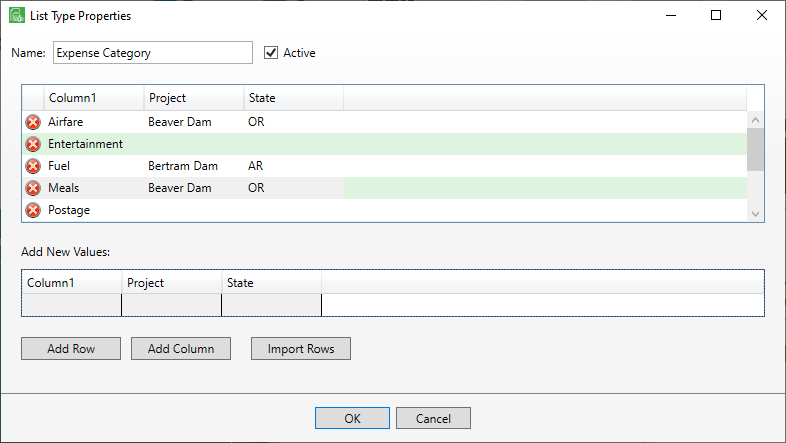
2.For example, in the Entertainment row, click in the Project column to add a new value.
Note: Any existing entry displaying on the List Type Properties window can be deleted by clicking the delete icon, that displays at the beginning of each row.
Adding a Row
1.Enter column information in the Add New Values grid.
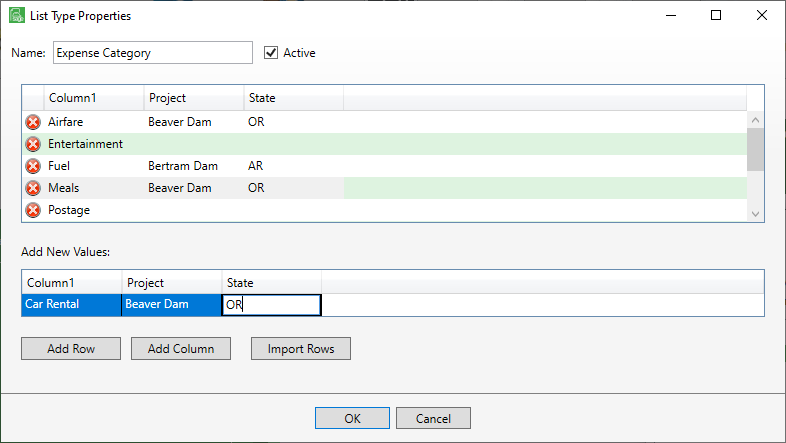
2.Click Add Row.
Changing a Column Heading
1.Click in the column heading space to display the following icons:
2.Click the edit icon,  .
.
A dialog box similar to the following displays:
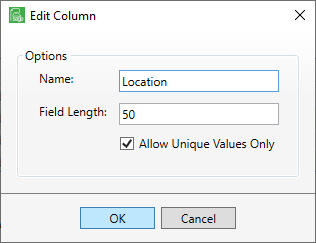
3.In the Name field, make your revisions.
4.The Field Length default length is 100. If the column should be longer or shorter, make the change here.
5.Select the Allow Unique Values Only checkbox if two rows in the column cannot have the same value.
This is important when building a backfill for a custom list.
6.Click OK to save your changes.
Deleting a Column Heading
1.Click in the column heading space to display the following icons:
2.Click the delete icon,  .
.
A confirmation dialog box similar to the following displays:
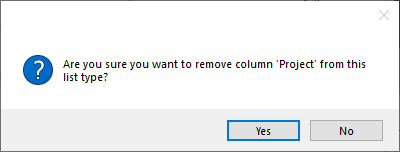
3.If you want to continue to delete the column, click Yes. Otherwise, click No.
Adding a Column
1.Click Add Column.
An Add Column dialog box similar to the following displays:
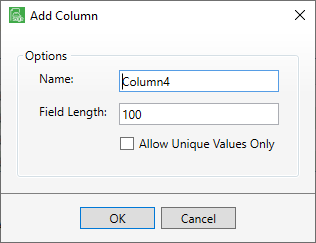
2.In the Name field, enter the new column heading.
3.The Field Length default length is 100. If the column should be longer or shorter, make the change here.
4.Select the Allow Unique Values Only checkbox if two rows in the column cannot have the same value.
This is important when building a backfill for a custom list.
5.Click OK.
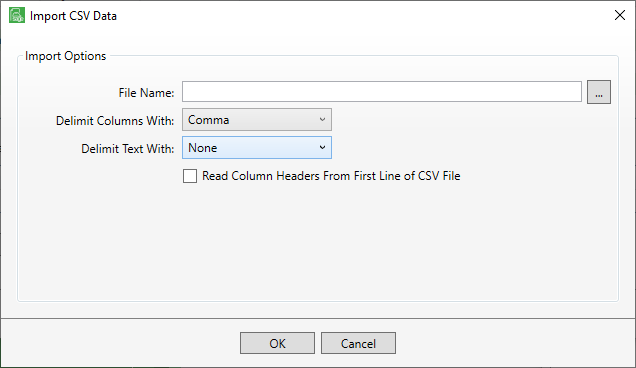
Importing Rows
When you import rows, these are "CSV Importer" style where column headers from the first line of the CSV file are read, where comma delimiter and double quotes are the defaults.
1.Click Import Rows.
The Import CSV Data window displays:
2.In the File Name field, click the  to access your associated CSV folder similar to the following:
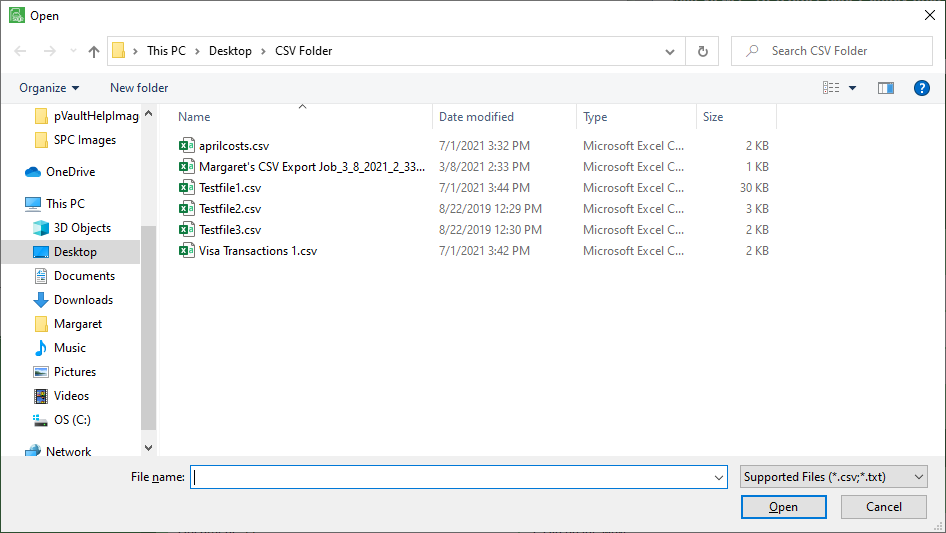
3.Highlight the file to select it.
4.Click Open.
A completed Import CSV Data window redisplays similar to the following:
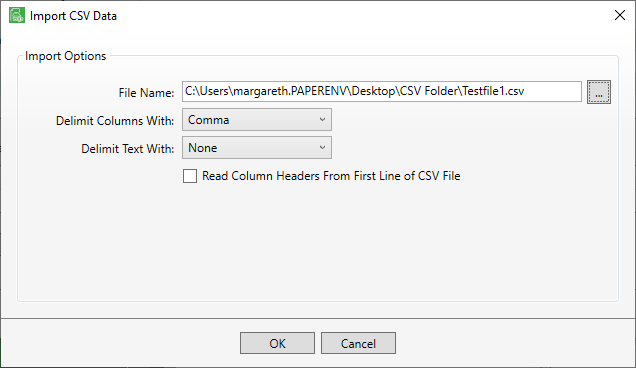
5.Click OK.
A warning message similar to the following may display should the CSV file you are importing include more columns:
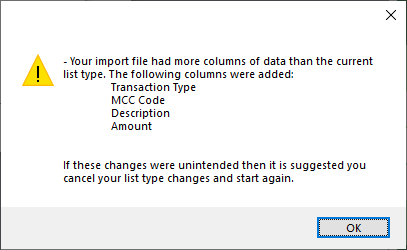
6.Click OK to close the warning message.
The List Type Properties window redisplays. Note the additional column headings and entries as a result of the CSV file you imported.