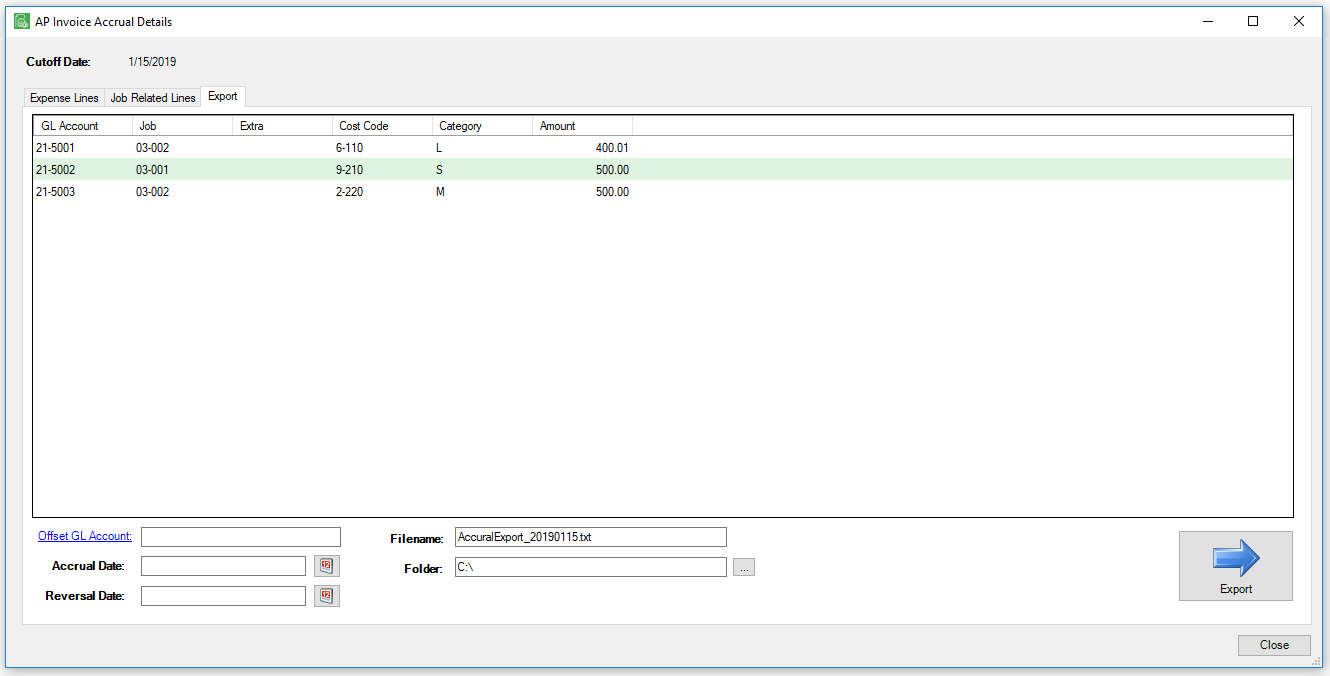
Click the Export tab of the AP Invoice Accrual Details screen.

This screen will display every selected invoice entry by GL Account number or Job number and its associated lump sum amount.
1.Verify that all the entries listed on the Export tab should be exported.
Note: To adjust entries listed on the Export tab, return to the Expense Lines tab or the Job Related Lines tab to deselect invoice lines.
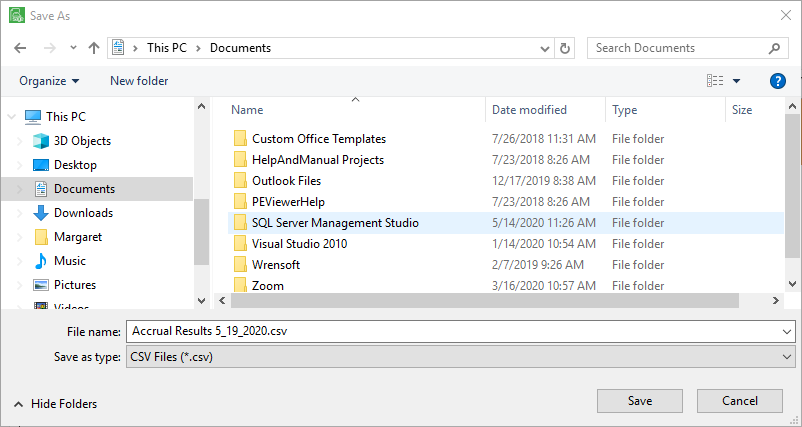
2.Click Save Results.
A Save As dialog box similar to the following displays:

This saves the export grid into a .CSV file that can be opened in Excel.
Note: The File name and Save as type fields are systematically populated.
3.If the Offset GL Account number needs to be changed, click the Offset GL Account field name to access the lookup utility.
If the Offset GL Account number is correct, leave the default.
Note: The Offset GL Account number is set up in the Manage AP Flow screen, AP Accruals tab, in the Offset GL Account field by the company Administrator.
4.Use the calendar icon to enter a date in the Accrual Date field. This is the date when the entries will post.
5.Use the calendar icon to enter a date in the Reversal Date field. This is the date when reverse entries will post.
6.In the Filename field, identify the filename.
7.In the Folder field, identify the folder. Click the ellipsis,  , to browse to other folders, if necessary.
8.Click Export.
9.Click Close.