Once document(s) are captured (refer to Capturing Documents), documents can be indexed and stored.
1.From the ribbon toolbar, click Capture.
2.Click Indexer,  .
.
The Index Document dialog box displays:
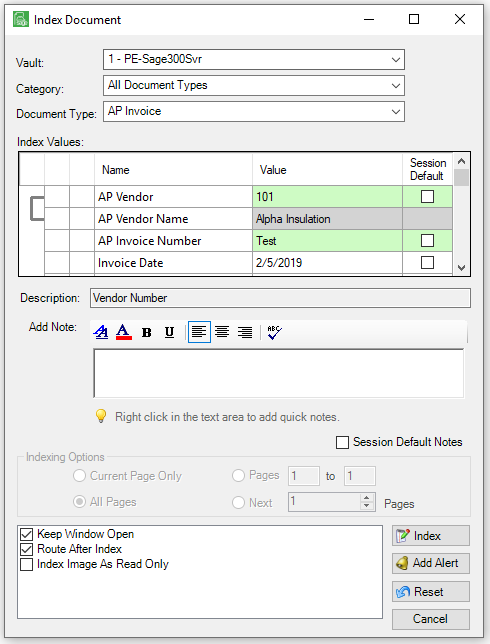
2.In the Vault field, verify that the vault identified in this field is correct. Use the dropdown to change the vault.
This is the vault where the image will be stored.
Note: The Index Documents screen will default to the active vault.
3.In the Category field, use the dropdown to select the document category for this document.
4.In the Document Type field, use the dropdown to select the document type for the image being indexed.
Note: Document Types are visible based on security access.
Index Values
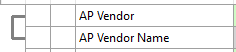
Index Values are associated with the chosen document type and are listed in the Index Values pane.
Required Index Value |
One type of Index Value associated with a Document Type. |
Optional Index Value |
Another type of Index Value associated with a Document Type. |
|
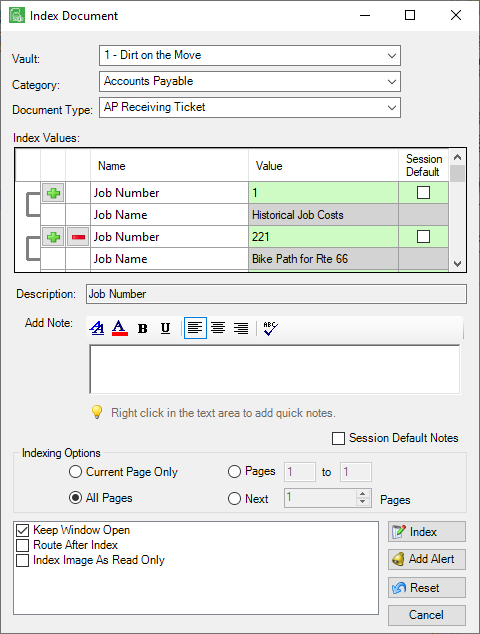
Index Values with multiple entries are identified with this symbol in the first column of the pane. |
|
To remove a duplicated index line, click this symbol in the second column of the pane. |
|
Certain Index Values have "backfills" associated with them. |


1.In the Value column, enter the Index Value.
Some Index Types are connected to the accounting system or other database that the company maintains (job numbers, vendors, etc.).
2.A Value column entry displaying a light green background means that a lookup is available for the associated Name column entry. Click F4 (which is the default).
After pressing the lookup key, a list of values stored in the database program will display to choose from.
If the index type is not linked to a database table, a list of previously indexed values stored in Sage Paperless Construction will display to choose from.
For document types with index types configured as multiple and tied to lookups, you can multi-select entries in the list using standard Windows multi-select actions (Shift+Click, Ctrl+click) to choose more than one index value at a time.
For example:
3.Click the Session Default check box if indexing multiple documents of the same type and the same index values will be entered repeatedly.
This saves the information entered in the Value field.
From that point forward, when that corresponding Index Value is encountered, the Value field is systematically populated. This continues until the Value is changed.
Note: Session defaults are saved until logging out of Sage Paperless Construction.
4.Use the Add Note text box to add pertinent notes to the document. Type notes into the text box or right click to add a note. (Refer to Quick Notes.)
5.Click to select Session Default Notes to add the same note for every document being indexed.
Indexing Options
If the document being indexed has more than one page, the Indexing Options section will be activated.
1.Click Current Page Only to index and store only the current page. This is the default.
2.Click Pages X to X to index a specific range of pages. That page range must be entered.
3.Click All Pages to index all pages of the batch as a single document.
4.Click Next X Pages to index the next specific number of pages not previously indexed.
5.Click to select the Keep Window Open check box, if necessary. This keeps the Indexing screen open as long as there are pages remaining in the batch or file being indexed.
Note: If this box is unchecked, the Indexing screen closes after clicking Index.
6.If available, use this to index the document and then route it to someone using the Document Routing module.
The Route After Index option only displays if the optional DocRoute™ module is installed.
Immediately after the document is indexed, the Quick Route screen displays and the document may be routed to other users in the company. (Refer to Document Routing for more detail).
7.Click Index Image As Read Only to set the Read Only flag on the document as it saves in Sage Paperless Construction.
8.After entering all necessary information, click Index to index and store the selected pages in the Sage Paperless Construction system.
Sage Paperless Construction will mark the pages, as they are indexed, with a large blue "I" icon to indicate the page was indexed.
The page will also be marked with a large red "X" to indicate that the page is marked for deletion from the file or batch.

9.If additional pages remain in the file or batch, start the indexing cycle over again by clicking Index, or, if Keep this Window Open is selected, the Indexing screen will be ready for the next page(s) to be indexed.
When the last page of a batch is indexed, the following dialog box displays indicating that all the pages were processed:
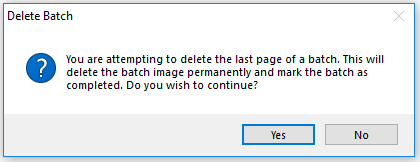
10.Click Yes to complete the process.
The following dialog box displays:
11.Click OK.
Another dialog box displays:
12.Click OK.
A Document Route Configuration window similar to the following displays:
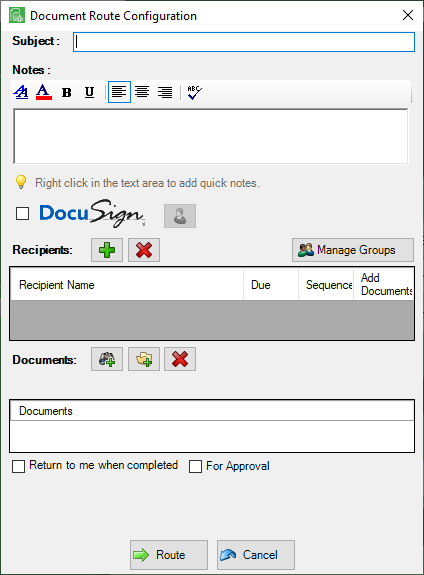
Note: Click here to refer to Document Routing details.