For specific Sage 100 Accounting System Routing Rules setup, click here.
For specific Sage 300 Accounting System Routing Rules setup, click here.
1.From the Invoice Entry screen, click Route Invoice,  .
.
A Route To Reviewers window similar to the following displays:

2.Click Change to access the Select Routing Groups dialog box similar to the following:
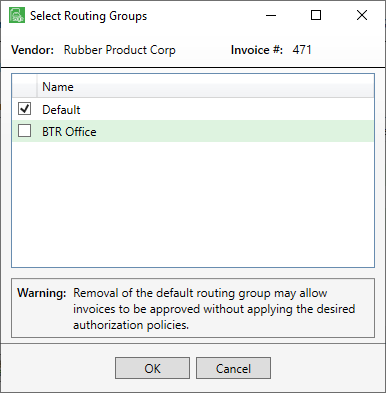
The Default group will systematically be checked.
3.Click to select additional routing groups, or click to deselect routing groups not needed, for routing the identified invoice for approval.
4.Click OK.
5.Click Check Invoice Route Rules.
The Invoice Route Test dialog box similar to the following displays:
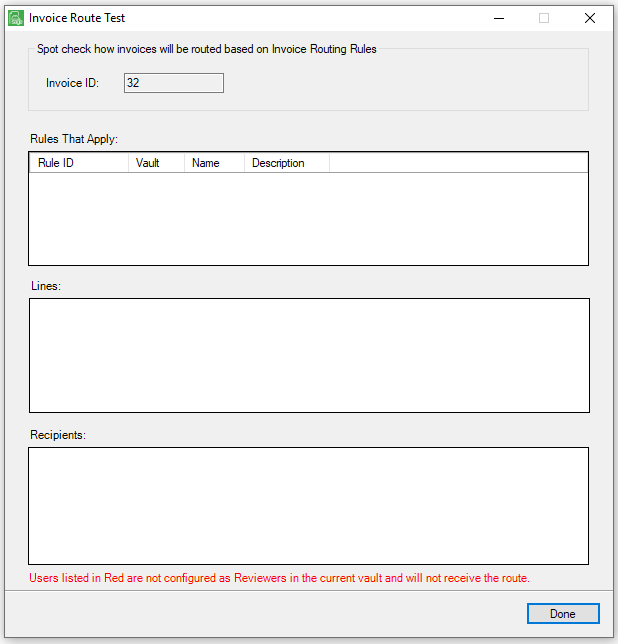
Look to see if any routing rules apply to the current invoice ready for review.
This Invoice Route Test provides verification of how the invoice will be routed based on the routing rules included here
Any Reviewers who are part of a routing rule will be systematically assigned to the invoice lines in the proper sequence.
6.Click Done.
7.Click Route.
If lines are not properly assigned to a Reviewer, the following dialog box displays:
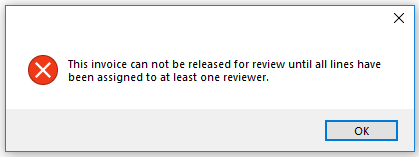
8.Click OK.
9.In the Current Reviewer Assignment pane, highlight the line needing to be assigned.
10.Click Add Reviewer.
A Lookup Utility dialog box displays with a list of Reviewers from which to select.
11.Click to select a listed Reviewer.
12.Click OK.
An Assign Reviewer To Invoice window similar to the following displays:
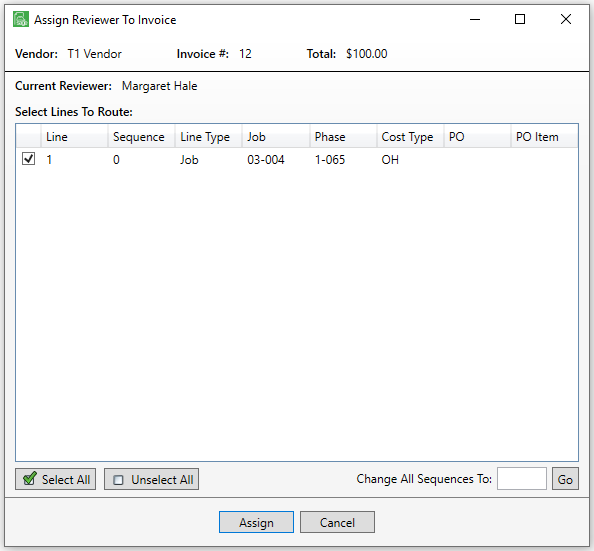
13.Uncheck any lines that the selected Reviewer should not approve.
If necessary, click Remove Reviewer to remove a Reviewer from a line.
14.If the route sequence on multiple lines needs to be changed to the same sequence, enter the route sequence number in the Change All Sequences To field and then click Go.
15.Click to Assign.
The Assign Reviewer To Invoice window closes.
16.If appropriate, click Add Note to generate an Invoice Notes dialog box where a new note can be written before routing.
17.If the Invoice Notes dialog box was accessed to add a note, click Save.
If the Invoice Notes dialog box was not accessed, continue with step 15.
18.Click Route.
Reviewers will instantly see the invoice in their Pending folder in the APFlow™ sidebar.
Note: A dialog box may display announcing: "You are a first level reviewer for this invoice." and asking: "Would you like to approve the invoice at this time?"
Click Yes or No, as appropriate.