Any non-indexed document can be "pushed" to a user queue for further processing.
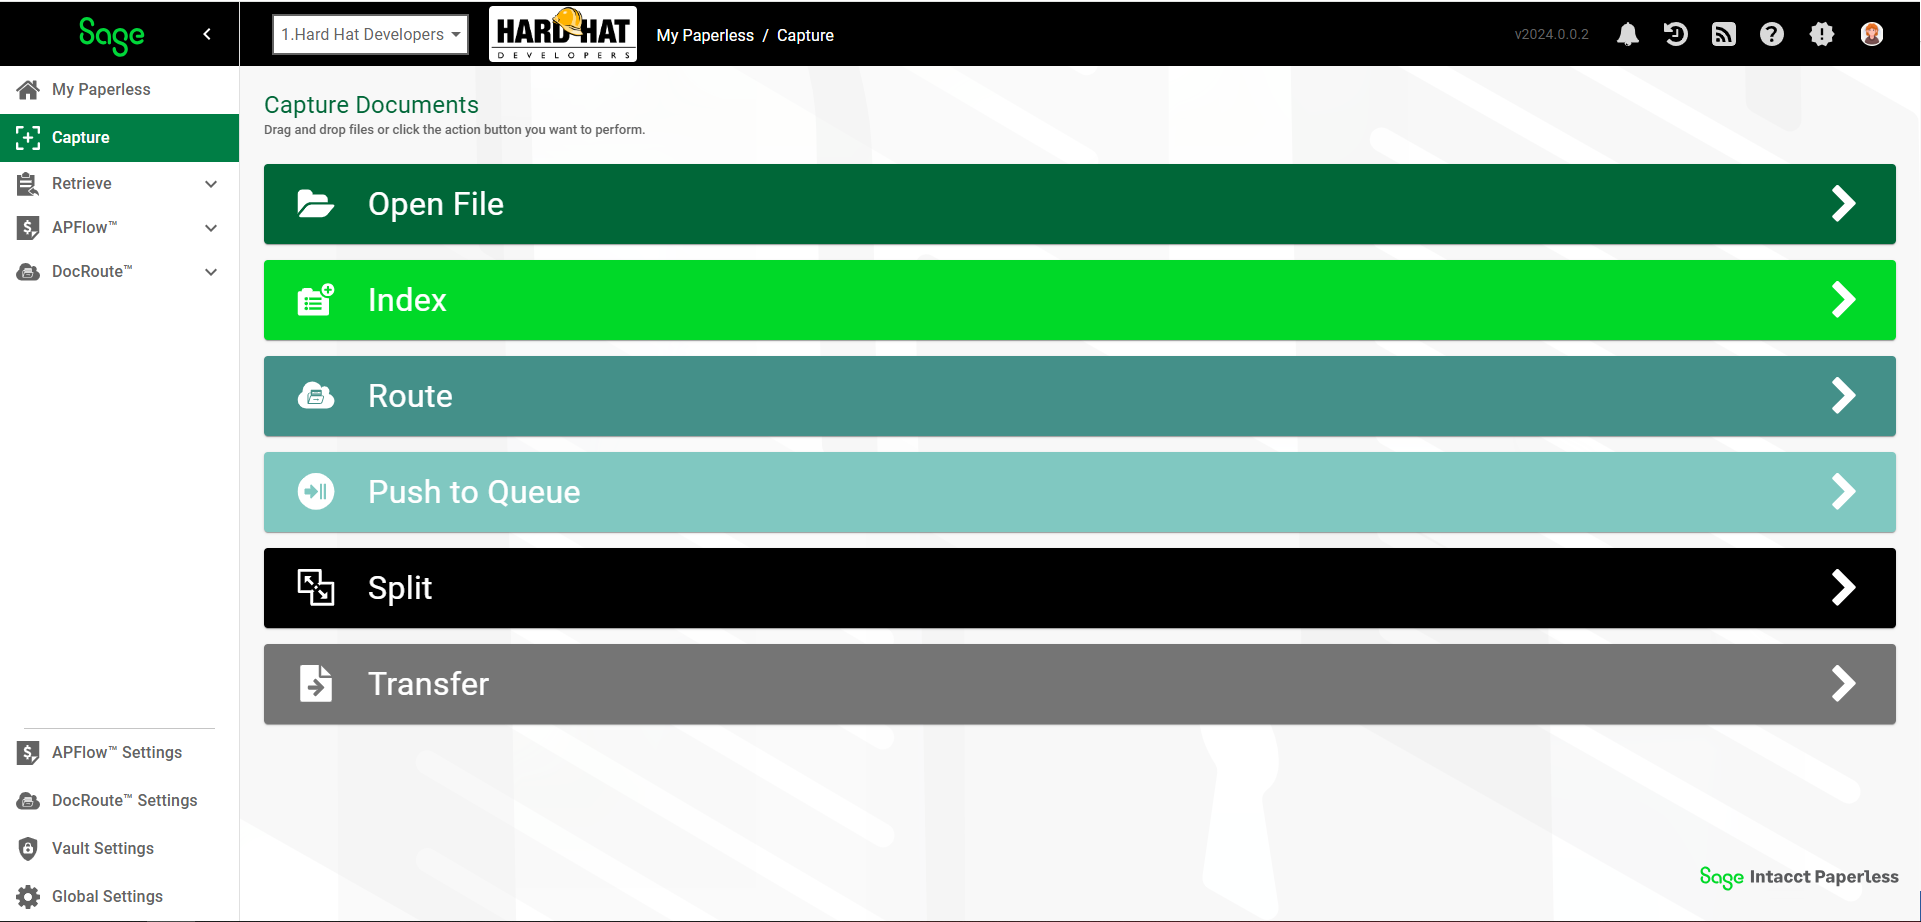
1.From My Paperless, click Capture.
The Capture Documents page with drag and drop options displays. One of these options is Push to Queue.
2.When you bring an external document into Sage Intacct Paperless through the Push to Queue option,  , you move the file directly into a specific user's queue.
The following Push To Queue dialog box displays:
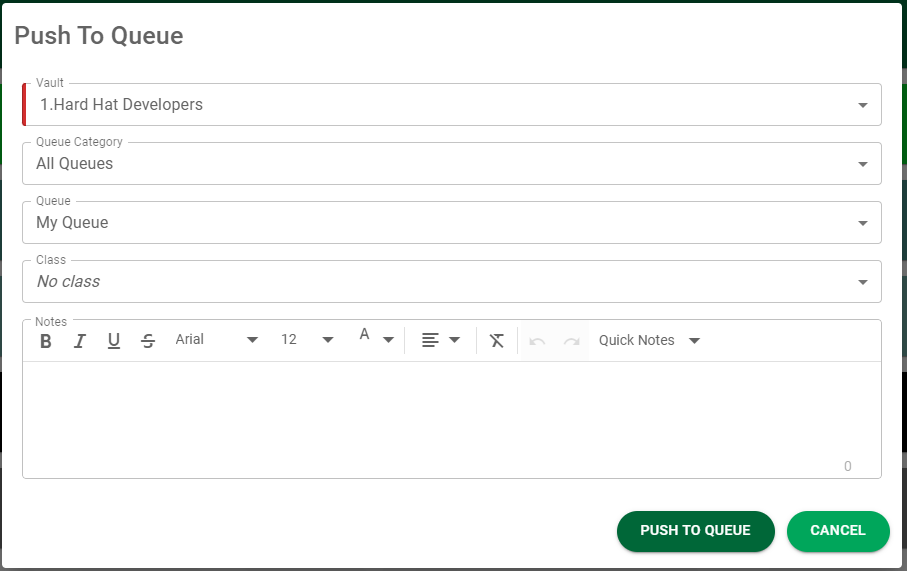
3.In the Vault field, use the dropdown list to select the vault where the document is to reside.
Note: The selector defaults to the current vault.
4.In the Queue Category field, use the dropdown list to select the queue category.
Note: Choosing the queue category allows the number of available queues to be limited.
5.In the Queue field, use the dropdown to select the queue into which the document is to move.
6.In the Class field, use the dropdown to select the class to which the document should be designated.
Note: The class designation may be used for a specific business purpose. In Sage Intacct Paperless, a class designation could be used with a routing rule or a report.
7.In the Notes text box, enter any appropriate notes.
8.Click  to perform the push to the selected queue.