If you have a vendor identified as No Match, you can add that vendor without leaving the Lien Waivers tab.
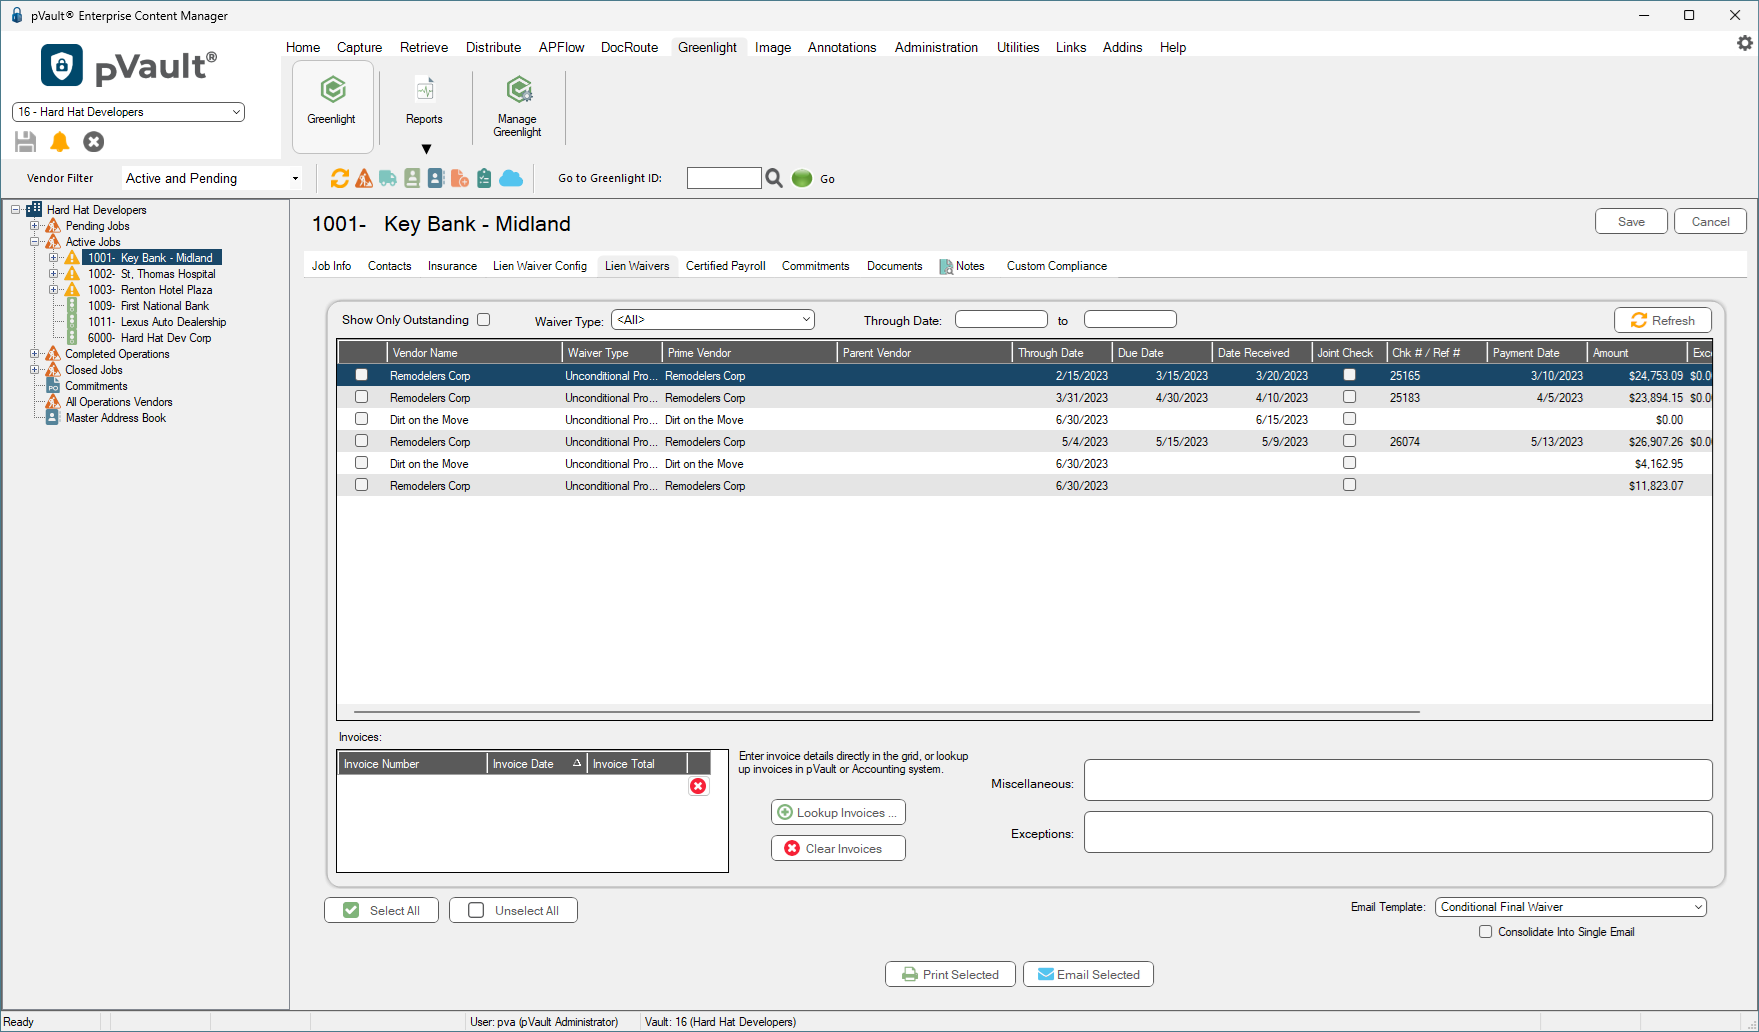
1.Within Greenlight, in the left navigation bar, click a job listed under Active Jobs.
2.Click the Lien Waivers tab.
A screen similar to the following displays:
3.Click the Add Waivers button.
The Generate Waivers dialog displays:
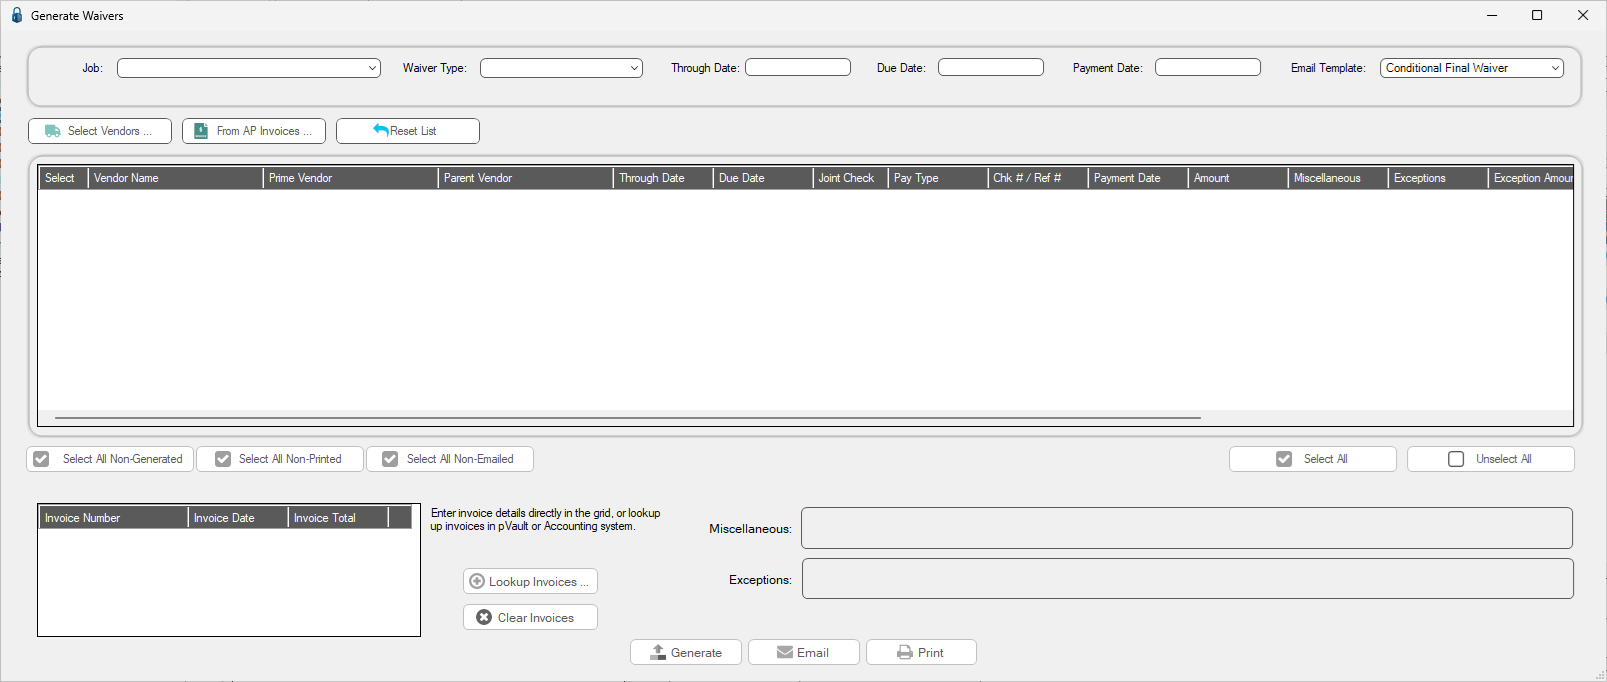
4.In the Job field, use the dropdown to look up the appropriate job.
5.In the Waiver Type field, use the dropdown to look up the available waiver types.
6.In the Through Date field, keep the system populated date or modify the date as necessary.
7.Leave the Due Date field blank.
8.In the Payment Date field, enter the appropriate date.
9.In the Email Template field, use the dropdown to look up the template matching the selected waiver type.
10. Click the From AP Invoices button.
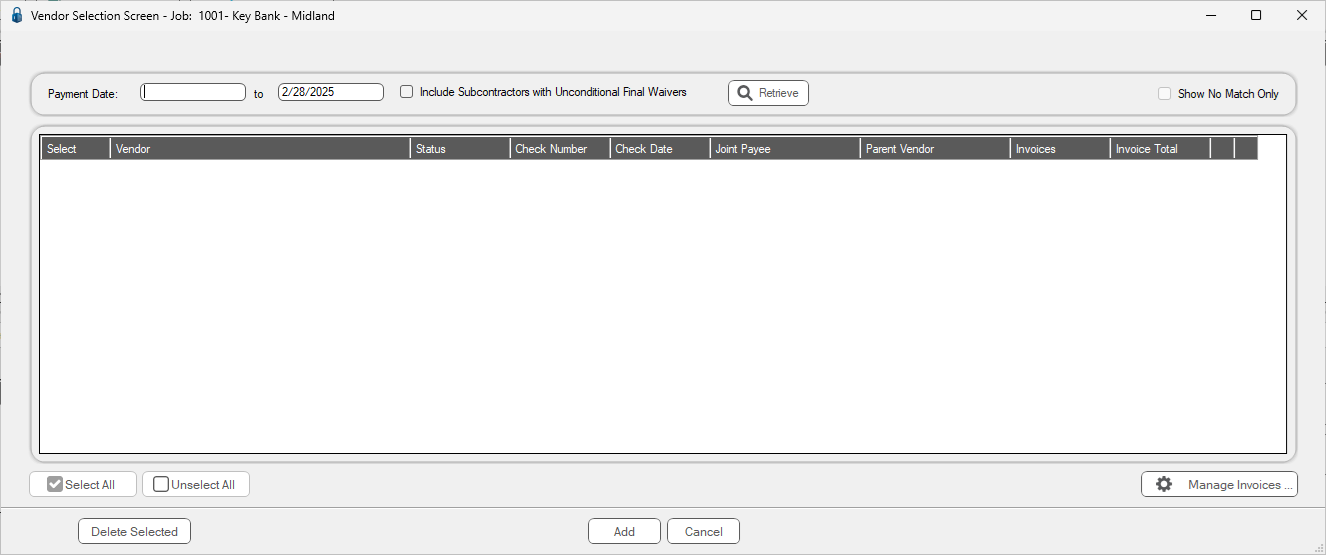
11. Enter a date in the Payment Date field.
12. Click Retrieve.
A Vendor Selection Screen for the selected job similar to the following displays:
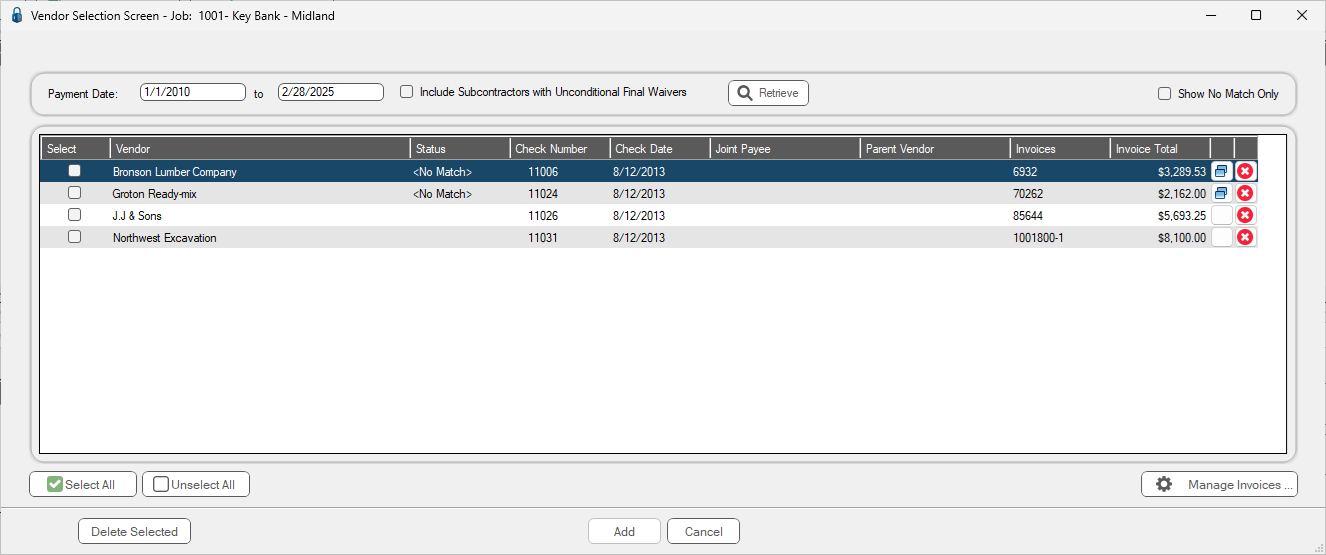
13. Scroll through the list to identify vendors with No Match in the Status column.
14. Click to select a No Match vendor.
15. Click the Add Vendor icon.
The following dialog displays:
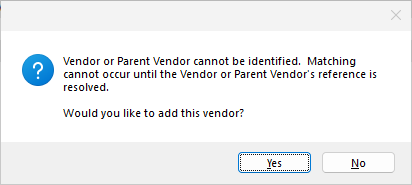
16. Click Yes.
The Create New Vendor screen displays:
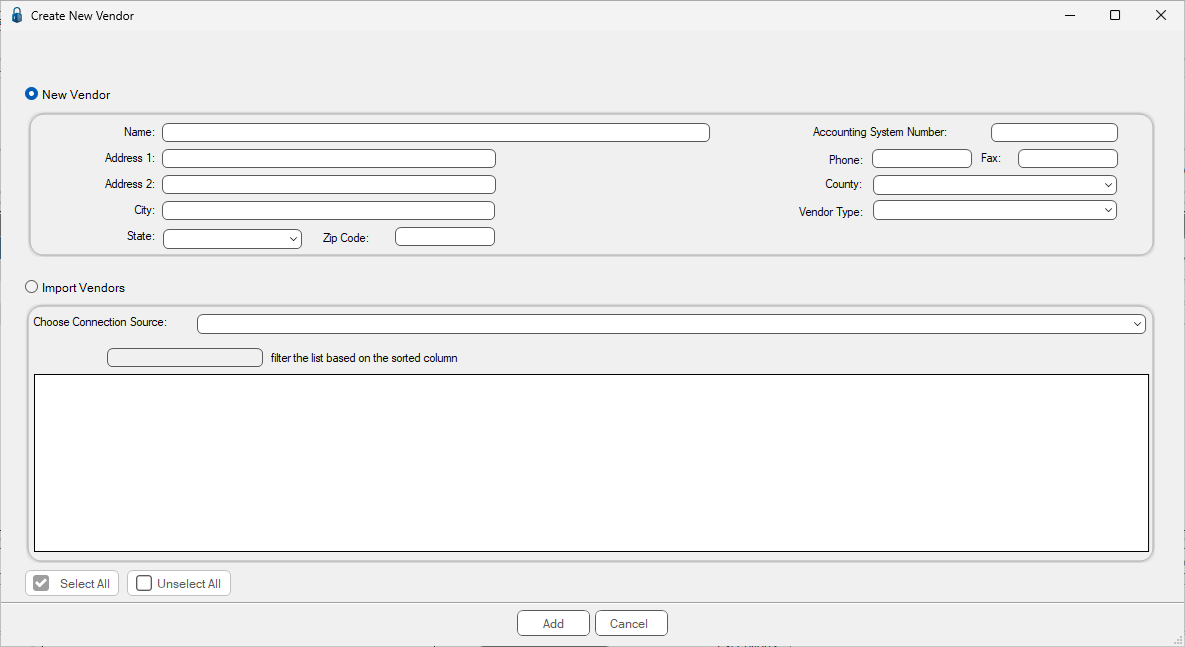
17. Complete the screen.
Note: For details on completing the screen, click here.
18. Click Add.