Jobs can be added manually or can be imported from the accounting system.
1.From the ribbon toolbar, click Greenlight.
2.Click Greenlight.
The main screen displays with the Dashboard tab active:
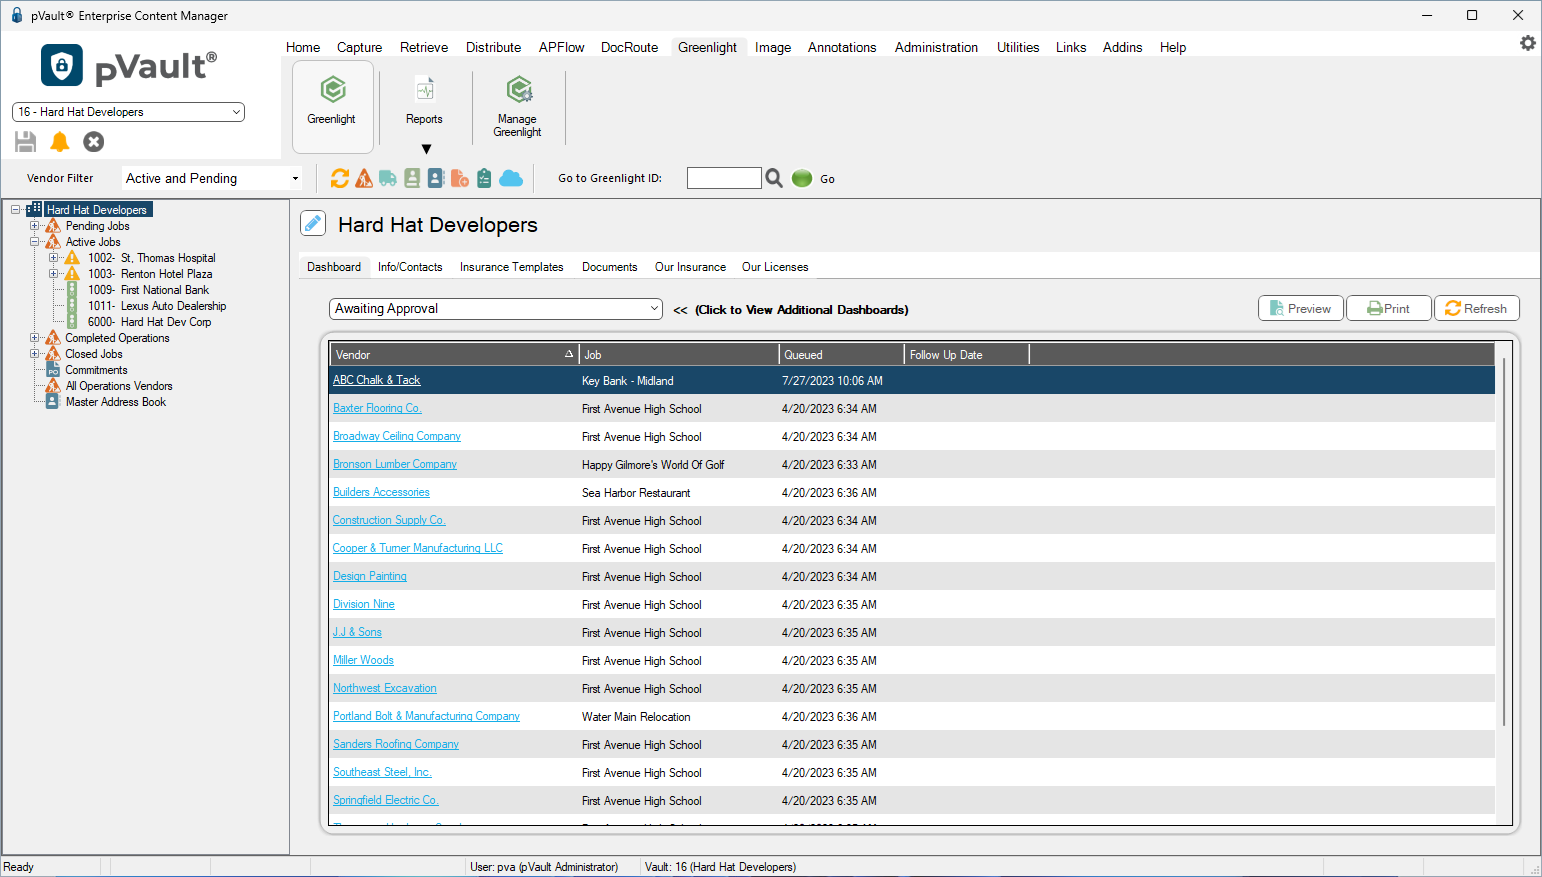
3.In the toolbar, click the Job icon.
The following Job Master dialog displays:
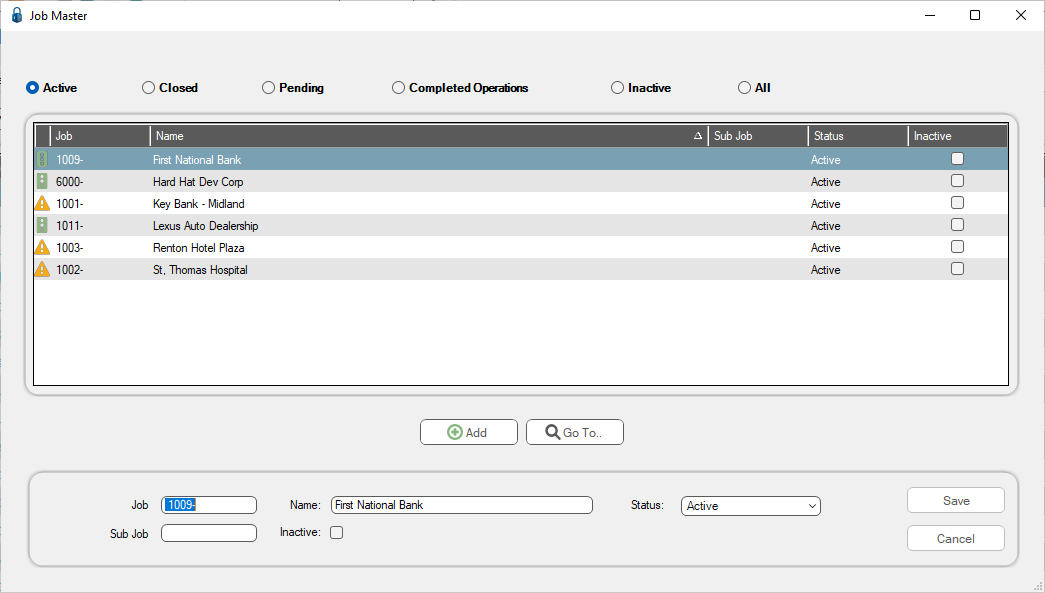
4.Click Add.
A Create New Job to Company dialog displays:
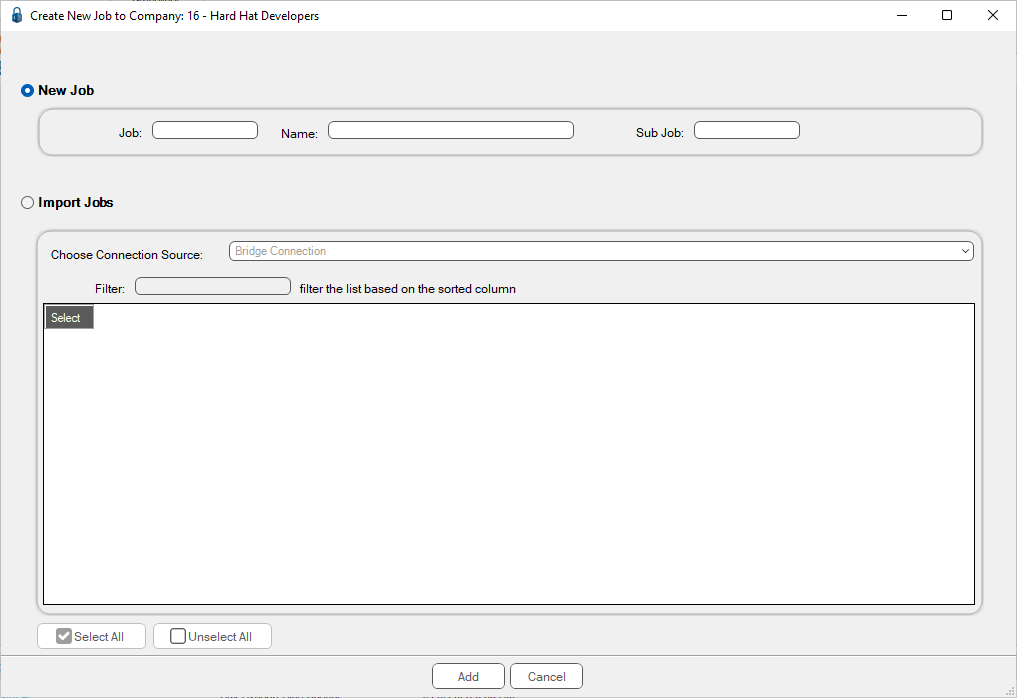
Note: The New Job radio button should be selected by default.
5.In the Job field, enter the job number.
6.In the Name field, enter the job name.
7.In the Sub Job field, enter a sub job name if applicable.
8.Click Add.
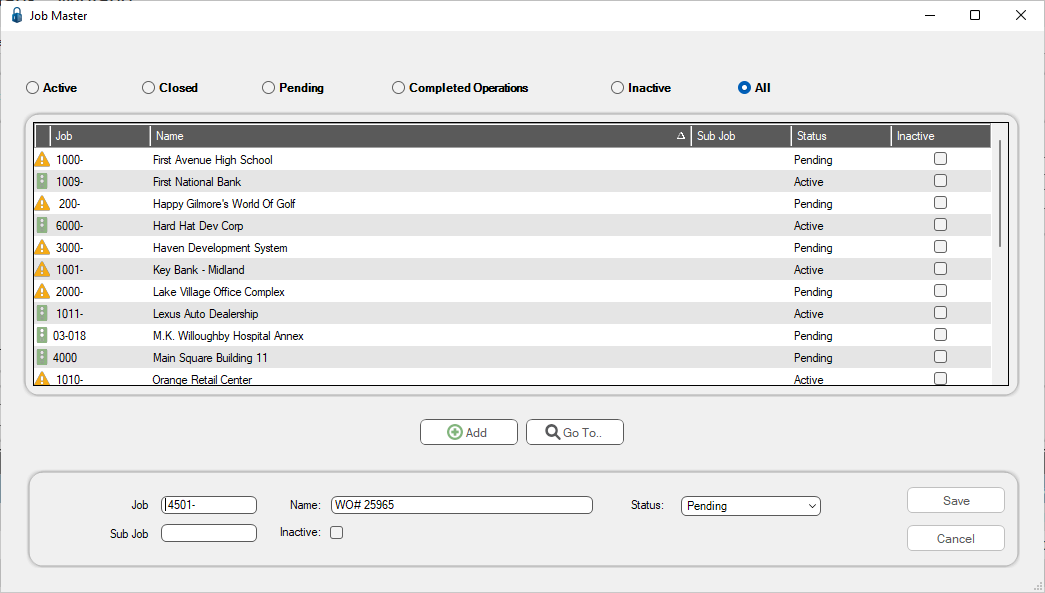
The newly created job displays in the Job Master dialog:
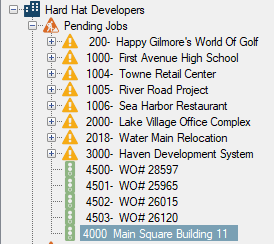
The new job is added to the left navigation bar, under Pending Jobs:
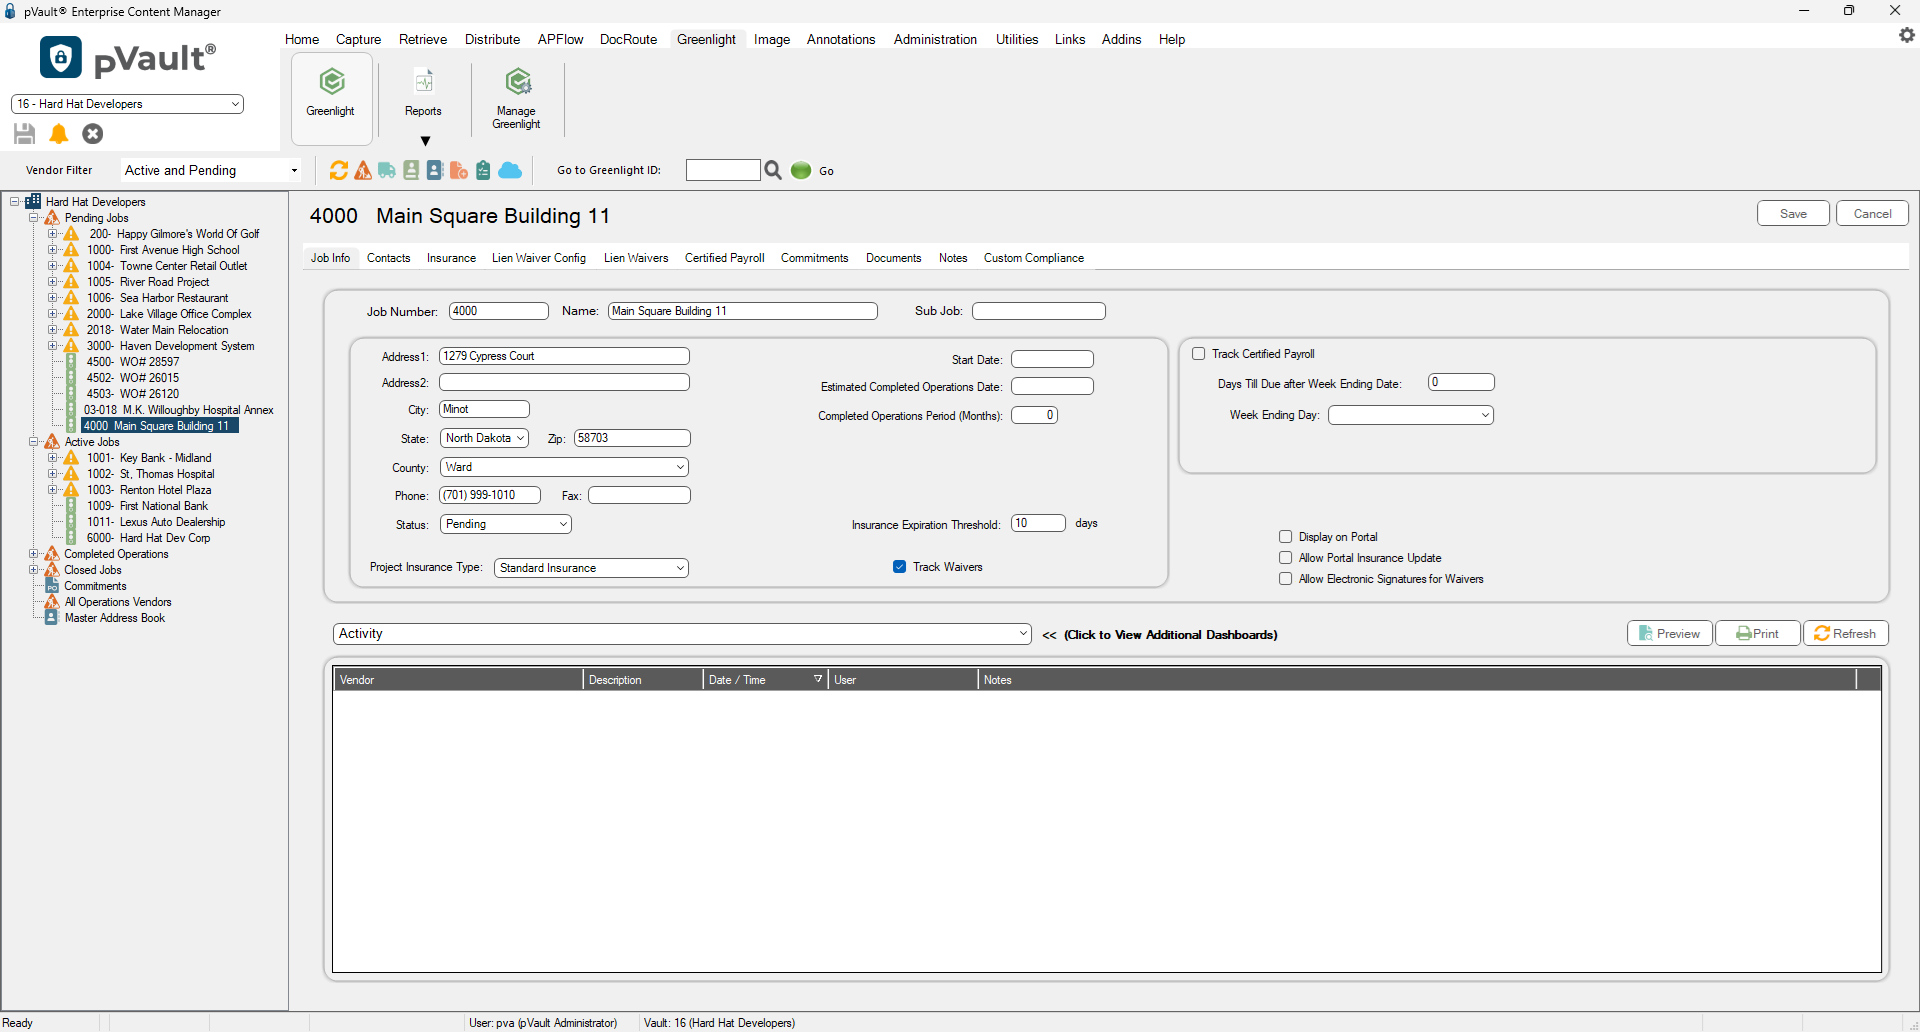
The Pending Job dialog with the Job Info tab active displays similar to the following:
TIP: If you leave the City field blank and populate the Zip field, the following dialog displays with relevant suggestions for the blank fields:
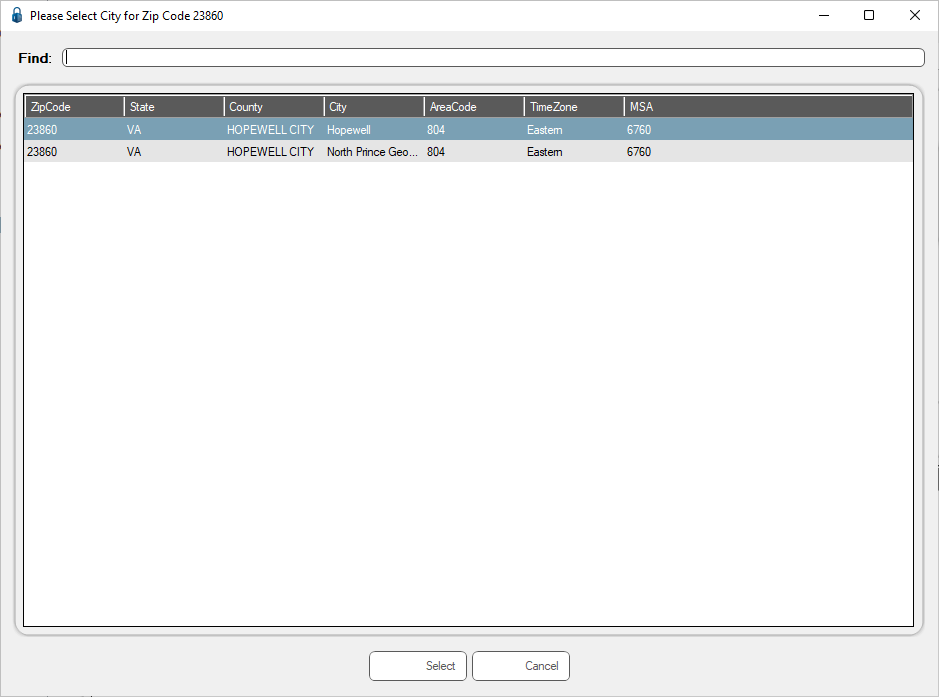
Highlight the appropriate row and click Select. The City and County* fields are systematically populated.
*Note: If the Zip field reflects a Louisiana city, Parish displays as the field label instead of County.
Once a job is added, users can access the Jobs from the left navigation bar or by using the Job Master dialog. Jobs are categorized on the left navigation bar according to job status.
For details on Pending Jobs, click here.