Email templates are used when you are on the vendor record and need to send an email to the vendor regarding insurance compliance issues or to notify the vendor that you received their insurance paperwork. You can attach reports and documents to these previously crafted emails. Much of the information is systematically prefilled to streamline the email creation process.
When a vendor's insurance is about to expire, Greenlight CM™ can automatically send an email warning the vendor that their insurance is about to expire.
The Administrator can choose which email template to use and determine how many days before expiration the system sends out the email.
Contact Roles determine which contacts are included in these emails. Click here for details.
1.From the ribbon toolbar, click Greenlight.
2.Click Manage Greenlight.
The main screen displays with the Users tab active:
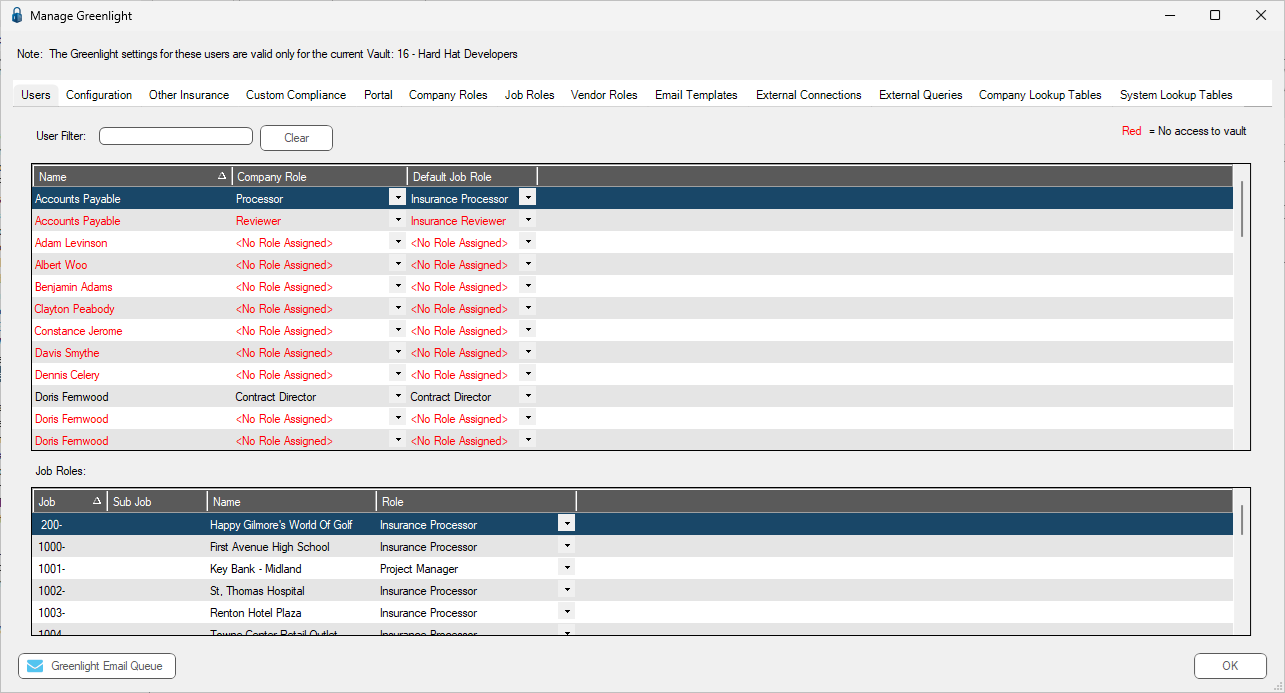
3.Click the Email Templates tab.
The following screen displays:
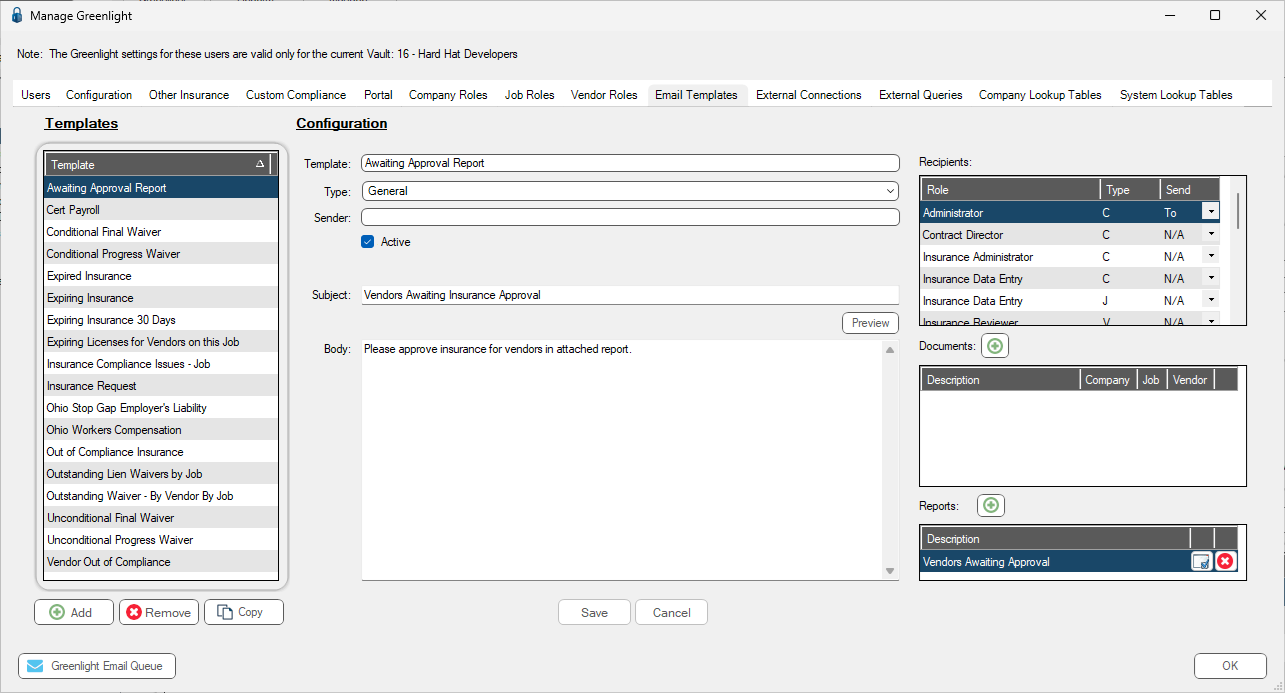
Creating Email Templates
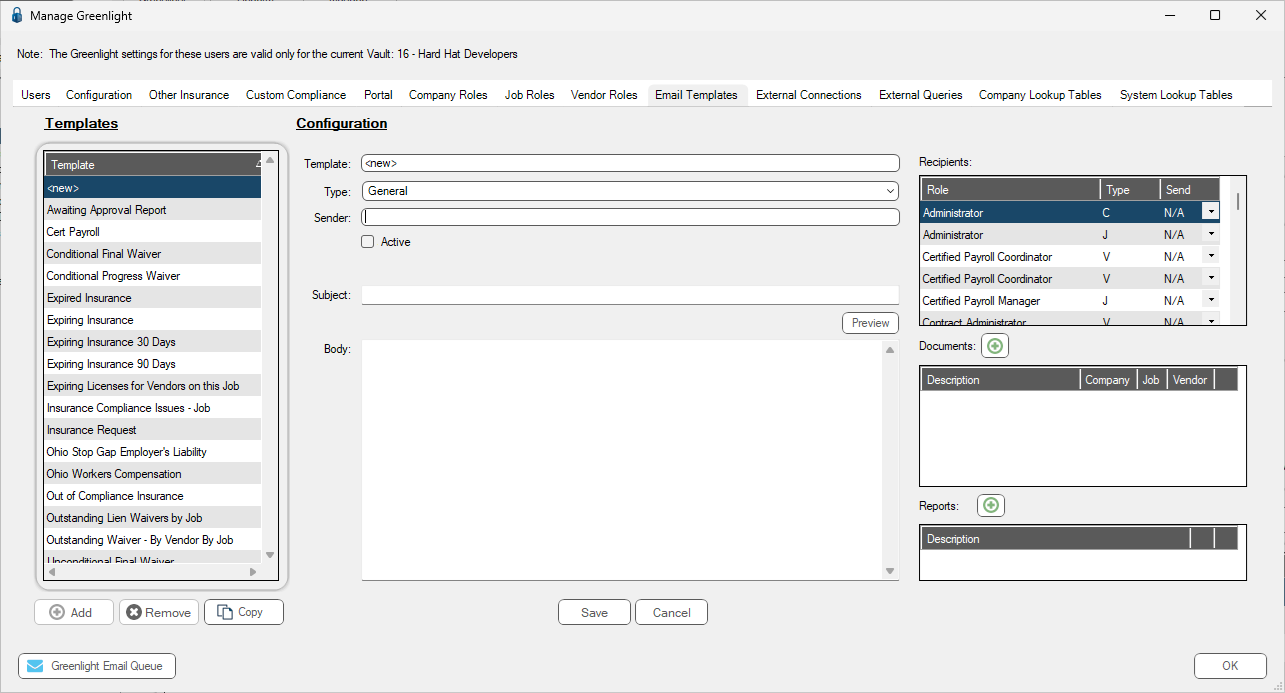
1.From the Email Templates tab screen, click Add.
A new template configuration displays:
2.In the Template field, enter a new name. For example: Outstanding Lien Waivers by Job
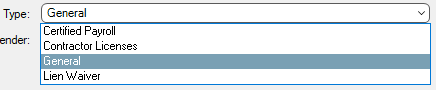
3.In the Type field, use the dropdown to select a type. General is the default.
4.This determines what email address to use. Leave the Sender field blank. It defaults to your system configuration email that was set up during implementation.
Note: If you want to use a specific email address to send out the email, you can update the email address here.
5.Click the Active check box to activate this email template.
6.If the Automatically Add Prime Vendor Contacts check box is selected on an email template and that email template is used to generate an email for a tier vendor, the prime vendor's contacts with the same roles used to pull the tier's contacts are added to the To, CC or BCC lines as appropriate.
If the Automatically Add Prime Vendor Contacts check box is not selected on an email template and that email template is used to generate an email for a tier vendor, only the tier vendor's contacts are added to the To, CC or BCC lines as appropriate.
7.In the Recipients grid, select the Role and in the associated Send column entry, use the field dropdown to select To.
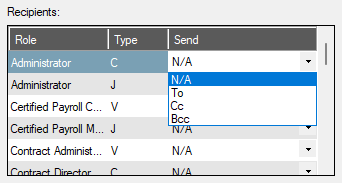
Contacts on the Vendor record with the assigned Contact Role are assigned to the email template when the automated services runs or a user manually uses the email template.
Type
C = Assigned at the Company level
J = Assigned at the Job level
V = Assigned at the Vendor level
Note: If you are sending out a lien waiver, select both the Lien Waiver Contact and the Compliance Contact if available.
8.In the Subject field, enter the appropriate information.
9.In the Body text field, type the email.
10. Right click in the Body text field to display a dropdown list of tags, similar to the following:
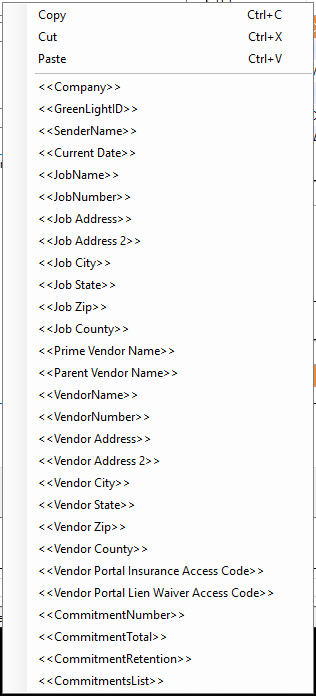
When you click on a tag or a series of tags, those tags act as placeholders until the email template is used to send an actual email. At that time, the placeholder(s) are replaced with actual data.
For example, if you need to send periodic emails to vendors on a specific project about compliance issues, you can click <<JobName>>, <<Job Address>>, <<Job City>>, <<Job State>>. This way you do not have to repeatedly type the job information into multiple emails.
Note: <<VendorName>> refers to a secondary tier vendor of an identified <<Prime Vendor Name>> or <<Parent Vendor Name>>.
Important: The tags that are listed in the email template are generic. The data that is populated is based on the job through which you are sending out the email.
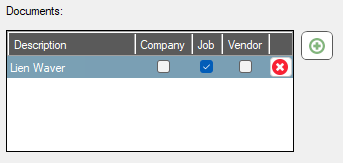
11. If you have a document to attach to the email, click the associated Add icon.
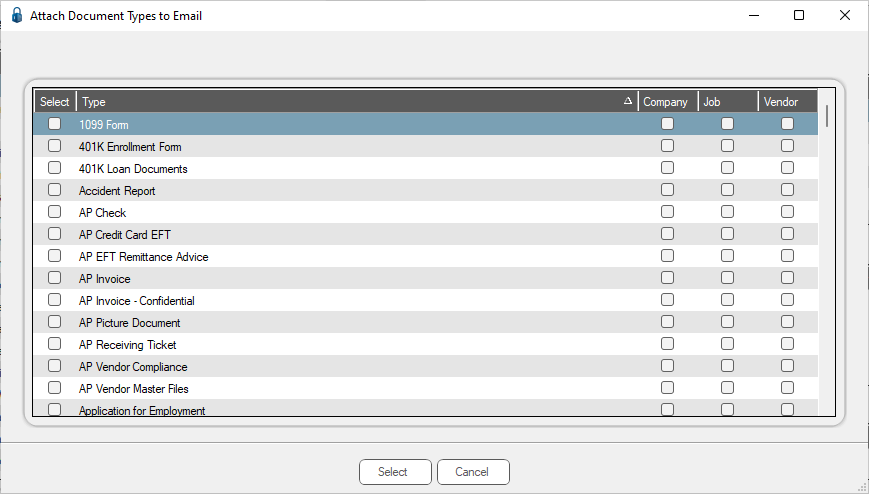
12. Locate the document you want to attach to the email.
13. Click Select.
Based on your selections, the Documents grid resembles the following:
14. If you have a report to attach to the email, click the associated Add icon.
The Attach Reports to Email dialog displays:
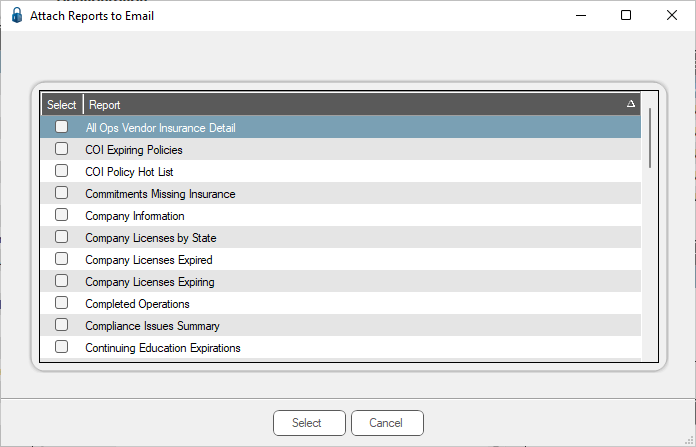
15. Click any reports that should be attached.
Note: Compliance reports can be added to the email to detail which liens have not been received and are past due.
16. Click Select.
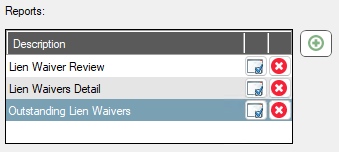
Based on your selections, the Reports grid resembles the following:
17. Click Preview.
Click it to view what the message may look like if you add HTML type formatting.
18.Click Save.
The email template you just created is listed in the Templates grid.
Be sure to configure the parameters for the report(s) so only past due compliance issues for a specific subcontractor are included for a specific job.
If you do not adjust the report parameters, the report includes every subcontractor with a past due compliance issue.
19. To adjust the parameters, click on the Greenlight Report Launch icon that displays to the right of the report in the Reports grid.
The Greenlight Report Launch dialog displays:
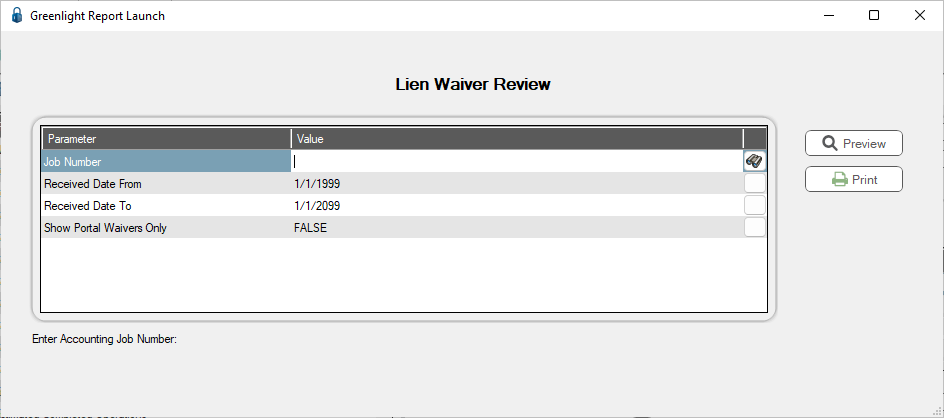
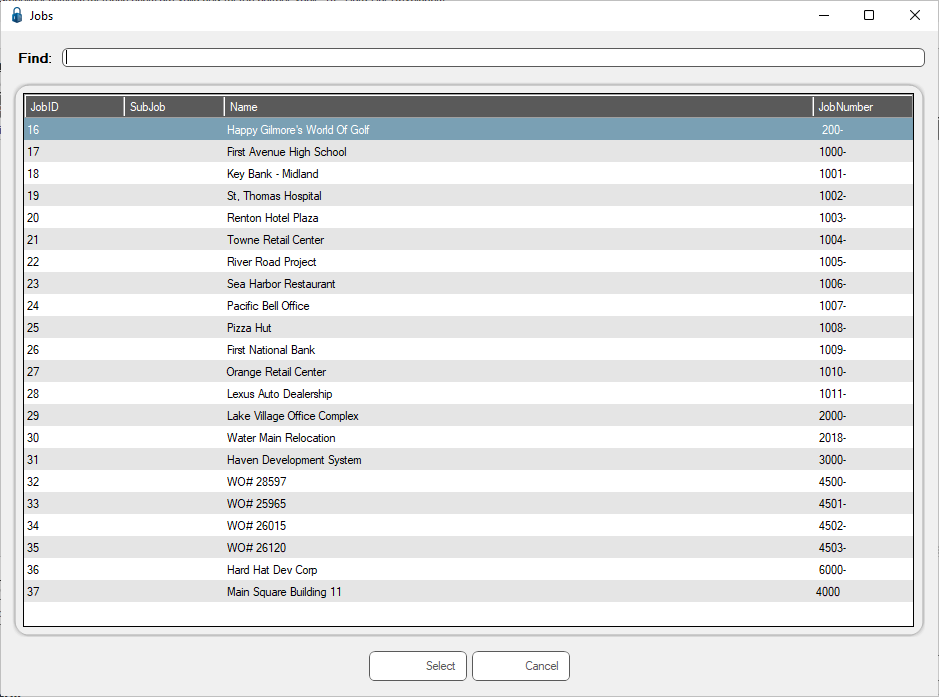
20. For appropriate values, depending on the parameter row you have selected, click the associated search icon.
The following dialog displays:
21. Click the Report Default Values icon.
The Report Default Values dialog displays:
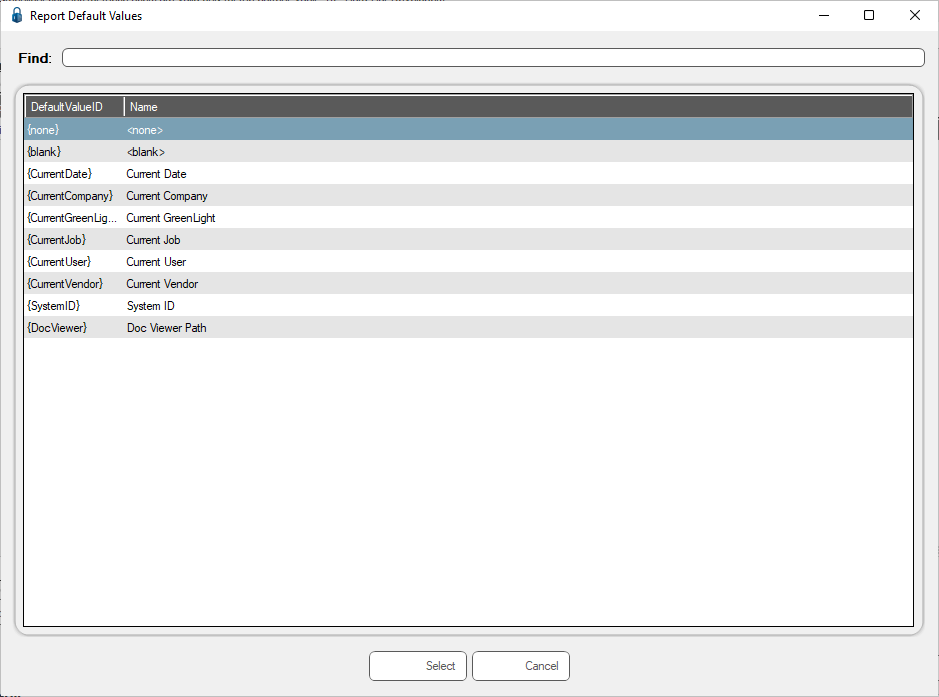
22. Make your changes.
23. Click Select.
24. Click OK to close the Manage Greenlight screen.
Greenlight Email Queue
Click Greenlight Email Queue to access the View Email Queue dialog.
Any previously sent messages display.
Click the envelope icon to view the messages.