Email templates use contact roles to determine which contact to include in the email. When you add a contact to Greenlight CM™, you must assign a contact role.
Contact roles can be assigned to Company contacts, Job contracts and Vendor contacts. Vendor contact roles are important when using the Greenlight email templates. Every contact in Greenlight must have a "role" assigned to them. The email templates are set up to look for roles and any contact assigned with a specific role is automatically added to the email.
Vendor roles are added to contacts associated with the vendors you are tracking in Greenlight.
1.From the ribbon toolbar, click Greenlight.
2.Click Manage Greenlight.
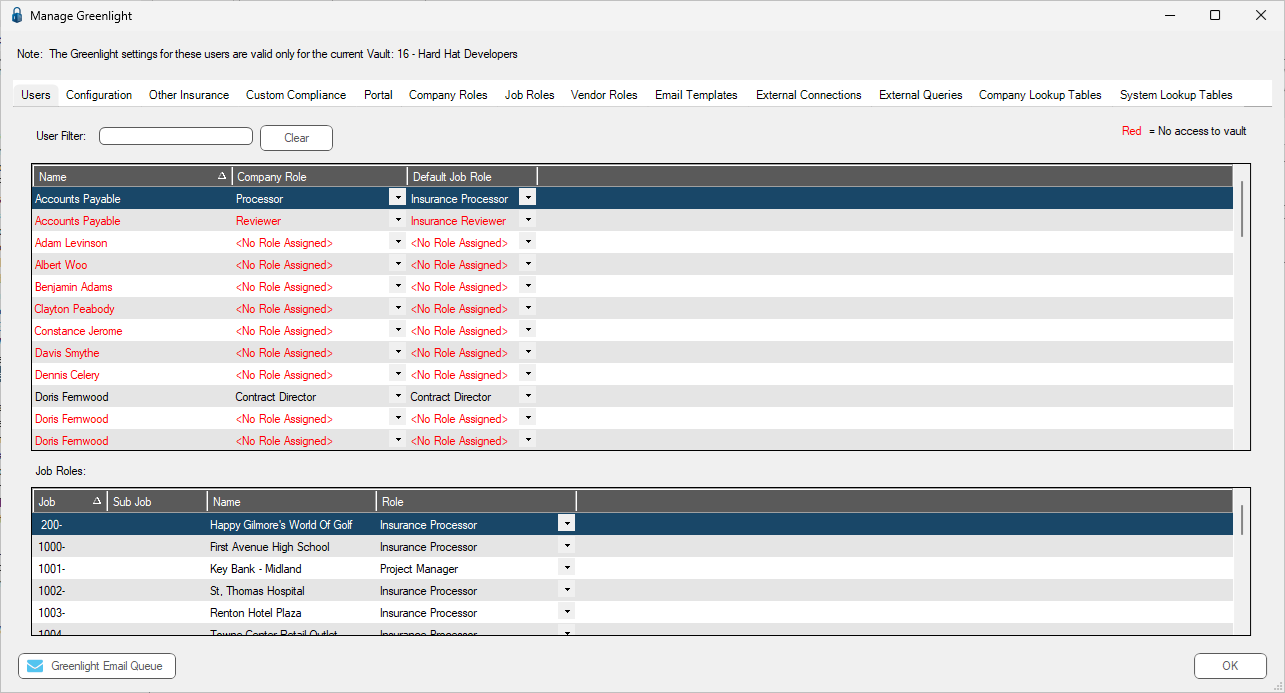
The main screen displays with the Users tab active:
3.Click the Vendor Roles tab.
The following screen displays:
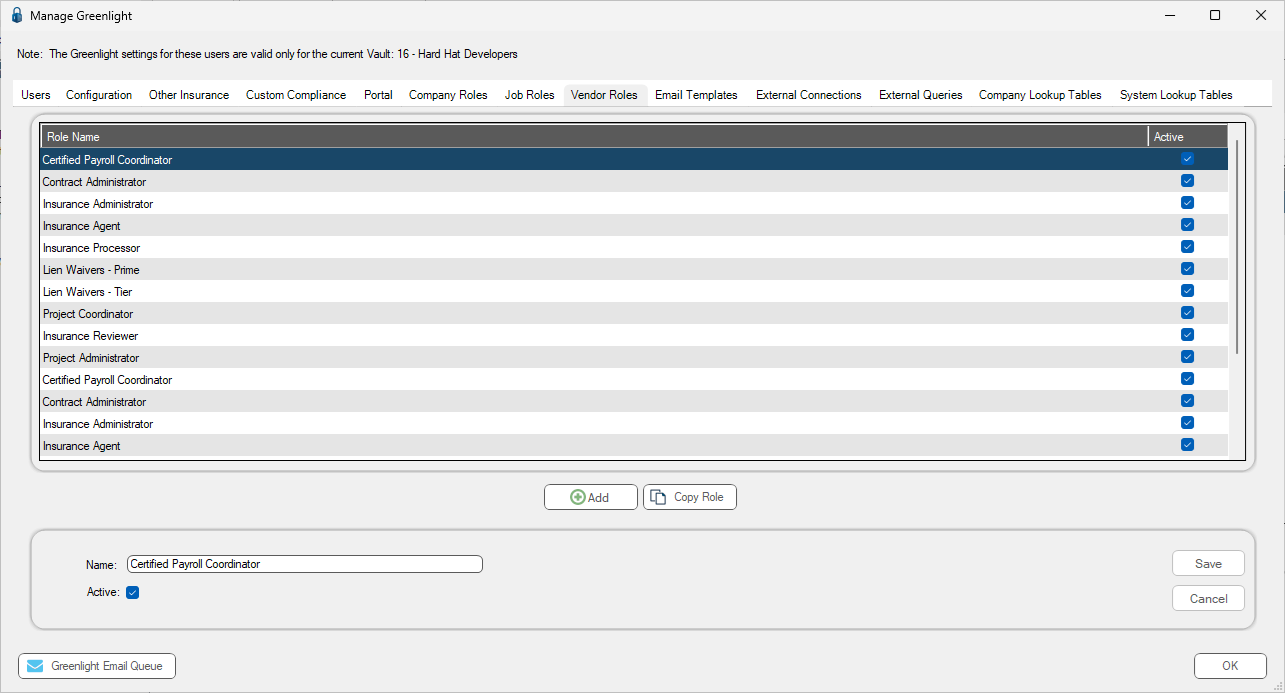
Note: It is recommended that for the vendor lien waiver contact, label the roles: Lien Waiver - Prime and Lien Waiver - Tier. If a vendor or subcontractor has hired any tiers, users want to add the prime subcontractor's contact person on the tier's Contact tab so both the prime and the tier receive compliance emails.
4.Type a new vendor role in the Name field.
5.Click the Active check box if no checkmark displays.
6.Click Save.
The Name field remains populated.
7.Click Add.
The Name field information is removed so you can add another vendor role.
Note: If you click OK, the Manage Greenlight screen closes and the most recent Greenlight screen is active again.
The completed screen resembles the following:

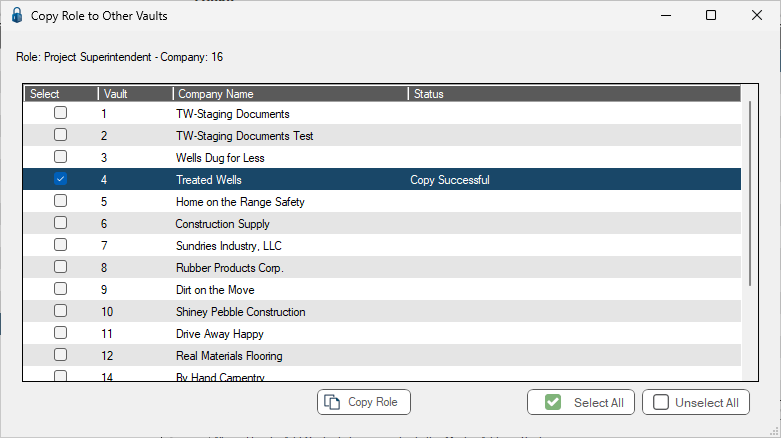
Copy Role
Information on the Manage Greenlight tabs are company and vault specific. Use the Copy Role button to copy role details to other vaults.
1.On the Vendor Roles tab, highlight a role whose details you want to copy to a different vault.
2.Click Copy Role.
The Copy Role to Other Vaults dialog similar to the following displays:
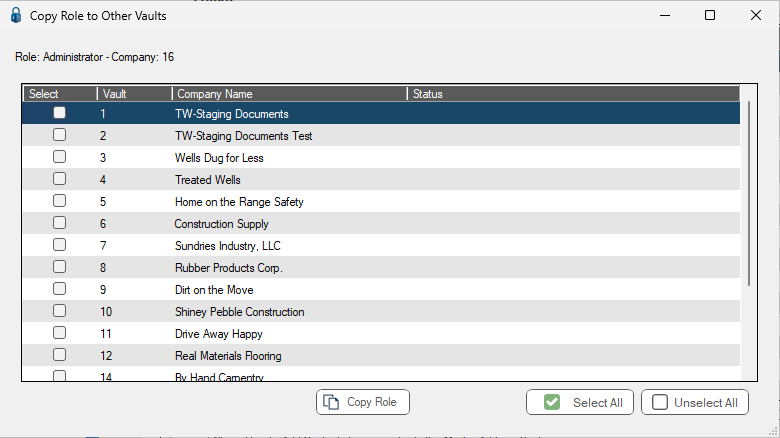
3.If you want to copy the role to all existing vaults, click Select All.
If you want to copy the role to a single existing vault, locate the vault in the list and click the associated check box in the Select column.
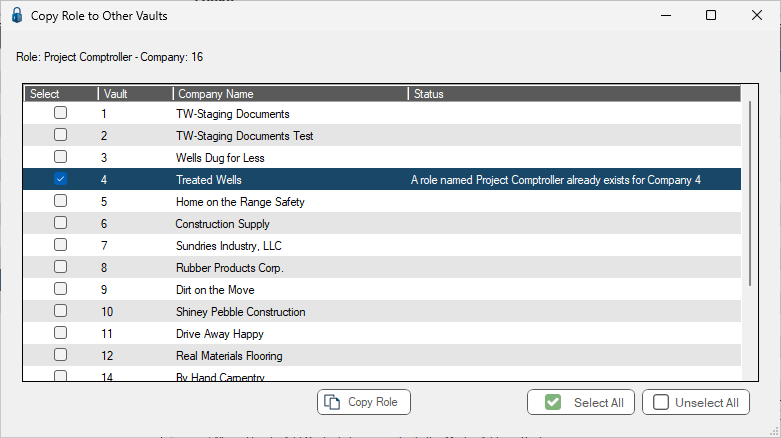
4.Click Copy Role on the dialog.
If the role was successfully copied, the Copy Role to Other Vaults dialog similar to the following displays:
If the role already exists for the target vault, the Copy Role to Other Vaults dialog similar to the following displays: