In pVault
Setup
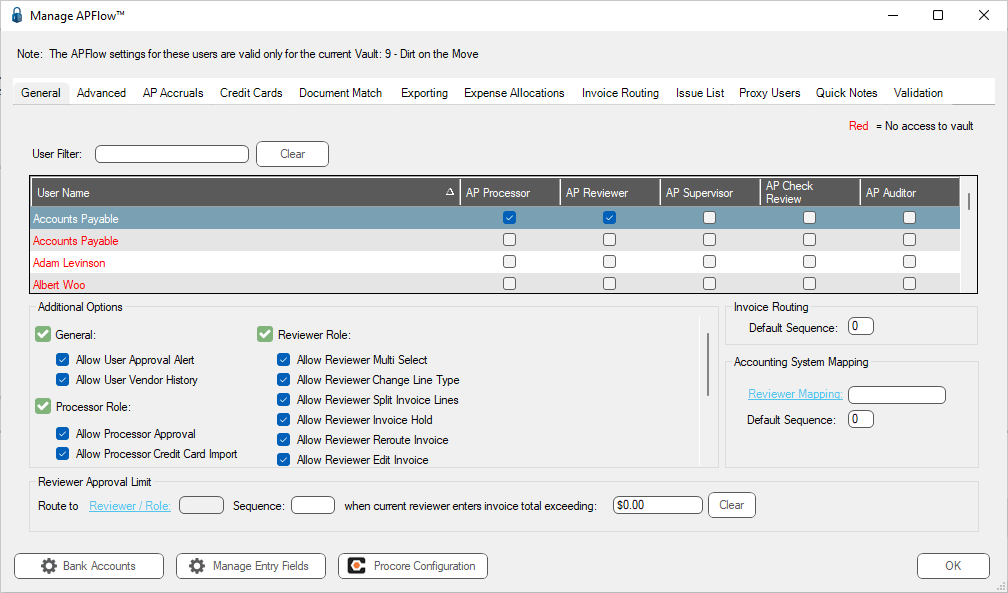
1.From the ribbon toolbar, click APFlow™.
2.Click Manage APFlow.
The following dialog similar to the following displays with the General tab active:
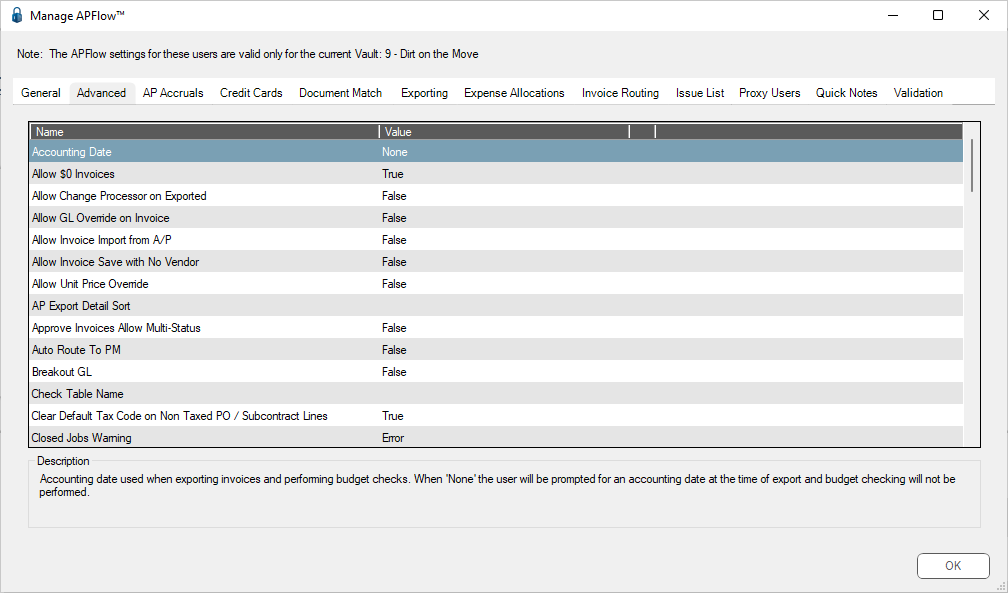
3.Click the Advanced tab.
The dialog similar to the following displays:
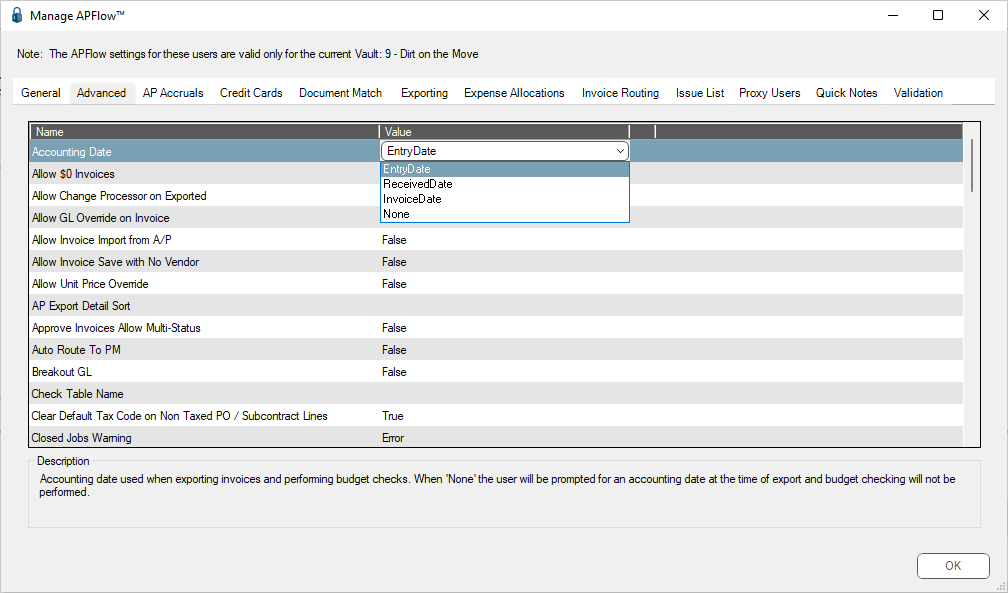
4.In the Accounting Date entry, Value column, select EntryDate from the dropdown.
5.Click OK.
Invoice Entry
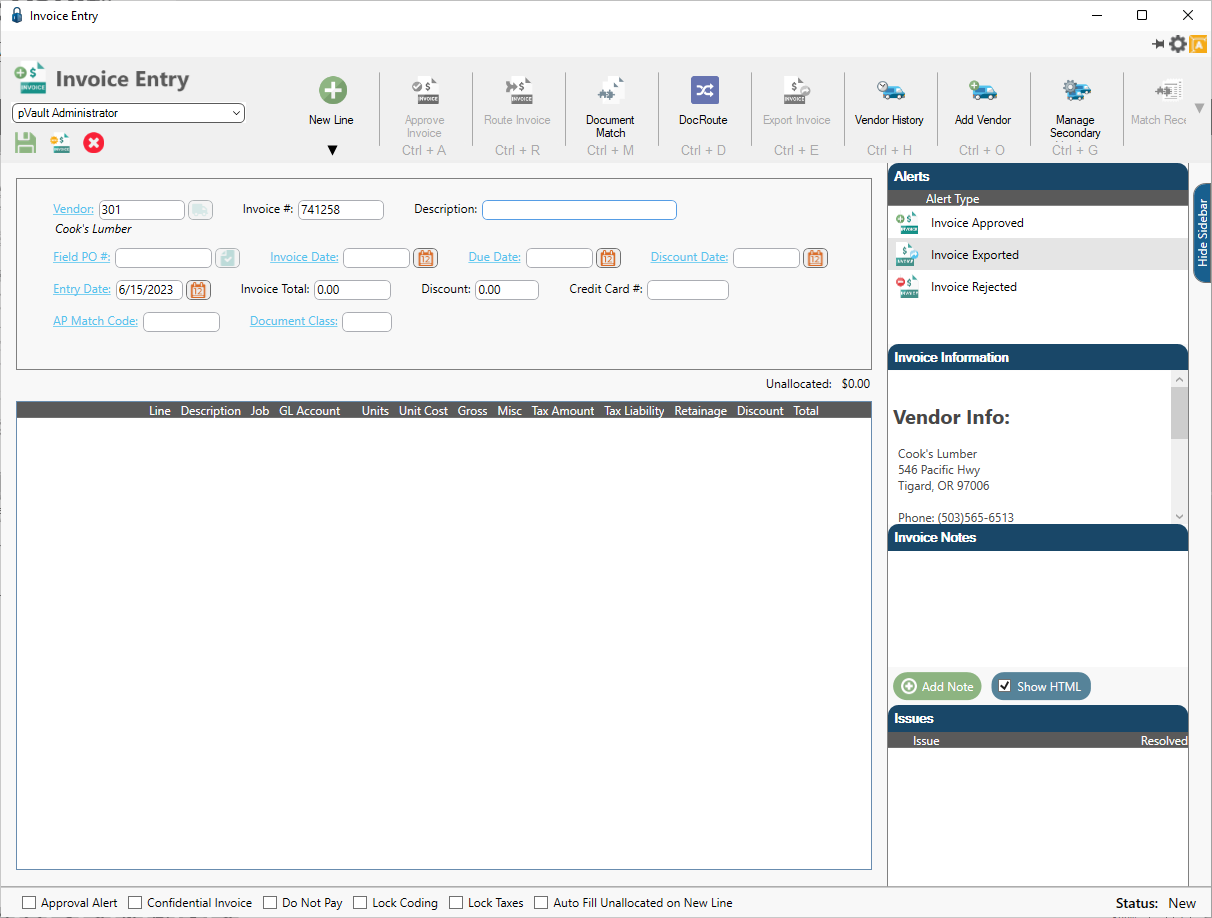
1.From the ribbon toolbar, click APFlow.
2.Click Invoice Entry.
3.From the APFlow sidebar, click New Invoice or Edit Invoice.
The Invoice Entry screen similar to the following displays:
 -2
-2
The Entry Date field displays in the header pane similar to the following:
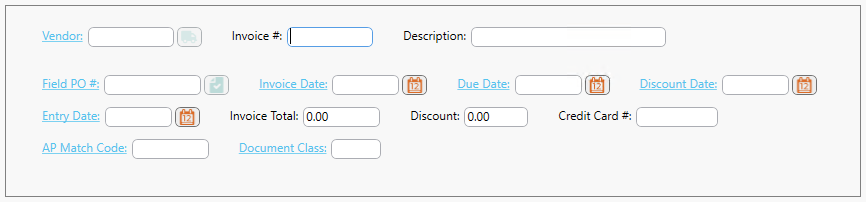
The current date displays in the Entry Date field in the header pane.
In Sage 300
The Entry Date field only displays in pVault if the Date received usage is set to Required or Not required.
If it is set to Not used, the Entry Date field does not display in pVault.
1.In the Accounts Payable module, from the ribbon toolbar, click File.
2.From the File dropdown menu, click Company Settings.
3.Click AP Settings.
The AP Settings dialog similar to the following displays:
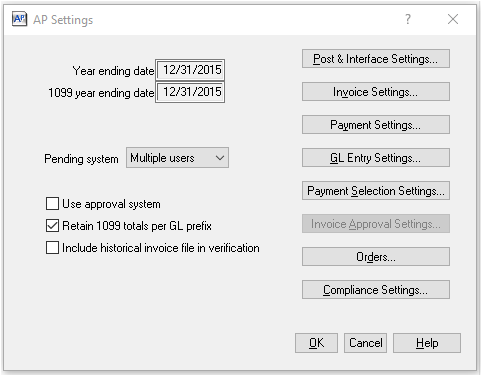
4.Click Invoice Settings.
The AP Settings - Invoice Settings dialog similar to the following displays:
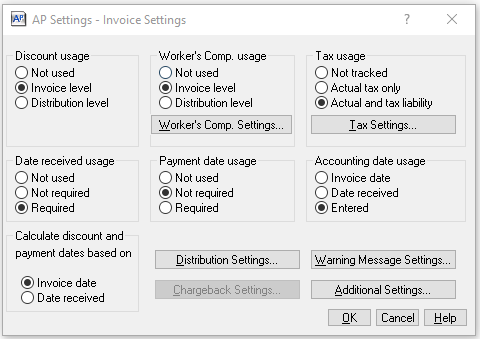
5.Look at the Date received usage box if the Date Received field is not displaying in pVault.
Important: The Date received may also impact the discount and payment date calculations based on the selection made in the Calculate discount and payment dates based on box.