1.From the ribbon toolbar, click Image.
2.Click Transfer Pages.
The Transfer Image screen similar to the following displays:
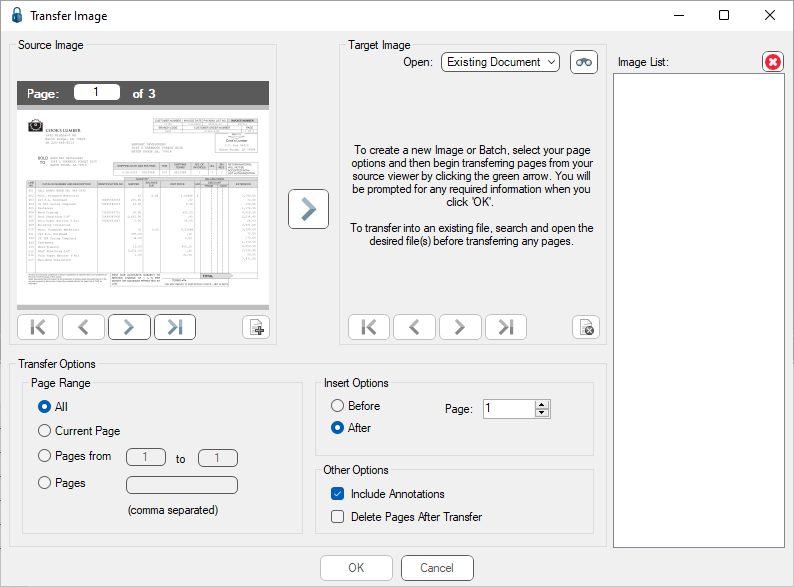
The document to be transferred displays on the left side of the screen in the Source Image pane.
3.In the Target Image Open field, use the dropdown list to identify the type (document, batch, file):
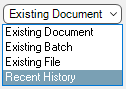
4.Click to highlight Existing Batch.
5.Click the binoculars icon.
An Open Batch dialog similar to the following displays:
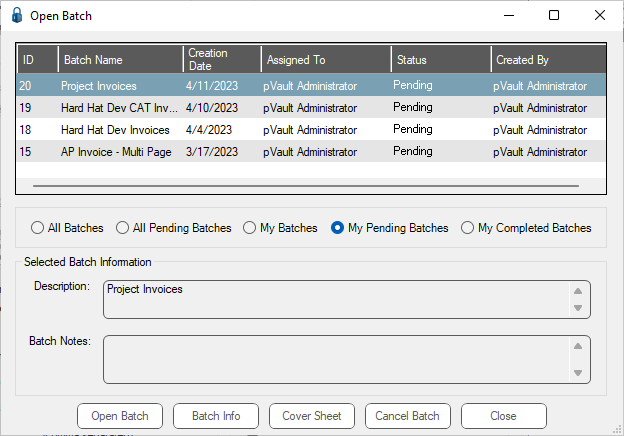
6.Click the appropriate radio button so the appropriate batches display.

7.In the grid, click to highlight the batch.
8.Click Open Batch.
The Transfer Image dialog similar to the following displays with the selected batch visible in the Target Image pane:
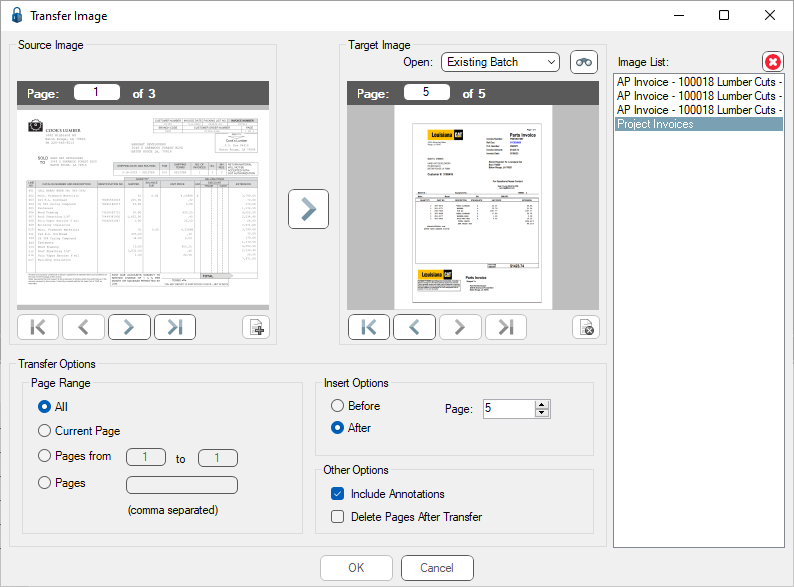
Below the Source Image is the Transfer Options pane. In the Page Range is where you identify which pages to transfer or copy. In the Insert Options is where you determine where those selected pages are inserted into the batch. In the Other Options is where you determine if annotations should remain on the original pages after the transfer and if the pages should be systematically deleted once the transfer is complete.
9.Make your Page Range selection. Choose from All, a range of pages (Page from), various pages (Pages) or just the Current Page.
Note: All is the default.
10. For the Insert Options, determine where the selected page(s) can be inserted.
Note: After is the default.
11. If the existing annotations should remain when the pages are transferred, click the Include Annotations check box.
Note: This check box is selected as the default.
12. If the original document pages should be automatically deleted once the transfer is complete, click the Delete Pages After Transfer check box.
Note: This check box is not selected as the default.
13. Click the green arrow between the Source Image and Target Image areas to perform the transfer.
14. Once the transfer is complete and the Target Image batch is in the desired format, click OK to make the transfer permanent.