Controlling Document Types on the Web
1.From the ribbon toolbar, click Administration.
2.Click Vaults, ![]() .
.
The Vaults window similar to the following displays:
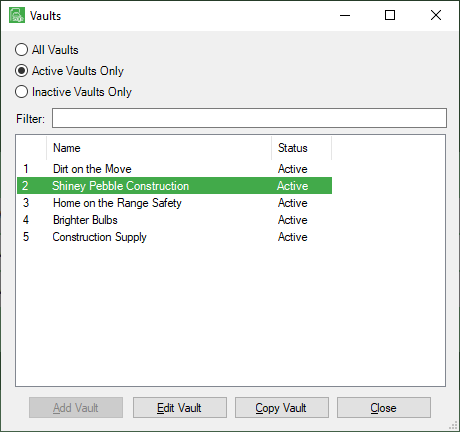
3.Click to highlight the vault, if necessary.
4.Click Edit Vault.
The Vault Properties window similar to the following displays with the General tab active:
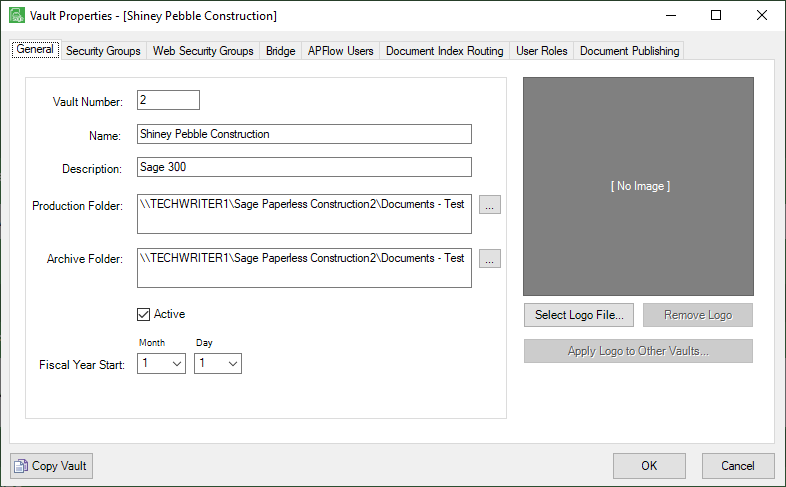
5.Click the Document Publishing tab.
The following window similar to the following displays:
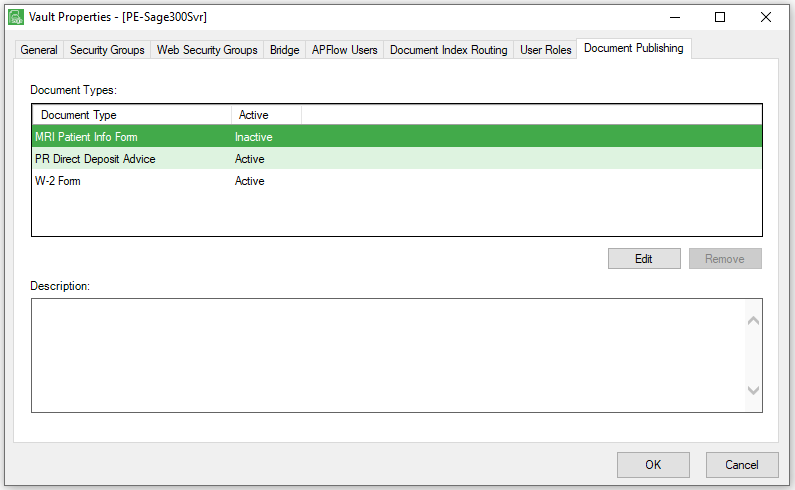
Document types listed in the Document Types text box, will be published to the web.
6.Highlight a row in the Document Types text box.
7.Click Edit to access the Document Index Routing Rule Properties dialog box:
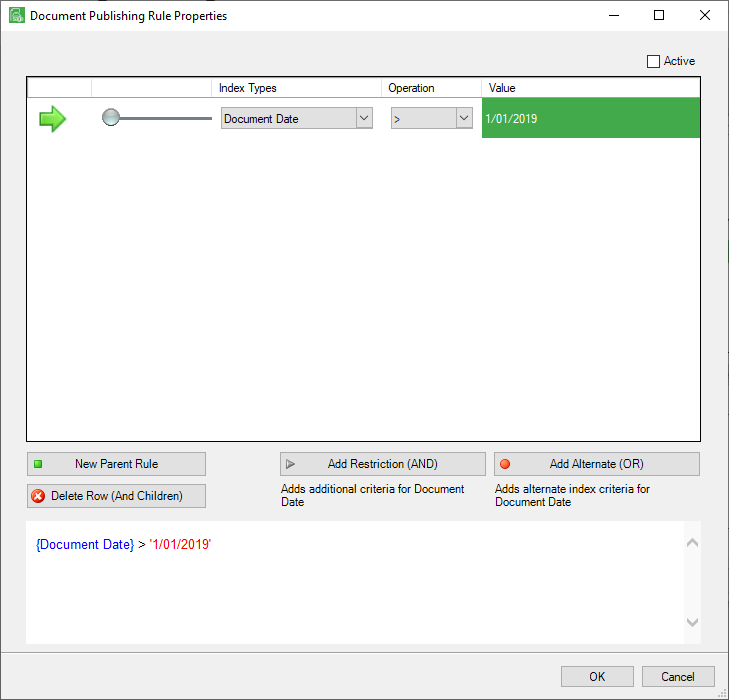
Important: If this dialog box is blank, there are no restrictions to this selected document type published on the web.
Adding Document Types to Document Publishing
1.From the ribbon toolbar, click Administration.
2.Click Vaults, ![]() .
.
The Vaults window displays:

3.Click to highlight the vault, if necessary.
4.Click Edit Vault.
The Vault Properties window similar to the following displays with the General tab active:

5.Click the Web Security Groups tab.
The window similar to the following displays:
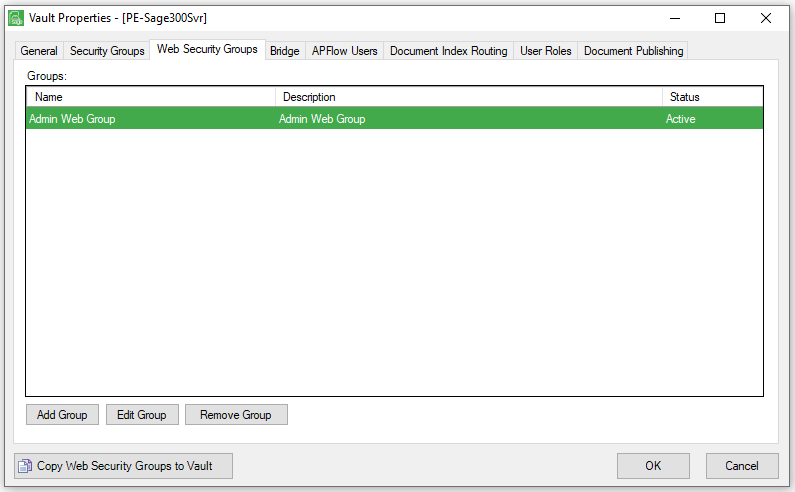
6.Click Add Group or Edit Group, as appropriate.
If clicking Add Group, a series of Create Web Security Group wizard windows displays.
If clicking Edit Group, the Web Security Group Properties window displays with the General tab active.
7.Click the Document Types tab (after clicking Edit Group).
A window similar to the following displays:
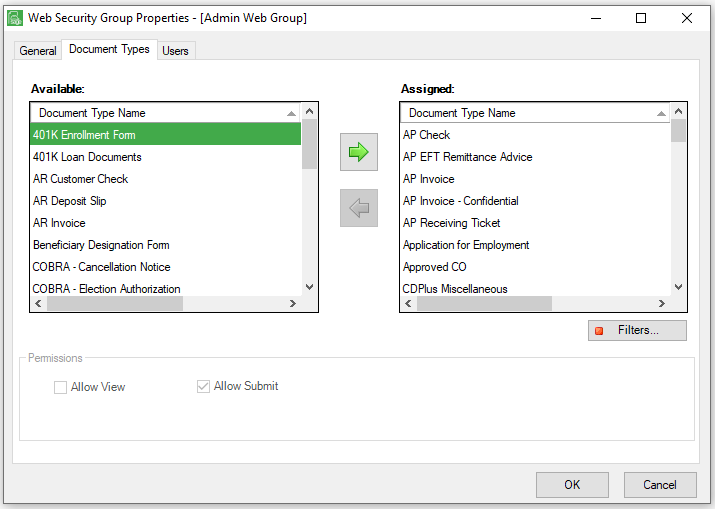
8.Click the Document Type Name in the Assigned pane to highlight it.
Note: If the Document Type Name is listed in the Available pane but not in the Assigned pane, highlight the name in the Available pane and click the arrow to move that Document Type Name to the Assigned pane.
9.In the Permissions pane, click Allow View.
This will add the selected Document Type to those Document Types visible on the web.
10.Click OK.
Controlling What Document Types are Viewed on the Web
1.From the ribbon toolbar, click Administration.
2.Click Vaults, ![]() .
.
The Vaults window similar to the following displays:

3.Click to highlight the vault, if necessary.
4.Click Edit Vault.
The Vault Properties window similar to the following displays with the General tab active:

5.Click the Web Security Groups tab.
The following window displays:

6.Click to highlight the group.
7.Click Edit Group.
The Web Security Group Properties window displays with the General tab active:
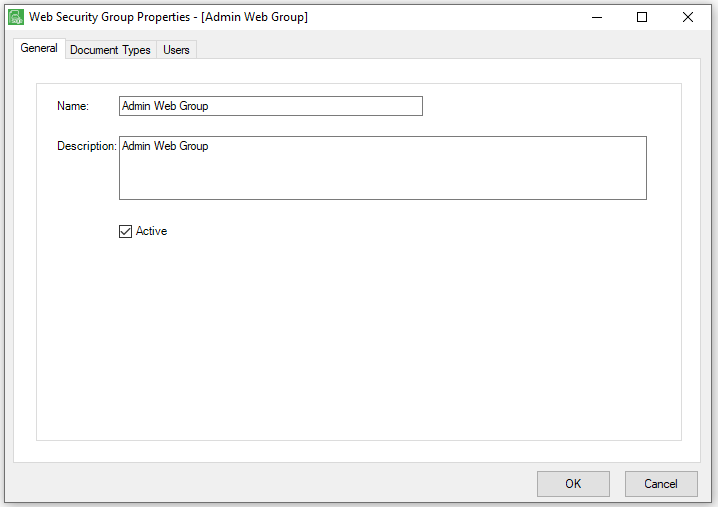
8.Click the Document Types tab.
A window similar to the following displays:

9.Click Filters.
The Index Filters for Group Admin Web Group window similar to the following displays:
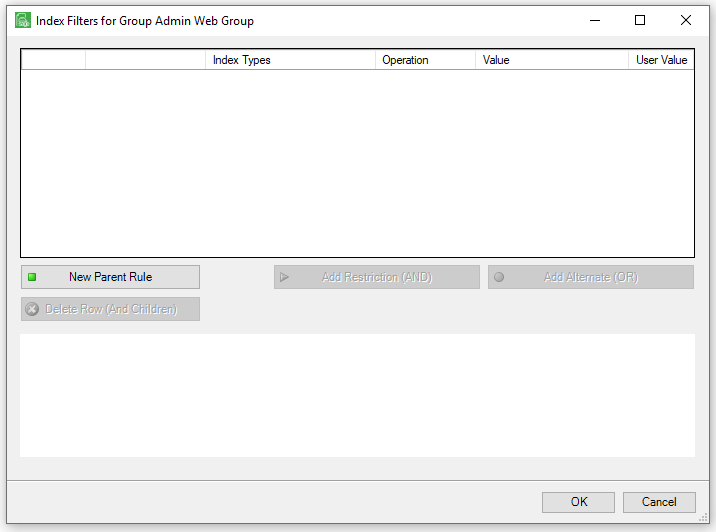
10. Create index level security restrictions to limit specific documents inside a document type to a specific security group.
This will control who sees what on the web.