System Requirements
•Sage Paperless Construction - version 4.2.0.92
•Sage 300 - version 9.7.0 or later
Advanced Bridge Settings
•Purchasing Module Interface
oClick True to use the Sage 300 CRE Purchasing module interface for PO receiving operations.
oAdditional configuration beyond the normal bridge setup is necessary to make an ODBC connection to the Purchasing module.
oTurning this option on enables a button, Additional DSN, to display. It is located on the Bridge tab where the additional ODBC connection is configured.
•Use PO Receiving
oClick True to use the receiving functionality in the accounting software for purchase orders.
oThis enables the functionality from the PO Quick List screen and displays a new, read-only field on the invoice Entry screen.
Vault Setup in Sage Paperless Construction
Prerequisites: System Requirements met.
Advanced Bridge Settings set.
1.From the ribbon toolbar, click Administration.
2.Click Vaults,  .
.
The Vaults window similar to the following displays:
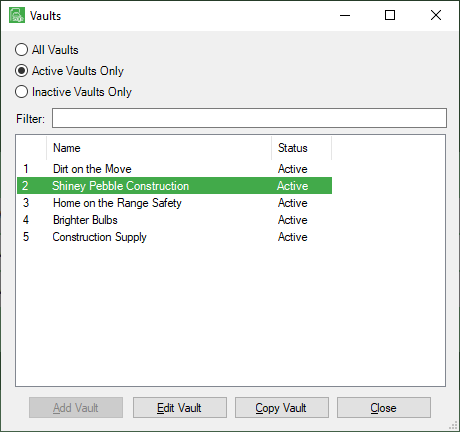
3.Click to select the vault from the list, if applicable.
4.Click Edit Vault.
The Vault Properties window similar to the following displays with the General tab active:
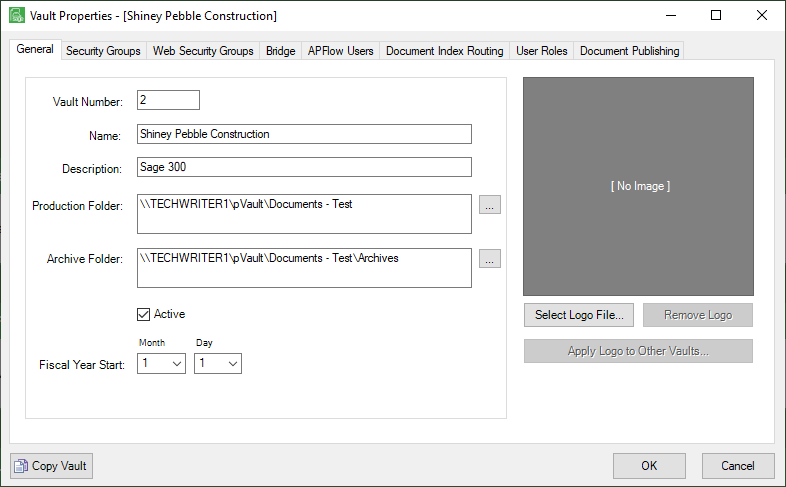
5.Click the Bridge tab.
The window similar to the following displays:
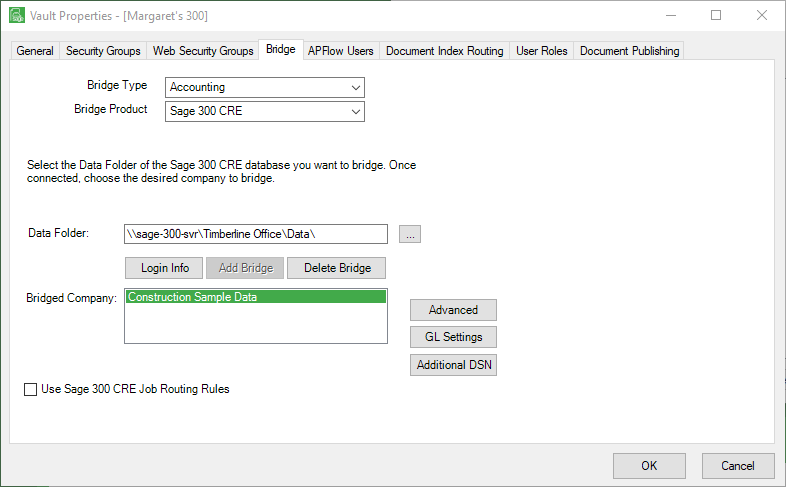
6.Click Additional DSN.
The dialog box similar to the following displays:

7.In the Sage 300 CRE Server field, enter the name where the Sage 300 database is hosted.
8.To determine the Purchasing DSN field information, leave Sage Paperless Construction.
9.Continue with the next section: Using the PSQL Monitor Program.
Using the PSQL Monitor Program
1.Connect to the Sage 300 server.
2.From the Start menu, click Actian PSQL 12.
3.When the PSQL Monitor program opens, from the main menu, click Options.
4.Click Connect.
5.In the Connect to Remote Server dialog box, enter the Sage 300 Server Name with a valid User Name and associated Password.
Note: Administrative permissions may be required.
6.Click OK.
7.From the toolbar, click SQL.
8.Select Active Sessions.
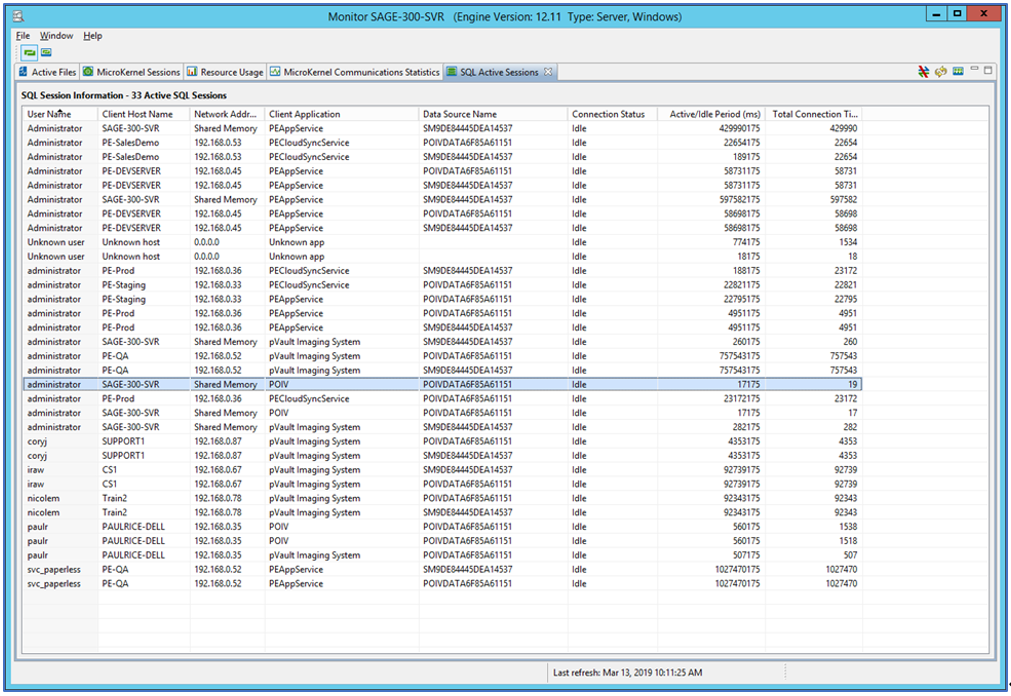
A SQL Session Information window similar to the following displays:
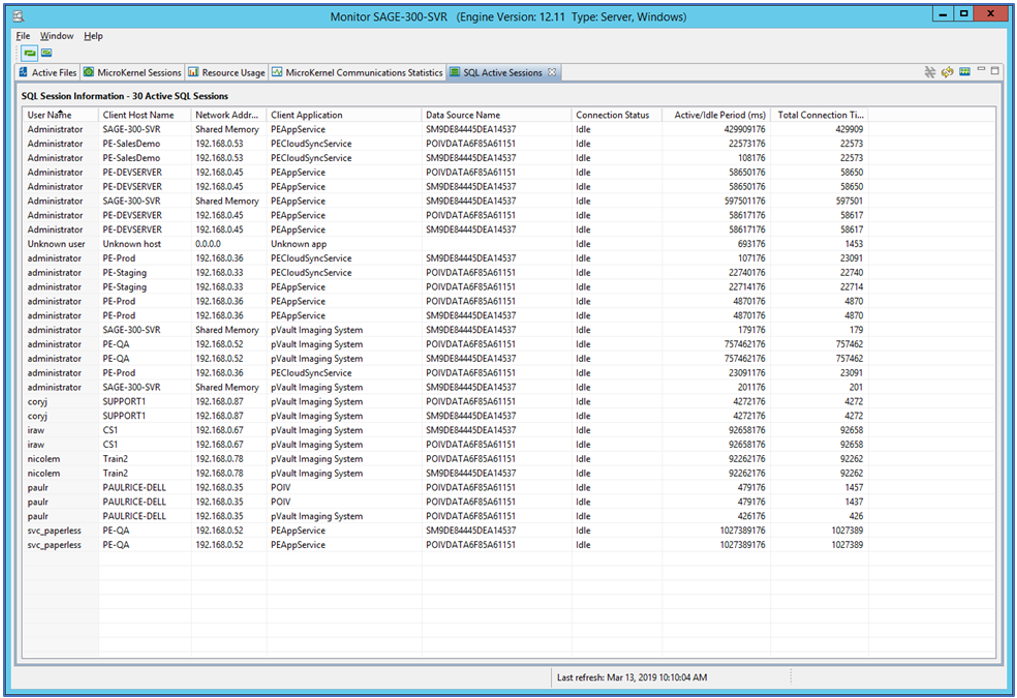
9.Open the Sage 300 software to access the Purchasing module.
10.Identify the entry in the grid associated with the user's login credentials and machine.
11.Then check the Data Source Name column associated with that user's login credentials and machine for the Sage 300 entry that begins with POIVData.
12.Make a note of that Data Source Name, as it will need to be entered in the Sage Paperless Construction Purchasing DSN field.
The appropriate entry will resemble the highlighted entry:
13.Return to Sage Paperless Construction.
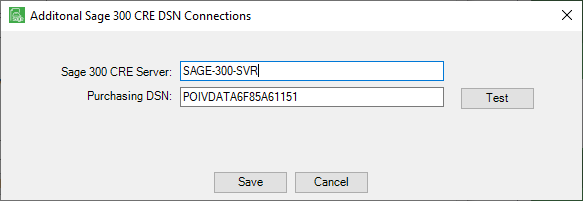
14.Re-access the Additional Sage 300 DSN Connections dialog box (refer to previous Vault Setup in Sage Paperless Construction section for access steps).
15.In the Additional DSN Connections dialog box, enter the Data Source Name identified in the PSQL Monitor in the Purchasing DSN field.
The Additional Sage 300 DSN Connections dialog box should resemble the following:
16.Click Test to verify that the entered credentials and DSN information allows for the data to successfully connect.
The following dialog box should display:
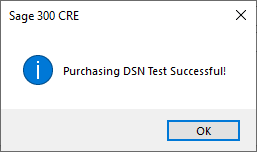
17.Click OK.
18.Once the connection is established, exit the Sage Paperless Construction configuration screen and close the Actian PSQL software.