The Sage Paperless Construction toolbars can be configured by each individual Sage Paperless Construction user by clicking the gear configuration button in the upper right hand corner of the Sage Paperless Construction desktop screen,  .
.
1.Click the Configure icon.
A Configure Toolbar window similar to the following displays:
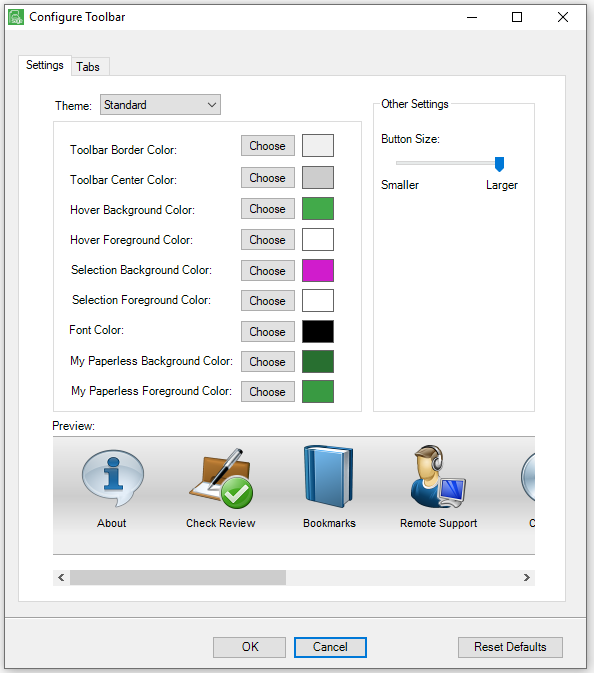
There are two tabs at the top of the Configuration screen labeled Settings and Tabs.
Settings
The Settings tab has three distinct areas:
• In the Theme section, the user can set custom colors for items on the toolbar. Select a predefined theme from the Theme drop down list and click Choose next to each item to make unique color selections.
• The Other Settings section has a slider feature allowing the user to change the size of the icons displays on the toolbar.
• The Preview section displays a toolbar preview with the selected colors and size changes made to the toolbar items.
Clicking Reset Defaults returns the toolbar colors and sizes back to the original settings.
Clicking OK saves the modified user's settings.
Tabs
The Tabs tab allows the user to edit the icons that display on predefined tabs, as well as to set up additional custom tabs in the toolbar.
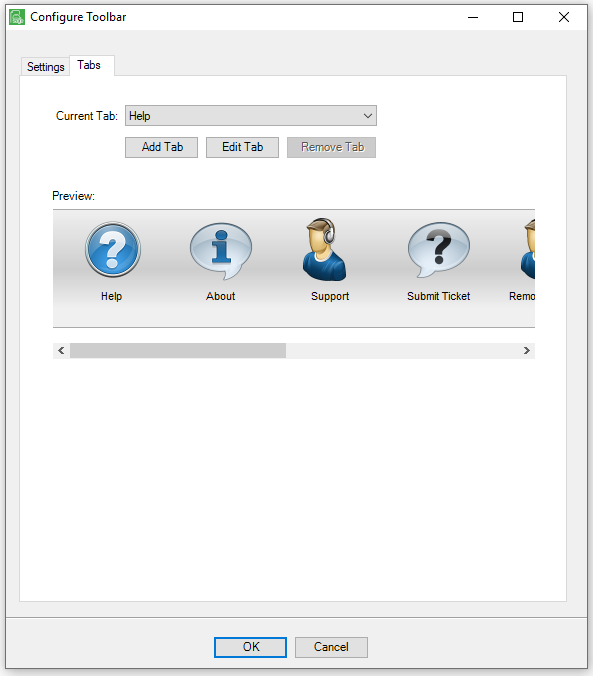
Editing a Tab
1.In the Current Tab field dropdown, select the tab to edit.
2.Click Edit Tab.
The following Tab Properties window displays:
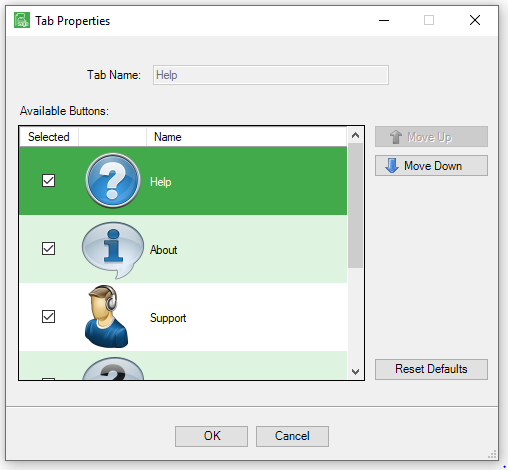
Note: All available system icons for the tab are listed in the Available Buttons grid.
3.To display a particular icon in the previously identified tab, click the Selected check box to the left of the icon.
To stop an icon from displaying, uncheck the Selected check box.
4.To change the icon display order, highlight the icon to select it.
5.Click Move Up or Move Down to change the display order.
6.To return the tab icons to the default display settings, click Reset Defaults.
7.Click OK to save the settings.
Adding Custom Toolbar Tabs
1.To add a new toolbar tab, from the main Tab Properties window, click Add Tab.
A Tab Properties window similar to the following displays:
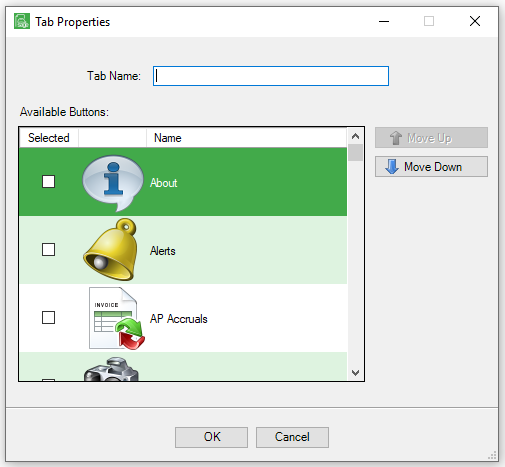
2.In the Tab Name field, type the toolbar tab name.
The entire Sage Paperless Construction system icon library is listed below in the Available Buttons grid.
3.To display a particular icon, scroll to locate the icon.
4.Click the Selected check box to the left of the icon.
5.To change the icon display order, highlight the icon to select it.
6.Click Move Up or Move Down to change the display order.
7.To return the tab icons to the default display settings, click Reset Defaults.
8.Click OK to save the settings.
Note: The custom tab only displays for the user who set up the tab. Users can add as many custom tabs as they want.