Use the Dispatcher functionality to create and populate RFMS-specific forms and route them to RFMS personnel to complete the forms and notify them of their job assignments.
From the Administrator
1.In Manage eForms, click the Admin dropdown.

2.Click Dispatcher.
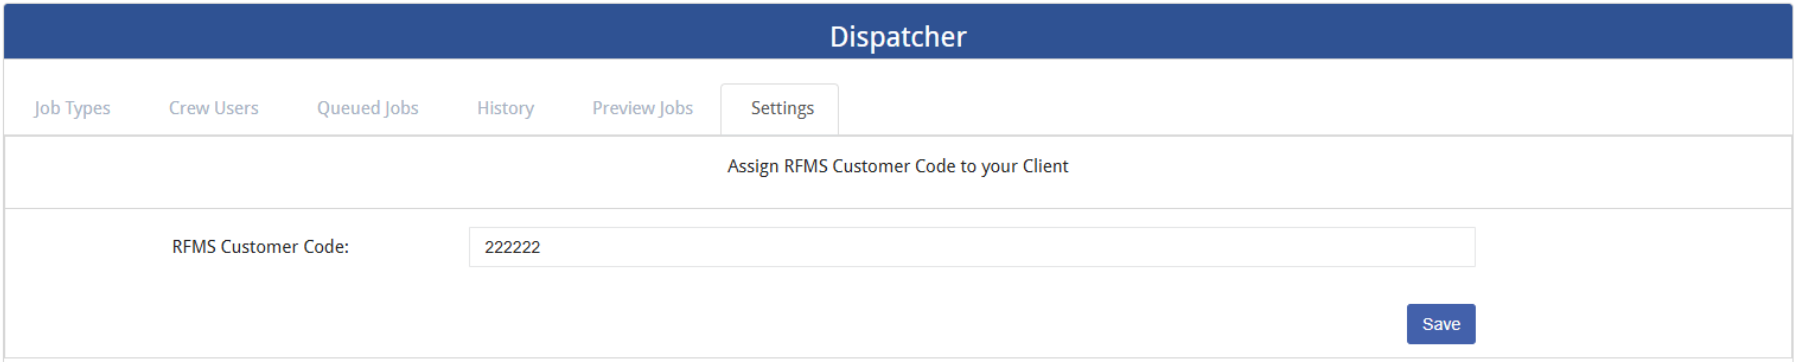
The following table displays with the Settings tab active:

3.Enter your RFMS Customer Code in the Customer Code field.
4.Click Save.
The table displays the available tabs with the Settings tab still active:
5.Click the Job Types tab.
The following table displays with the Job Types tab active:
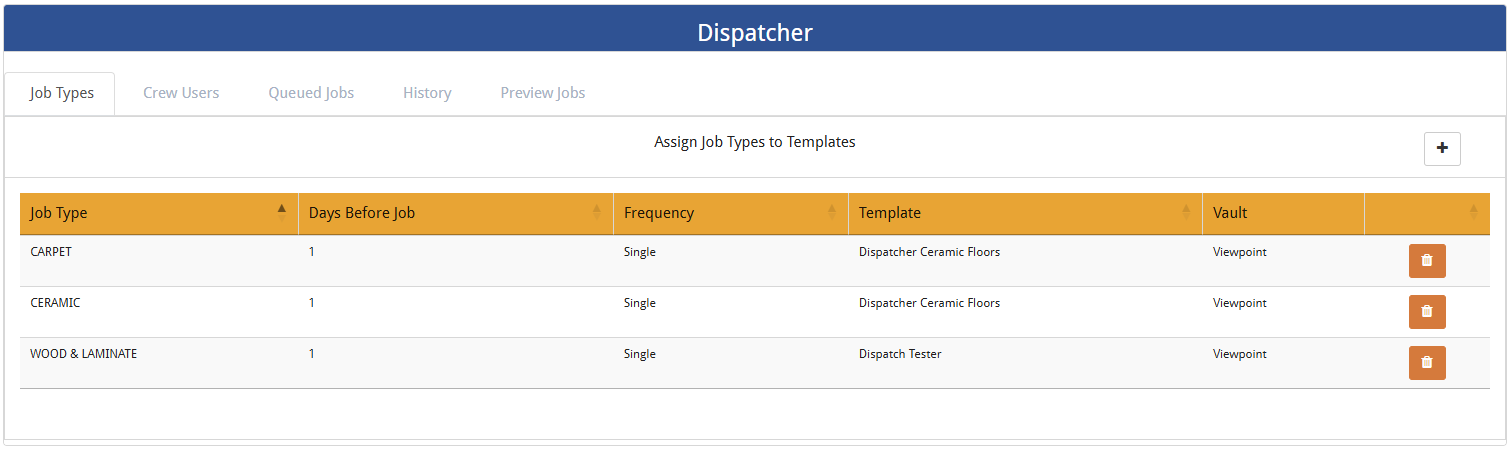
Job types display here that are assigned to templates.
6.To add a new job type, click plus.
The Add Job Type to a Template dialog similar to the following displays:
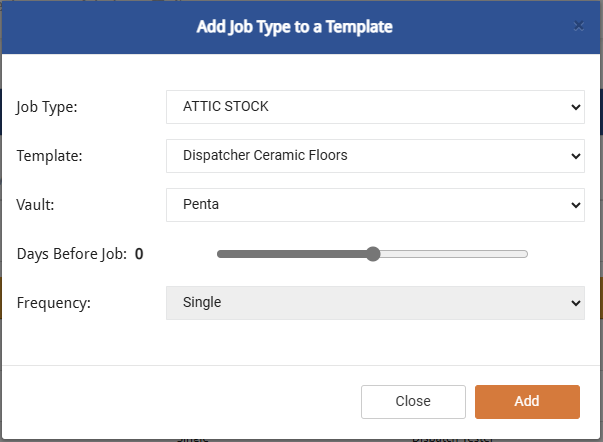
7.For the Job Type, use the field dropdown to make your job type selection.
In this example: CERAMIC
8.For the Template, use the field dropdown to make your template selection.
In this example: Dispatcher Ceramic Floors
9.For the Vault, use the field dropdown to make your vault selection.
In this example: Sage 300
10.For the Days Before Job slider, manually move the slider to reflect the appropriate number of days. This number is based on the Job Start Date
In this example: 1
11.For the Frequency, Single is the default. The field dropdown is not enabled.
The updated Add Job Type to a Template dialog resembles the following:
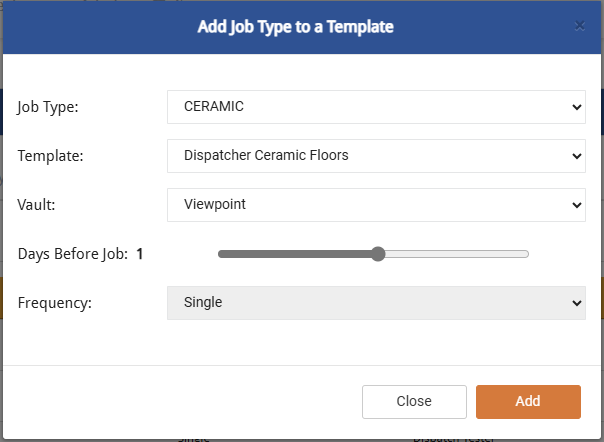
12.Click Add.
13. Click the Crew Users tab. This is where an eForms user is associated to an RFMS Crew
The following table similar to the following displays:
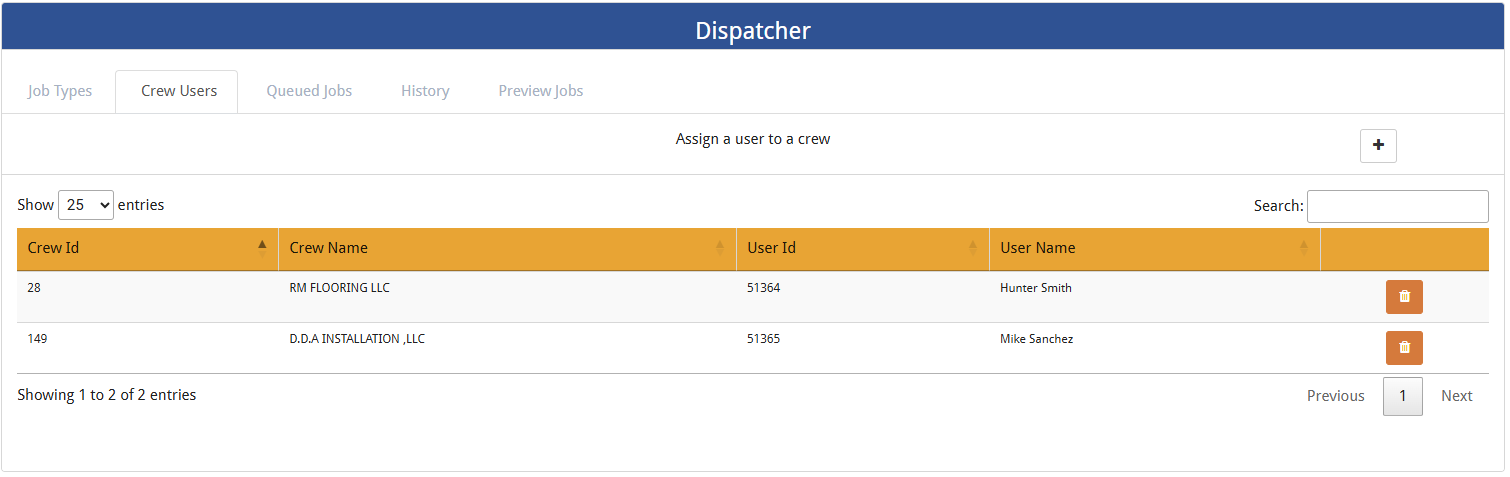
14. Click plus.
The Add User to Crew dialog similar to the following displays:
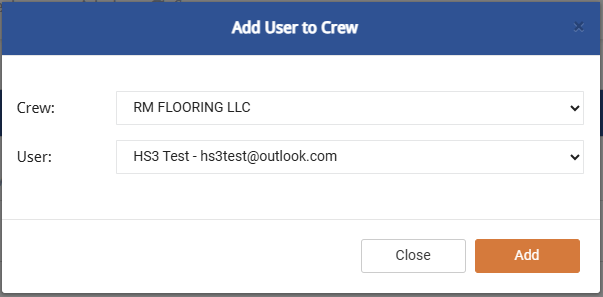
Note: The User (selected from the field dropdown) is the superintendent of the identified Crew (selected from the field dropdown).
15. Click Add.
Queued Jobs
1.Click the Queued Jobs tab to view those jobs already set up and with a future Job Date.
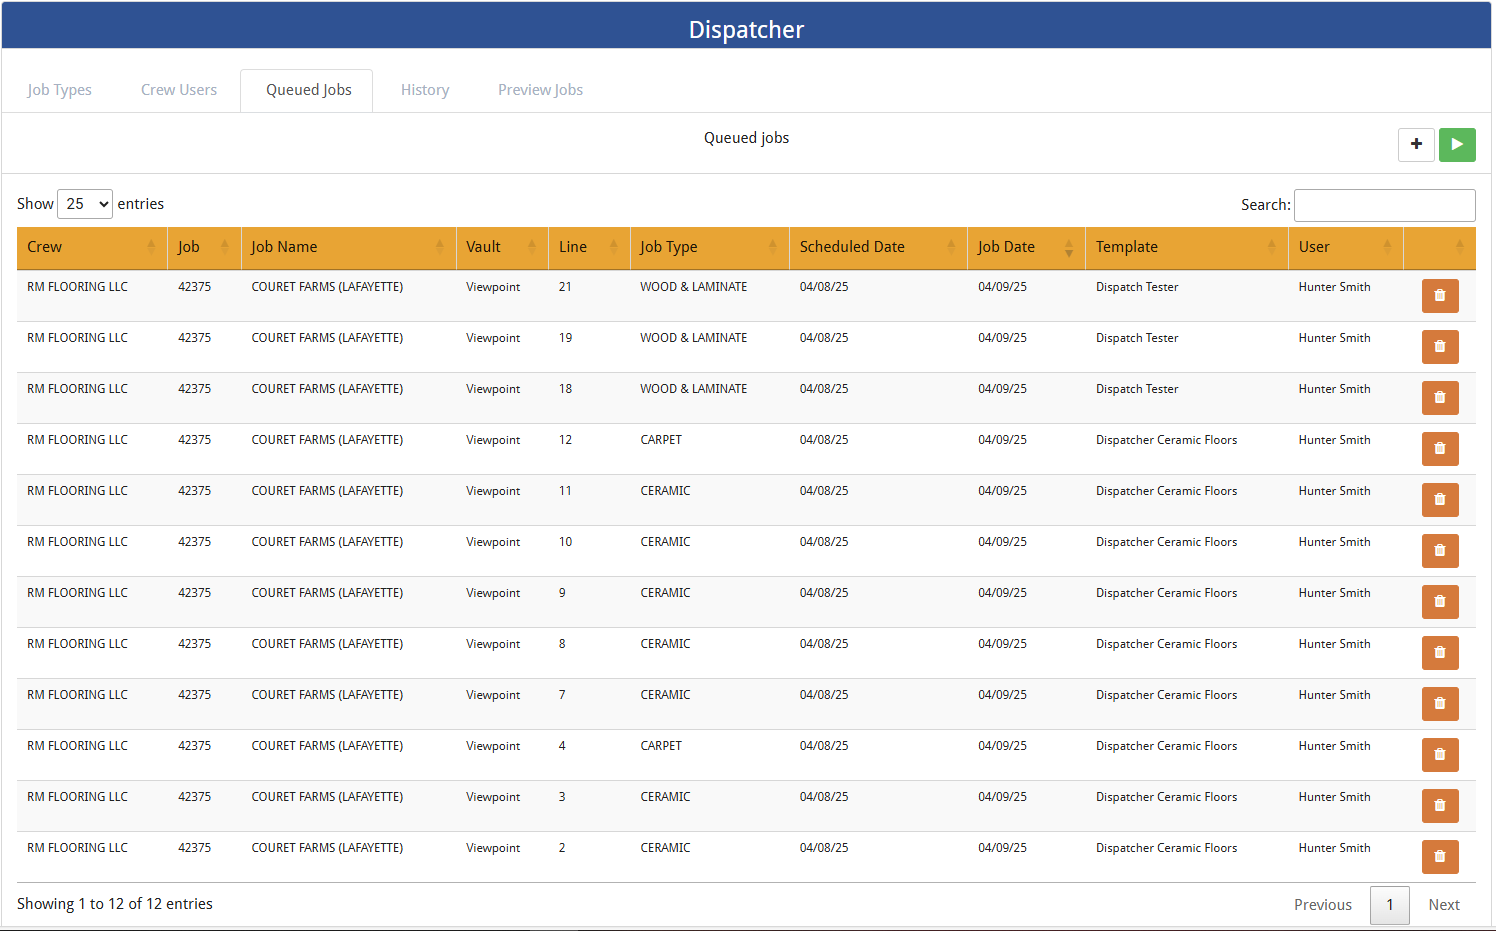
2.To run jobs manually, click the Run Jobs Manually button.
By clicking this button, the job queues up for 15 minutes. After an hour it is dispatched. Then it is visible in the History tab.
This confirmation dialog displays:
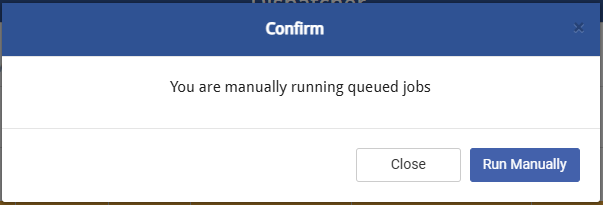
3.Click Run Manually.
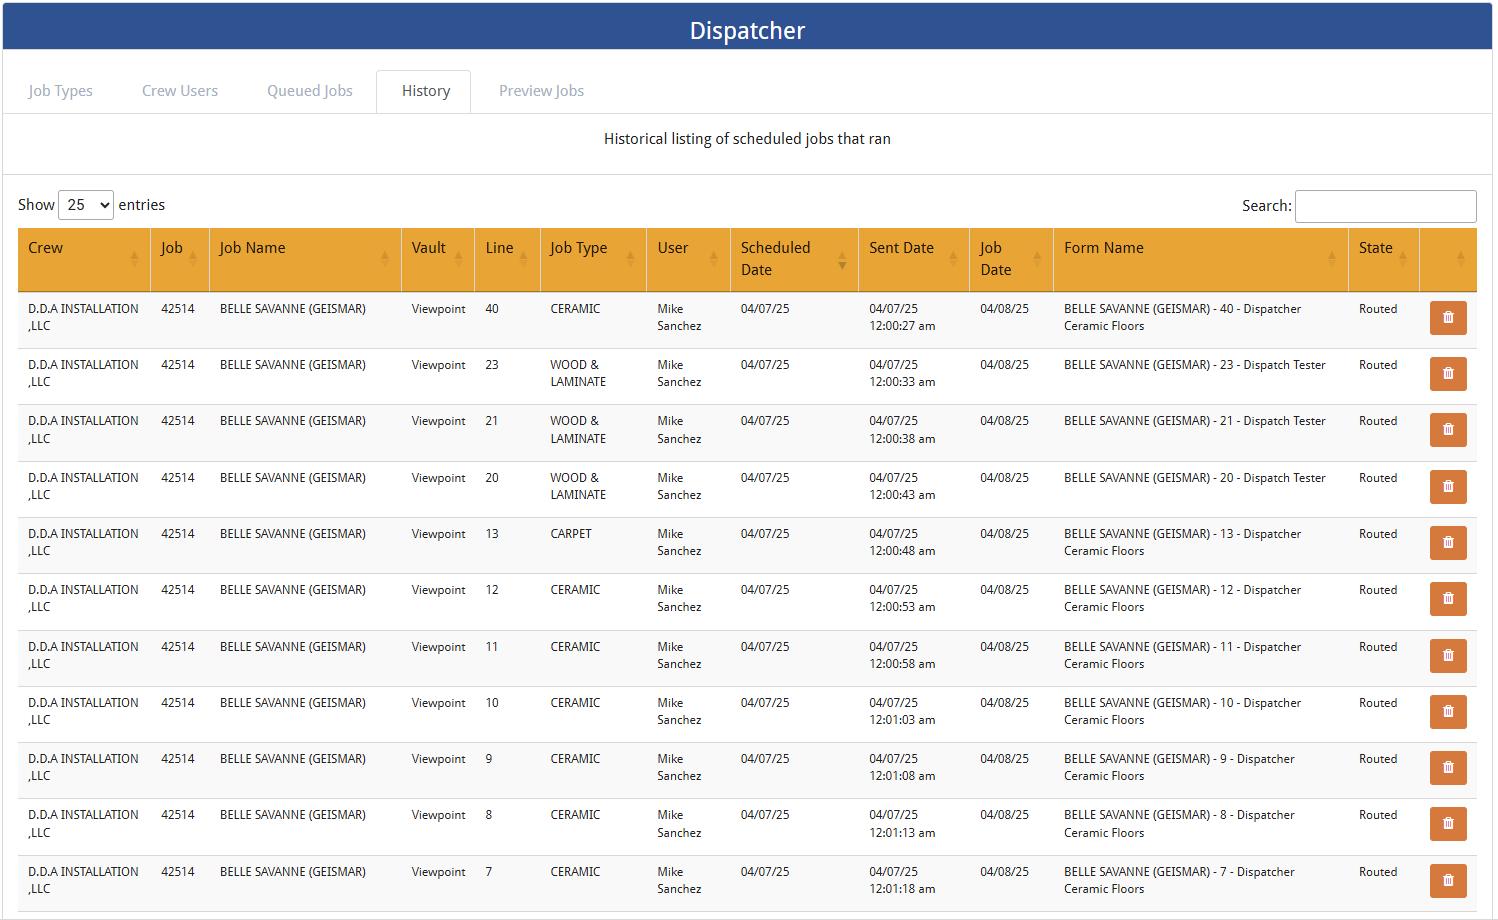
History
Click the History tab to view a list of the scheduled jobs that ran.
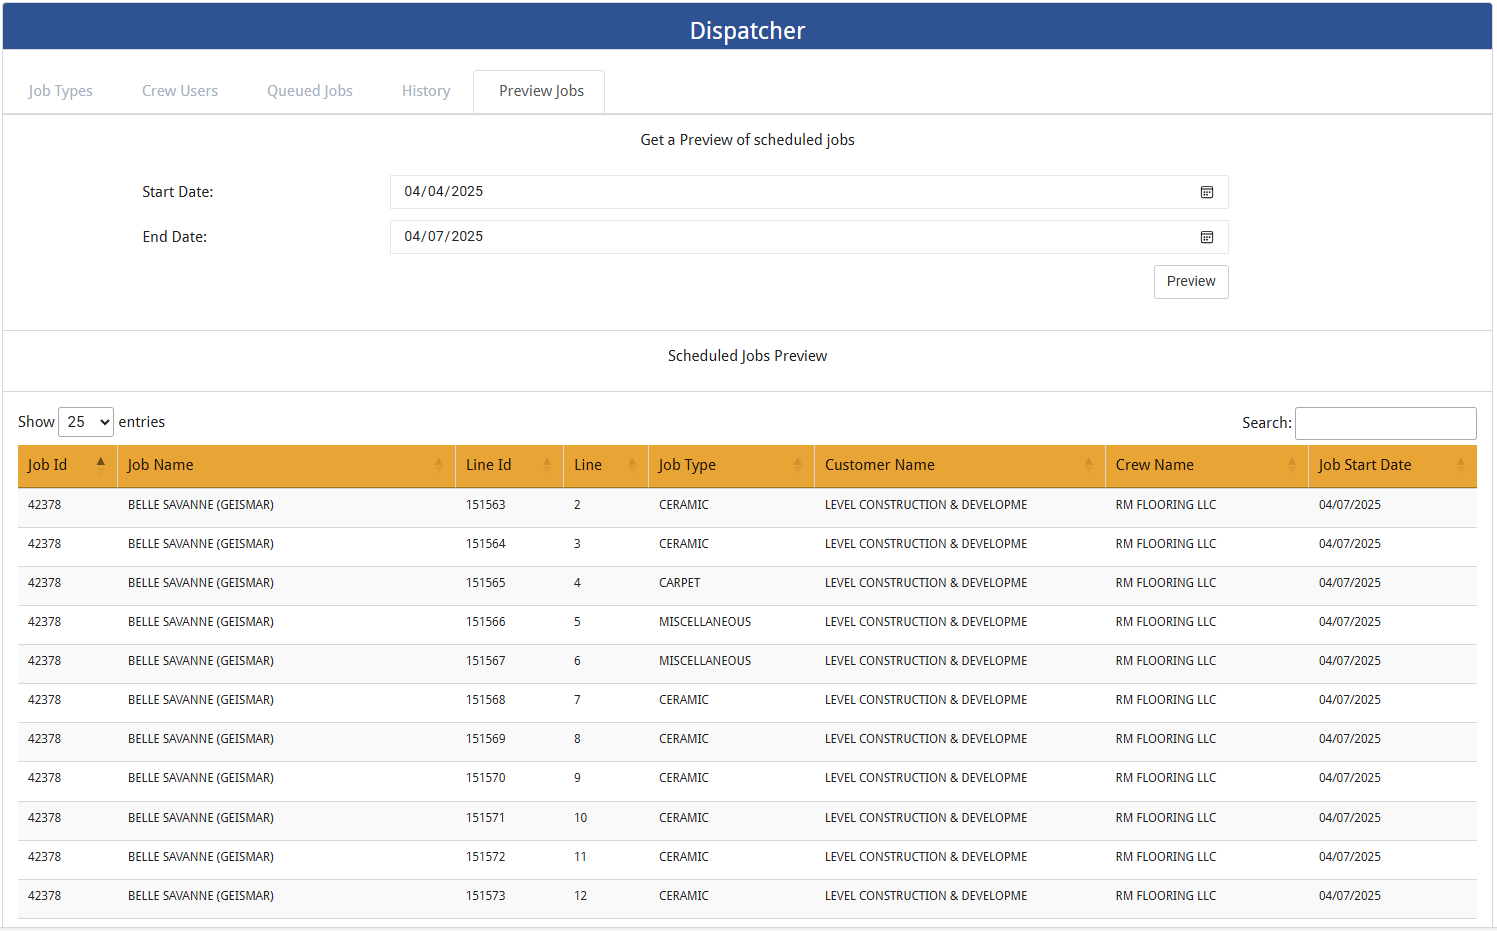
Preview Jobs
This is a view into RFMS. The primary criteria are Crew Name and Job Type. The table includes all jobs that were routed. Once a job is opened, it cannot be deleted.
To the Crew Member
1.As part of the crew member's responsibilities, from a tablet or phone, open the eForms™ portal.
2.Access the Route to Me grid.
The grid may resemble the following:
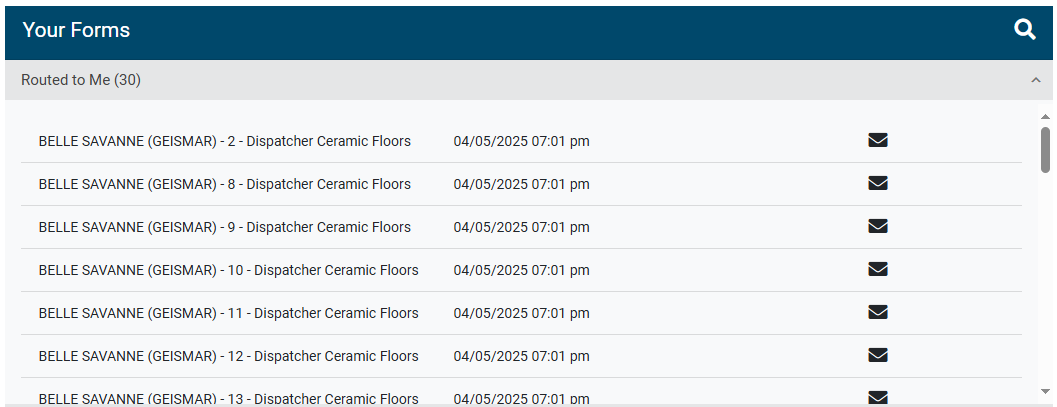
3.Click the Open Route Form icon.
The following dialog displays:
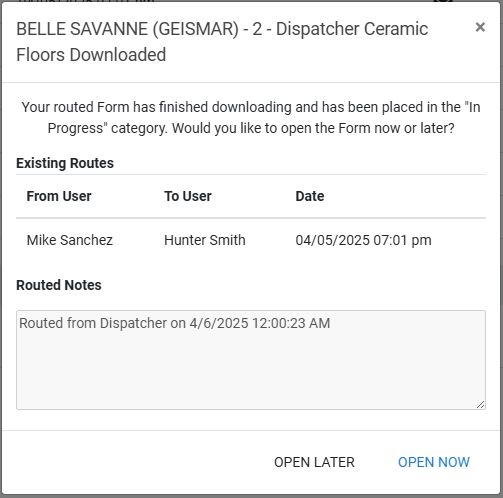
4.Click to either OPEN LATER or OPEN NOW.
If you click OPEN LATER, the dialog closes, and the entry moves from the Route to Me grid to the In Progress grid.
If you click OPEN NOW, the dialog closes, the entry moves from the Route to Me grid to the In Progress grid and the form opens so you can manually complete it.
The form similar to the following displays:
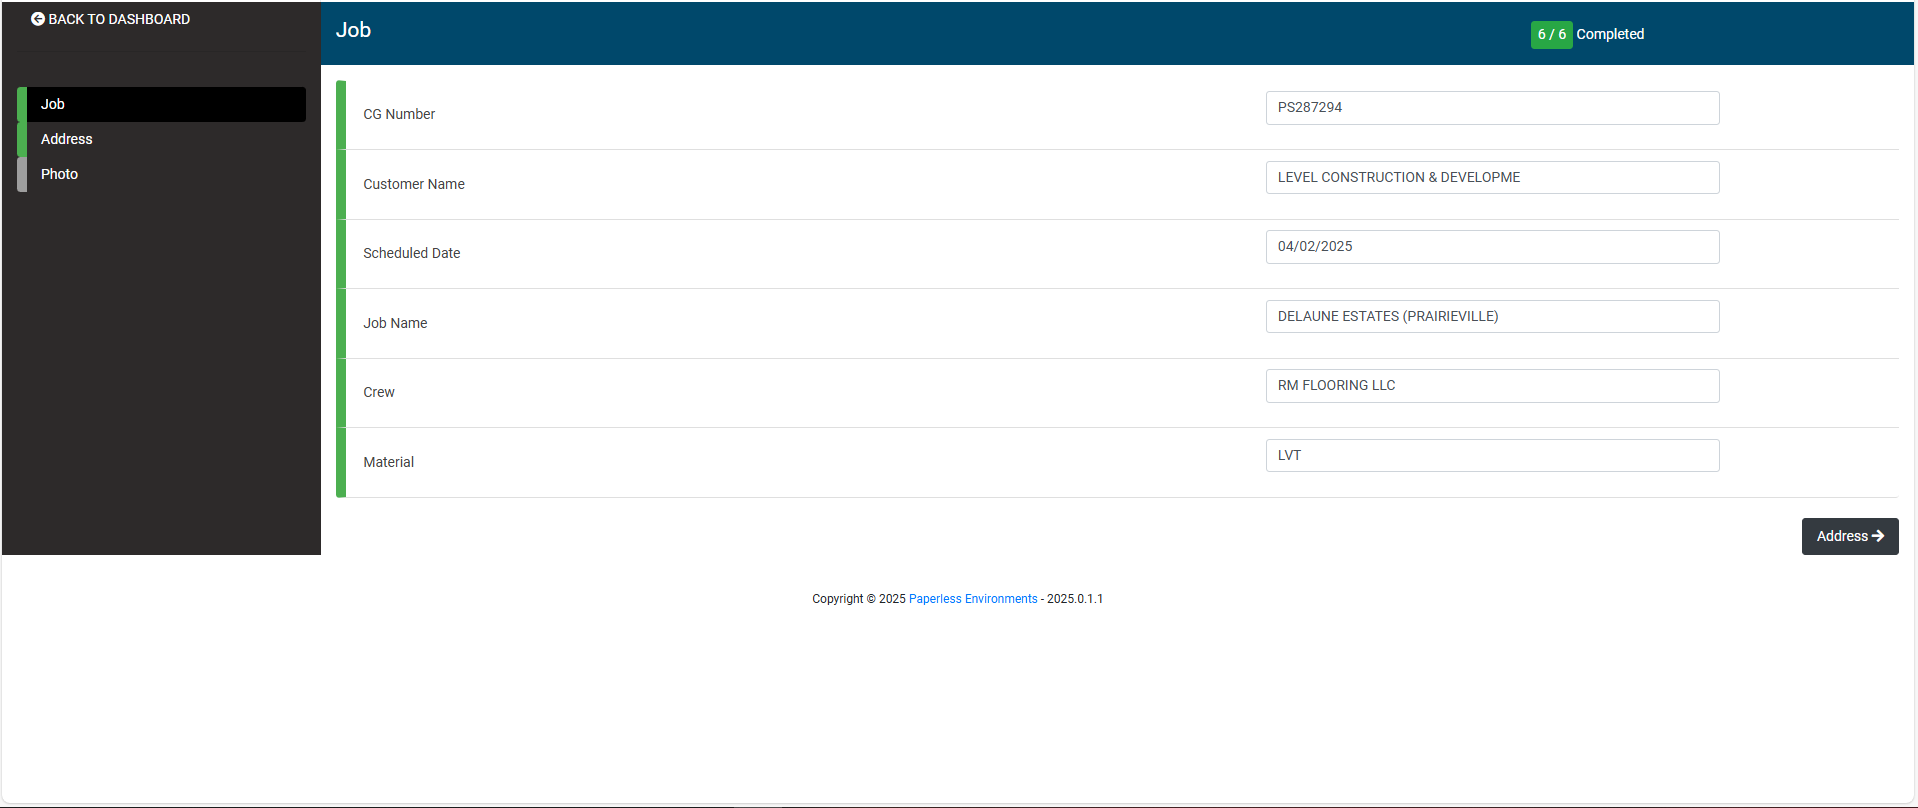
5.Scroll through the form and respond to the incomplete questions.
6.Click Submit once all questions are completed.
Once completed, the form moves from the In Progress grid to the Synced grid.