•To read about the Administrator level Expense Allocations settings, click here.
•To read about Allocation Rules, click here.
1.Access Invoice Entry for this invoice.
Important
The Allocations icon, ![]() , is visible in the toolbar only if allocations are supported and configured for the vault.
, is visible in the toolbar only if allocations are supported and configured for the vault.
The Allocations icon will only be enabled once lines can be added (by filling out the Vendor and Invoice Number fields).
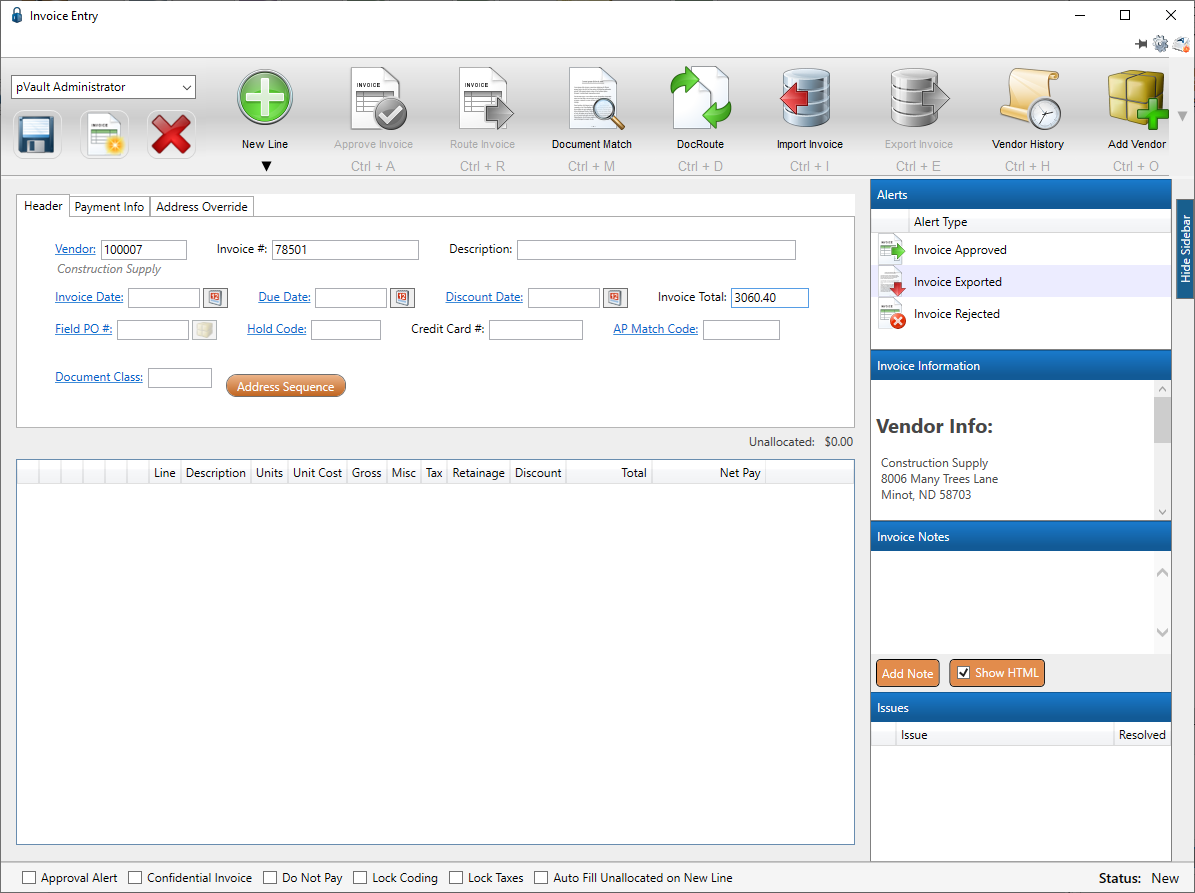
A sample Invoice Entry screen before including the allocations. Notice the Unallocated amount is $3,060.40:
2.Click the Allocations icon dropdown arrow, ![]() .
.
This is an example of allocation selections:
![]()
If Allocation Rules exist, this dropdown will resemble the following:
![]()
3.Click to select one of the listed allocations, to select to apply the allocation rules or to select to apply the allocation rules and route the invoice.
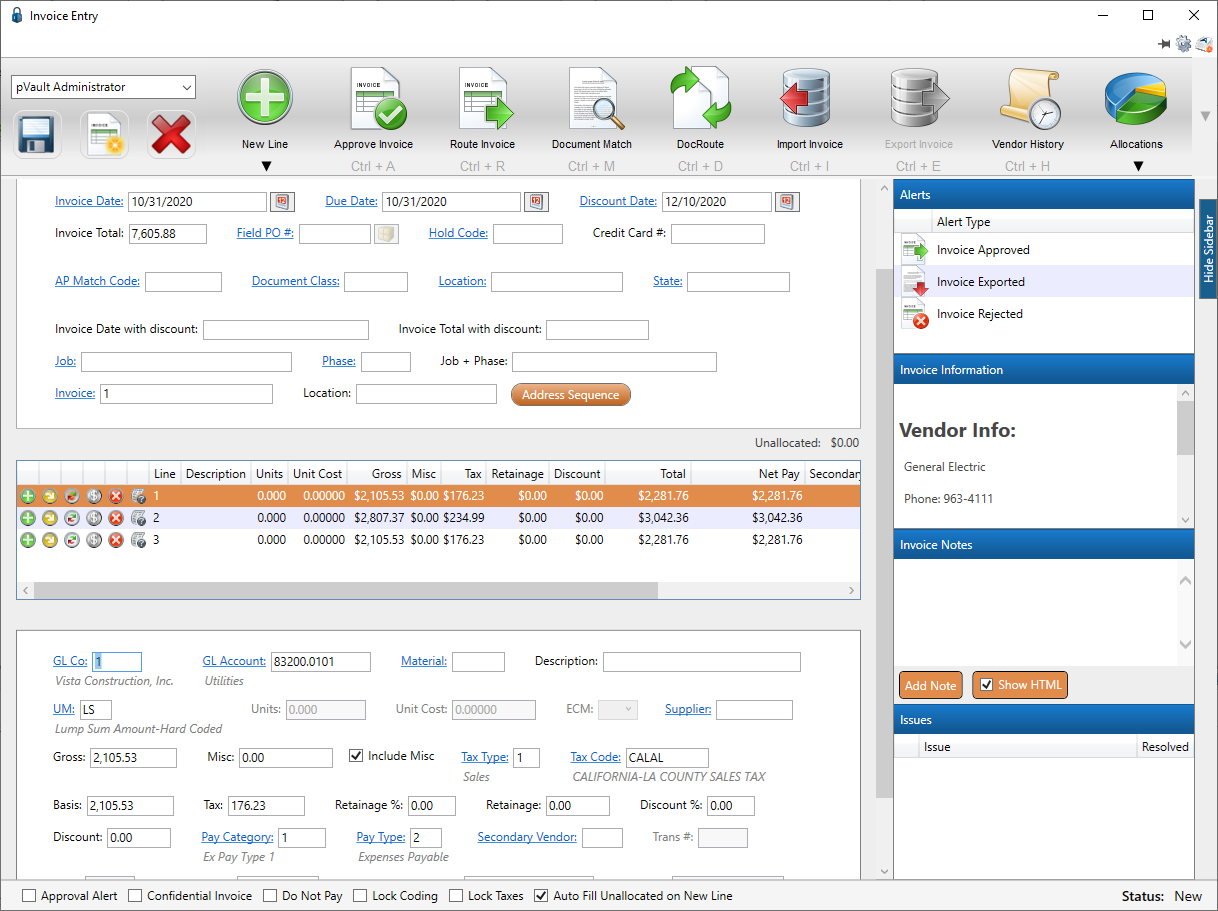
A sample Invoice Entry screen after including the allocations. Notice the Unallocated amount is now $0.00:
4.Code the Detail section beyond those fields pre-filled through Invoice Allocations.
5.Add lines, as appropriate, to allocate the identified remaining Unallocated amount.
6.Remove a single line or multiple lines, as appropriate.
Note: For more information on deleting multiple lines, click here.
7.Complete any additional actions such as coding, approving or routing.
When choosing an allocation to apply, it is best to choose it before adding any lines.
Choosing an allocation after lines are already added will require the deletion of those previously-entered lines.
Adding an Allocation When Invoice Lines are Present
When adding an allocation that is either dollar amount-based or percent-based and no lines exist on the invoice, the allocation is based on the amount in the Invoice Total field. There are no prompts for the amount to apply for the allocation.
When adding an allocation when invoice lines already exist, one of two dialog boxes display, determined by a dollar amount allocation or a percentage-based allocation.
For allocations with preset amounts on the invoice lines, the following prompt displays:
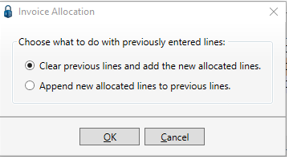
1.Click to either clear previous lines and add new allocated lines or append new lines to the existing lines.
2.Click OK.
For percent-based allocations, the following prompt displays:
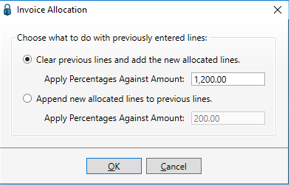
1.Click to either clear previous lines and add new allocated lines or append new lines to the existing lines.
2.With either selection, default amounts display for both adding new allocated lines (this is the full invoice total) and appending to previous lines (this is the remaining unallocated amount). Both amounts may be overridden as necessary.
3.Click OK.
In Invoice Entry, if you run Allocation Rules and multiple allocation apply, an Invoice Allocation dialog box similar to the following displays:
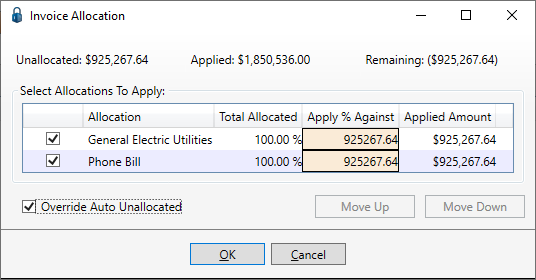
Important: The order of lines will impact how each line is allocated.
You can select which allocations you want to apply.
There are two options for the allocation method:
•The first option is to apply each allocation based on the remaining unallocated after the initial allocation is applied.
•With the second option, you can turn off the auto unallocated by unchecking the Override Auto Unallocated check box. It will default to applying each allocation against the total unallocated; however, you can change the amount to allocate against in the Apply % Against column entry.
If you deselect the Override Auto Unallocated, the Invoice Allocation dialog box will change to indicate that both allocations are applied:
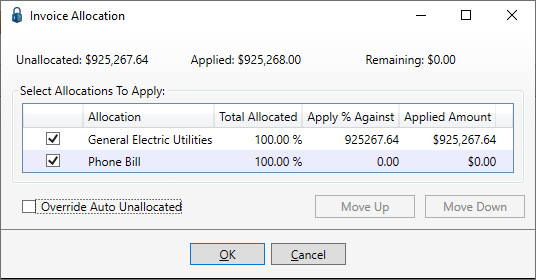
Note: The Auto Fill Unallocated on New Line check box at the bottom of the Invoice Entry screen is not taken into consideration if checked.