In Vista
1.From the Main Menu navigation screen, click Accounts Payable in the left navigation bar.
2.Click Programs.
3.In the Forms listing, double click AP Payment Workfile.
The AP Payment Workfile Detail screen similar to the following displays:
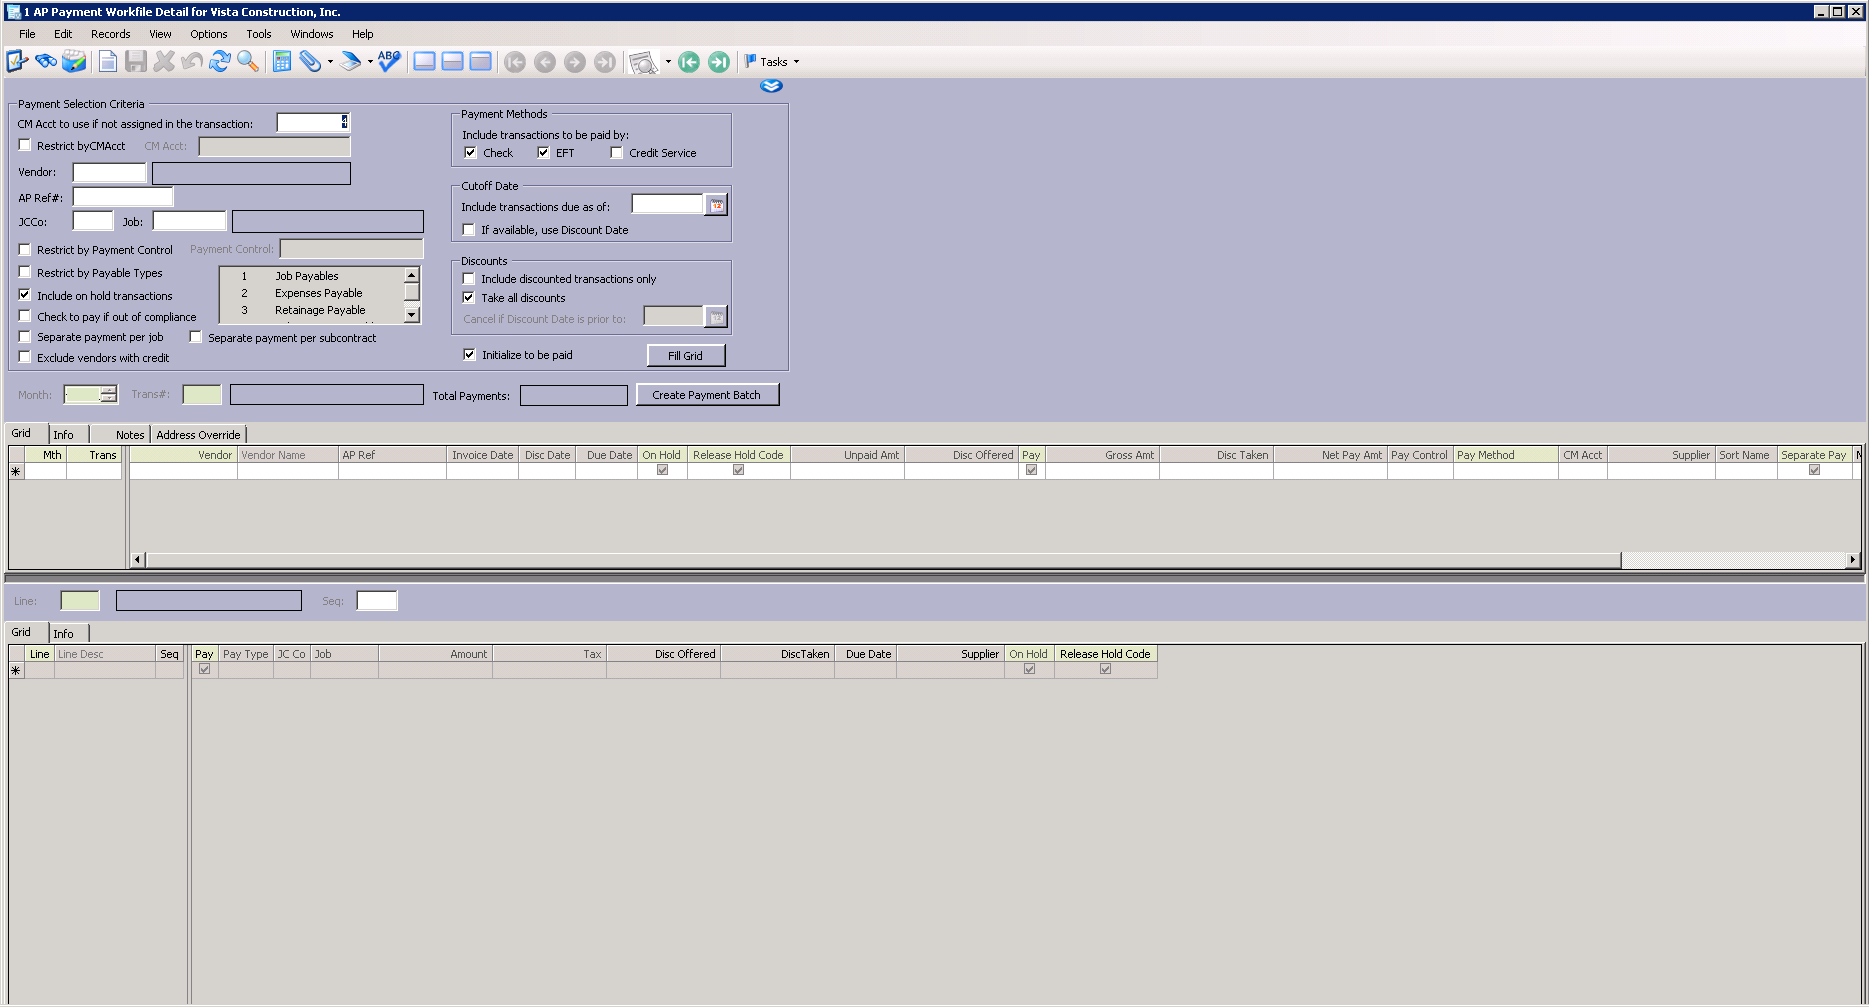
4.In the Vendor field, enter the appropriate vendor number.
5.Click Fill Grid.
The transaction added to workfile prompt displays:
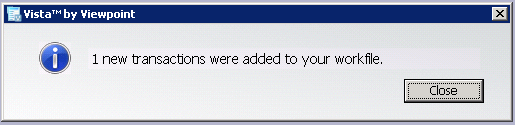
6.Click Close.
7.In the Grid area that now displays, click in the Pay column and then click to select the entry.
The grid area should resemble the following:

8.Click Create Payment Batch.
The Batch Selection window similar to the following displays:
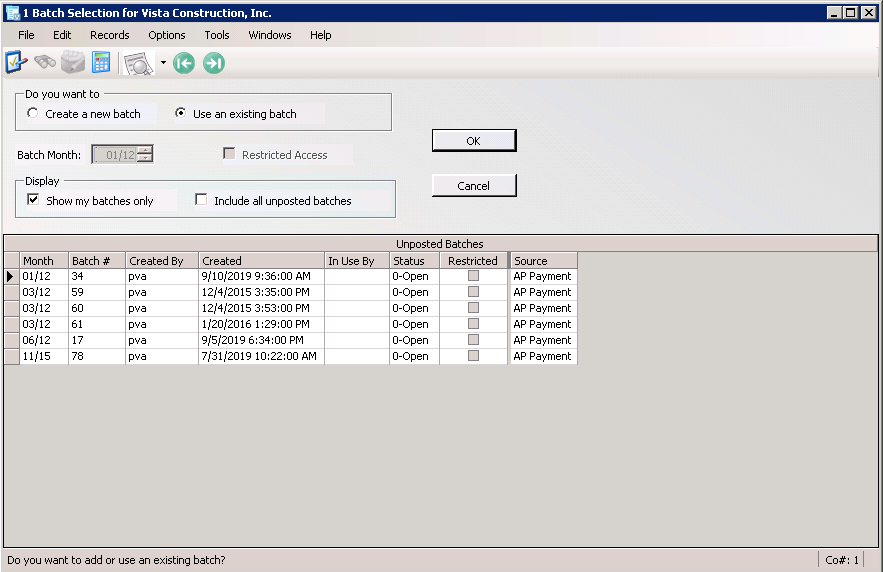
9.Click Create a new batch.
10.Change the Batch Month field as appropriate.
11.Click OK.
The AP Payment Posting Detail window similar to the following displays:

12.On the AP Payment Posting Detail window toolbar, click File.
13.From the dropdown menu, click Print Checks.
The AP Check Print dialog box similar to the following displays:
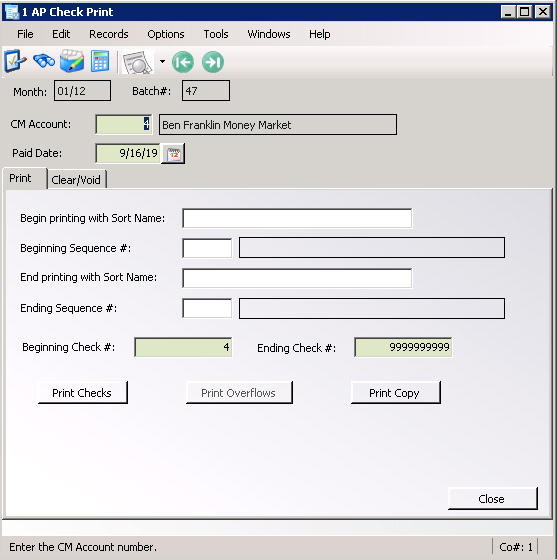
14.Click Print Checks.
The following Print dialog box displays:
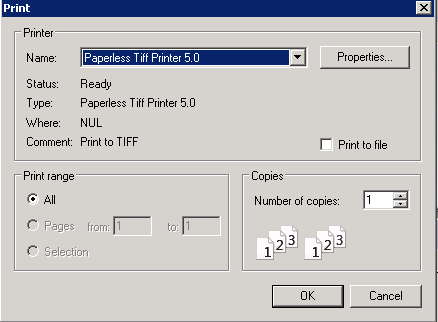
15.From the Name field, use the dropdown to select TS PDF Generator.
16.Click OK.
A prompt indicating the check printed successfully displays.
Posting in Vista
1.On the AP Check Print dialog box toolbar, click File.
2.From the dropdown menu, click Close.
3.On the AP Payment Posting Detail toolbar, click File.
4.From the dropdown menu, click Process Batch.
The AP Batch Process window similar to the following displays:
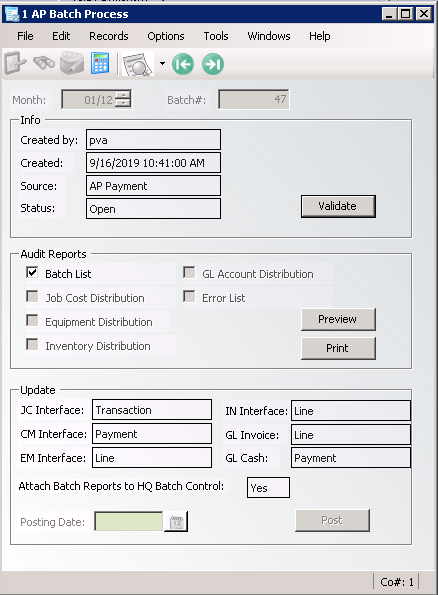
5.Click Validate.
The Status field changes from Open to Validated.
6.Note that in the Audit Report section of the AP Batch Process dialog box, the reports expected to generate are:
Batch List
GL Account Distribution
If invoices are posting to different modules, different audit reports will generate.
7.Click Post.
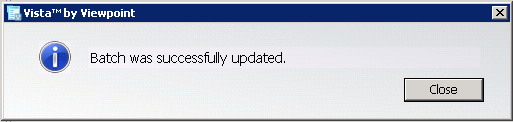
The following batch successfully updated prompt displays:
8.Click Close.
In pVault®
Verify that three reports generated.
1.From the ribbon toolbar, click Retrieve.
2.Click Search,  .
.
The Search Utility screen similar to the following displays with the Search tab active:
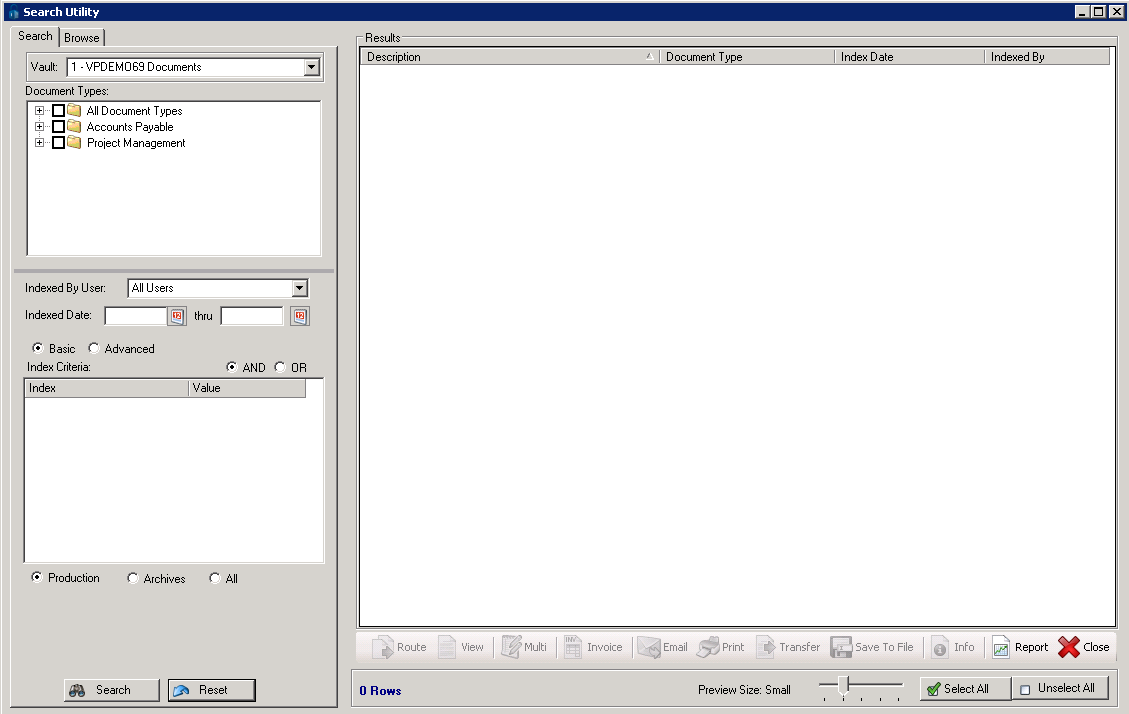
3.Click the All Document Types check box to select every document type.
4.In the Indexed Date field, click the calendar to select the date the batch was indexed.
5.Click Search.
Two Index Batch Control Reports and the AP Check Non-negotiable report should be listed similar to the following:
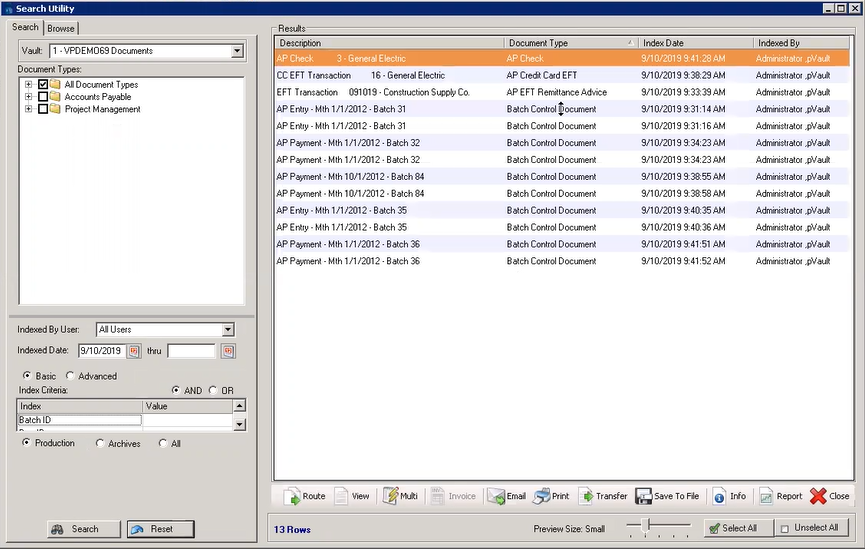
6.Click the AP Check entry.
The AP Check should resemble the following:
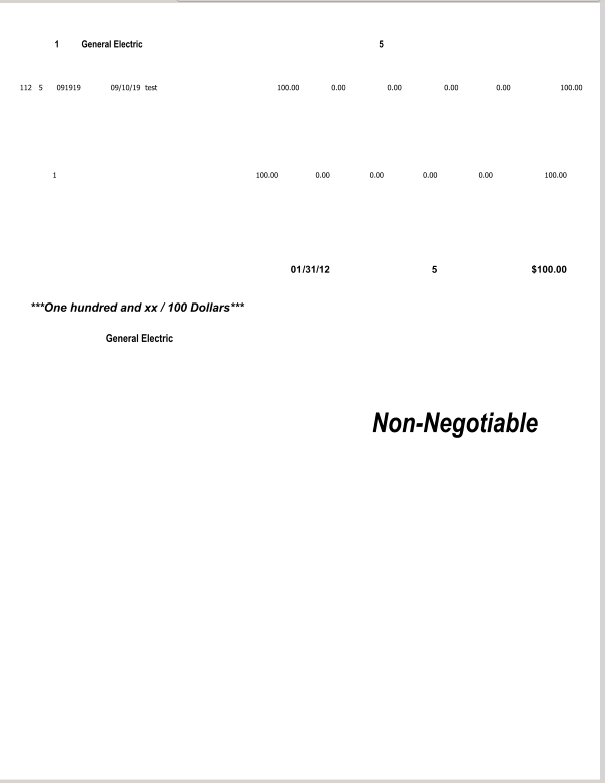
Important: Verify that Non-Negotiable is visible.
7.Close the report.
8.Click the next entry. This is the AP Payment report.
The report will resemble the following:
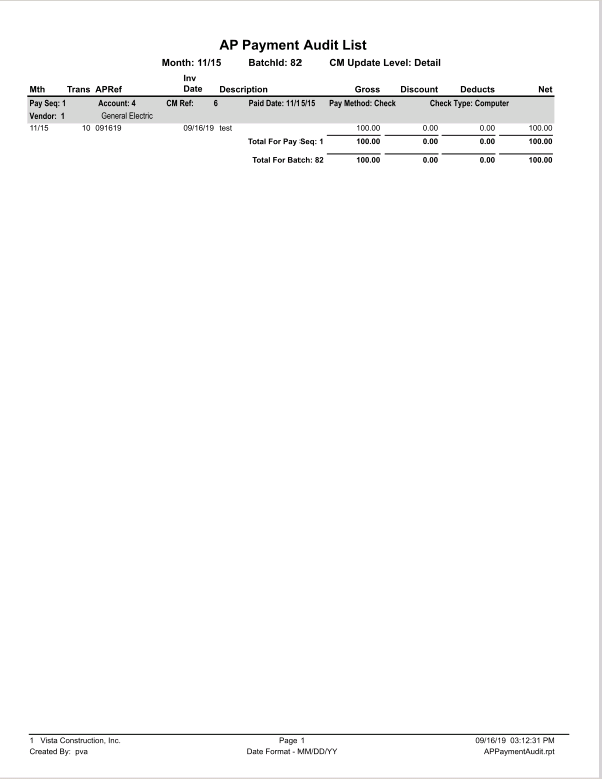
9.Close the report.
10.Click the next entry. This is the GL Payment List.
The report will resemble the following:
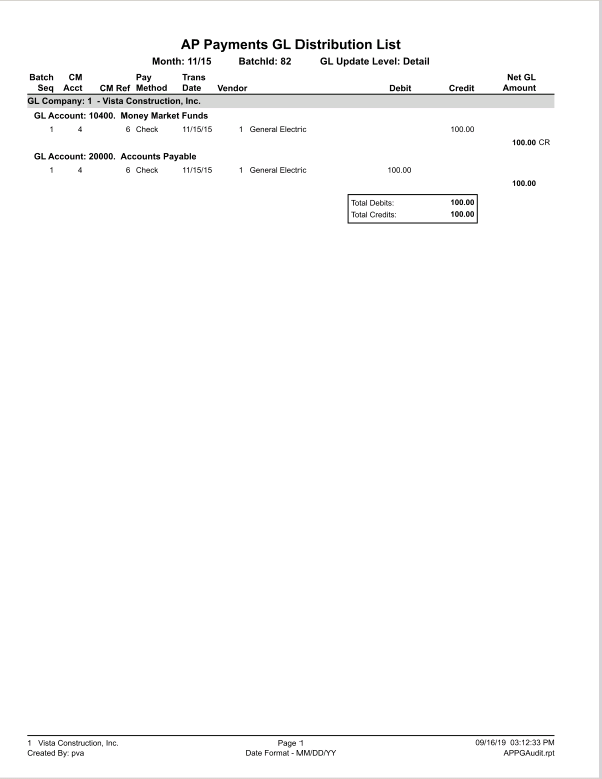
11.Close the report.