In the Sage 300 accounting system, a generic vendor is set up as a Summary Vendor type. This generic vendor is used as a placeholder and will not have their own invoices. Instead this Summary Vendor type is used to deal with one-time vendors.
Note: The pVault® Quick Vendor functionality is not the same as Add Vendor, as the Add Vendor functionality is for a new vendor that is not yet in the accounting system but has already begun generating invoices. Click here to read more about the Add Vendor functionality.
In pVault®
1.From the ribbon toolbar, click APFlow™.
2.Click Invoice Entry,  .
.
3.From the APFlow™ sidebar, click New Invoice or Edit Invoice.
The Invoice Entry screen similar to the following displays:
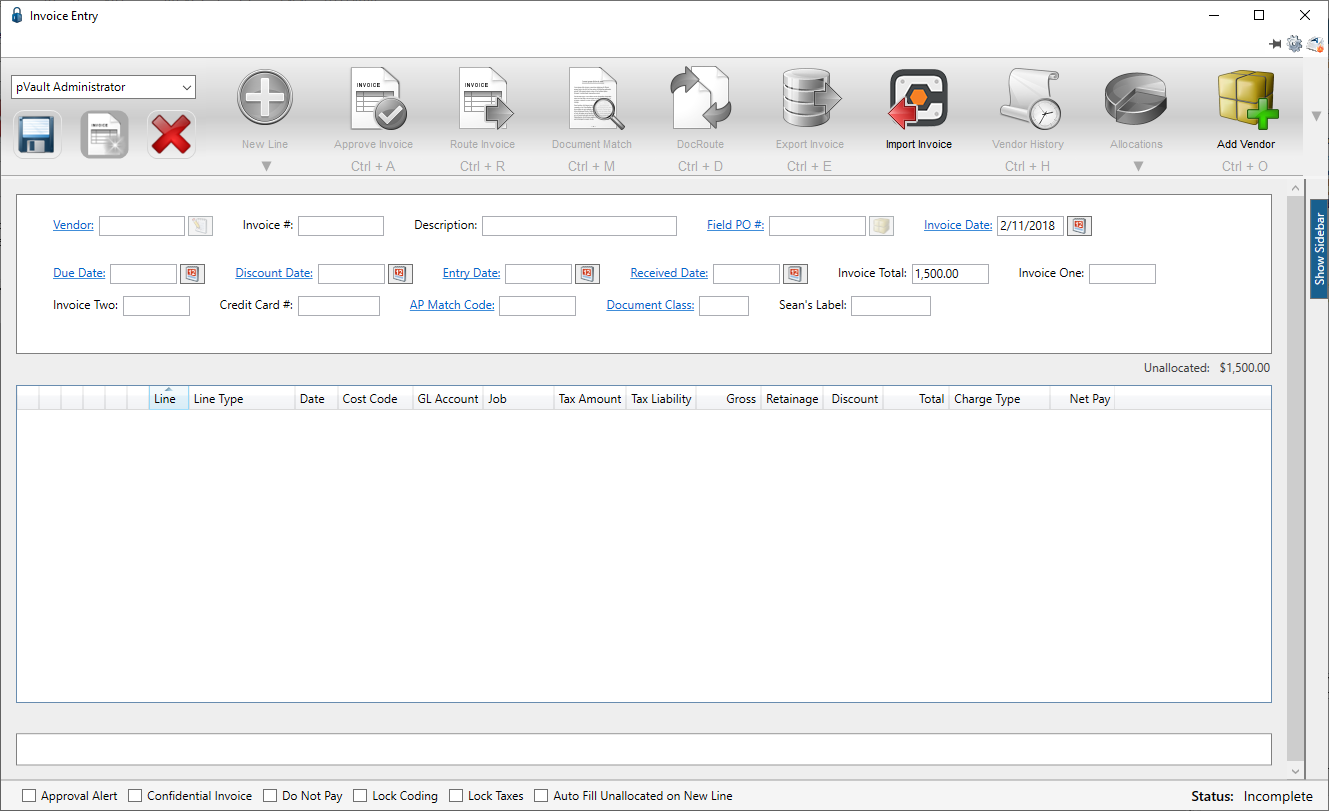
4.In the Vendor field, enter the vendor number assigned as a Summary Vendor type.
5.Press Tab.
The Quick Vendor icon that displays adjacent to the Vendor field,  , is active if the vendor number represents a Summary Vendor type created in the Sage 300 accounting system. Otherwise the icon is grayed out.
When a vendor number (identified in Sage 300 as a Summary Vendor type) is entered in the pVault® Vendor field, a Quick Vendor dialog box systematically generates:
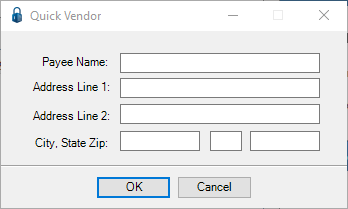
6.Fill in the Quick Vendor dialog box fields with the one-time vendor information and then click OK to close the dialog box.
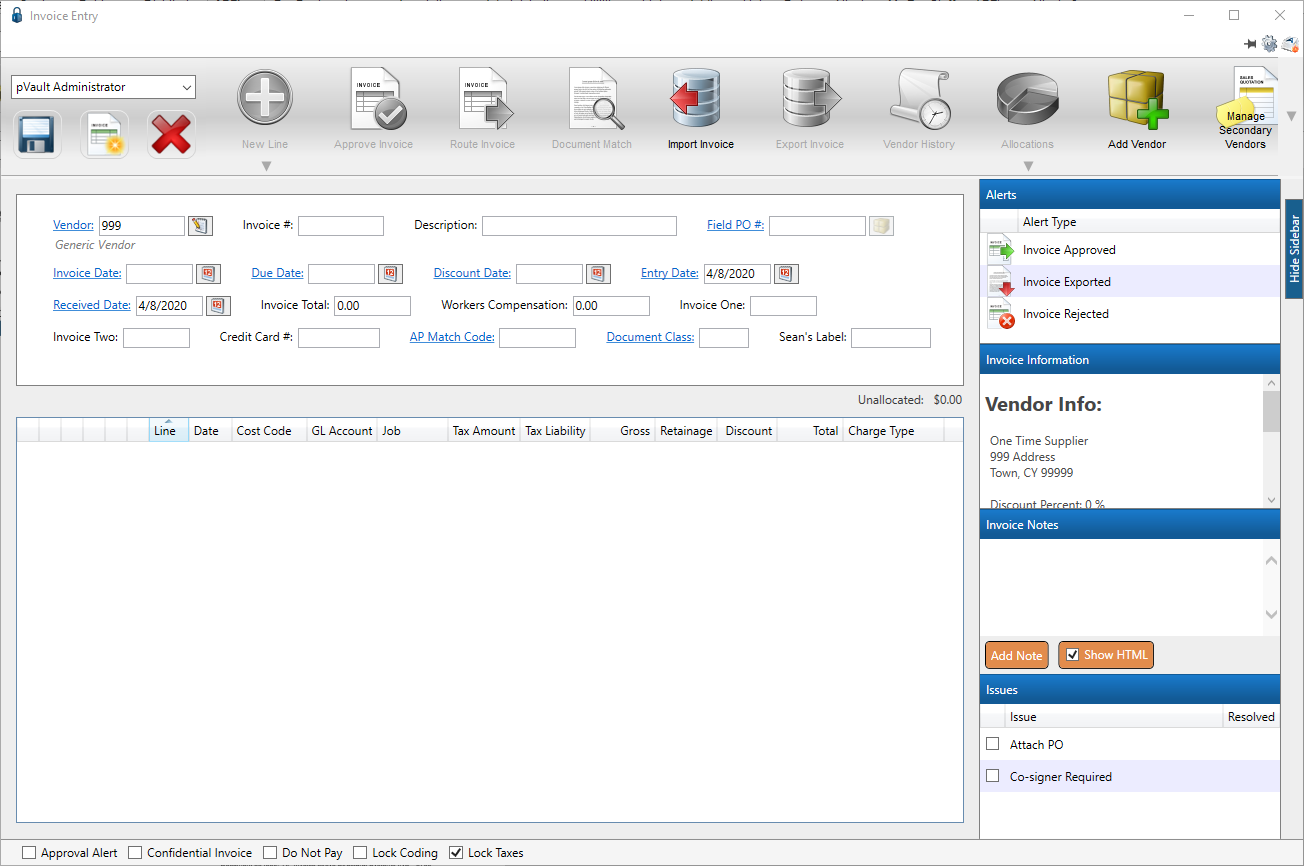
Note: The Invoice Information pane of the Invoice Entry sidebar populates with the one-time vendor information.
The Invoice Entry window will resemble the following:
In Sage 300
A generic vendor set up as a Summary Vendor type in Sage 300 influences the Vendor field in pVault®.
1.In the Accounts Payable module, from the ribbon toolbar, click Setup.
2.From the Setup dropdown menu, click Vendors.
The following Vendor Setup window displays:

3.In the Vendor field, enter the vendor ID number that will be identified as a generic vendor. This is the vendor number that will be used for one-time vendors.
4.In the Name field, enter an appropriate vendor name. For example: Generic Vendor
5.Tab through the remaining fields. Information does not need to be entered in these fields because as a Summary Vendor type, this one-time vendor information will be entered in pVault® in the Quick Vendor dialog box.
6.In the Vendor type pane, click to select Summary.
7.Click Save.