In pVault®
Setup
1.From the ribbon toolbar, click APFlow™.
2.Click Manage APFlow™,  .
.
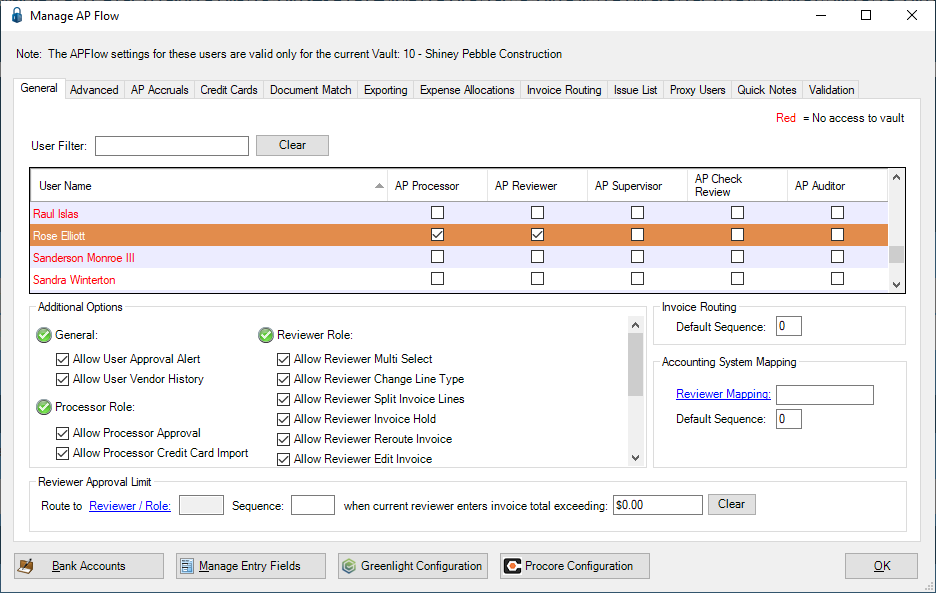
The following window similar to the following displays with the General tab active:
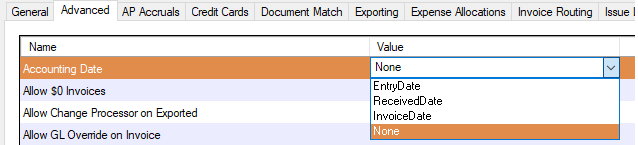
3.Click the Advanced tab.
The window similar to the following displays:
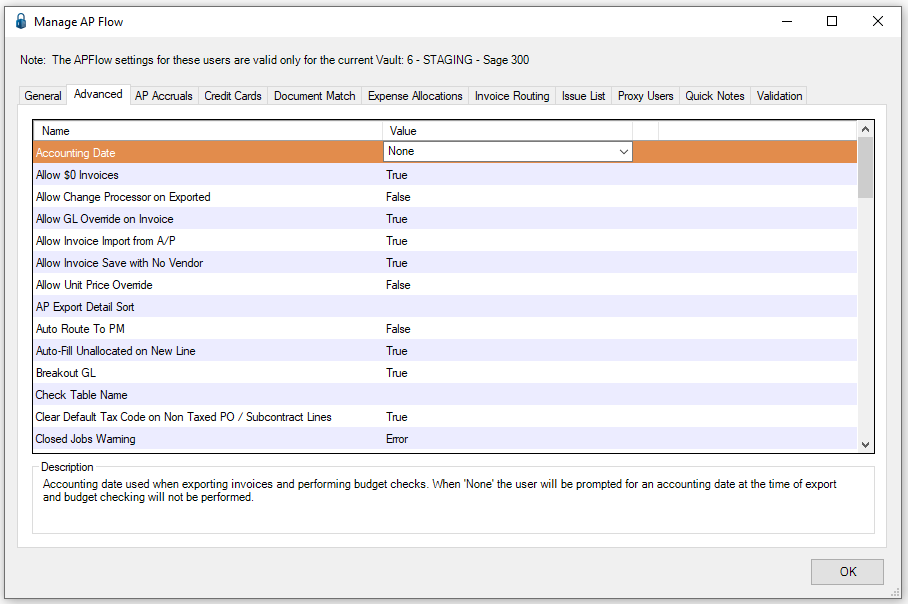
4.In the Accounting Date entry, Value column, select ReceivedDate from the dropdown.
5.Click OK.
Invoice Entry
1.From the ribbon toolbar, click APFlow™.
2.Click Invoice Entry,  .
.
3.From the APFlow™ sidebar, click New Invoice or Edit Invoice.
The Invoice Entry screen similar to the following displays:
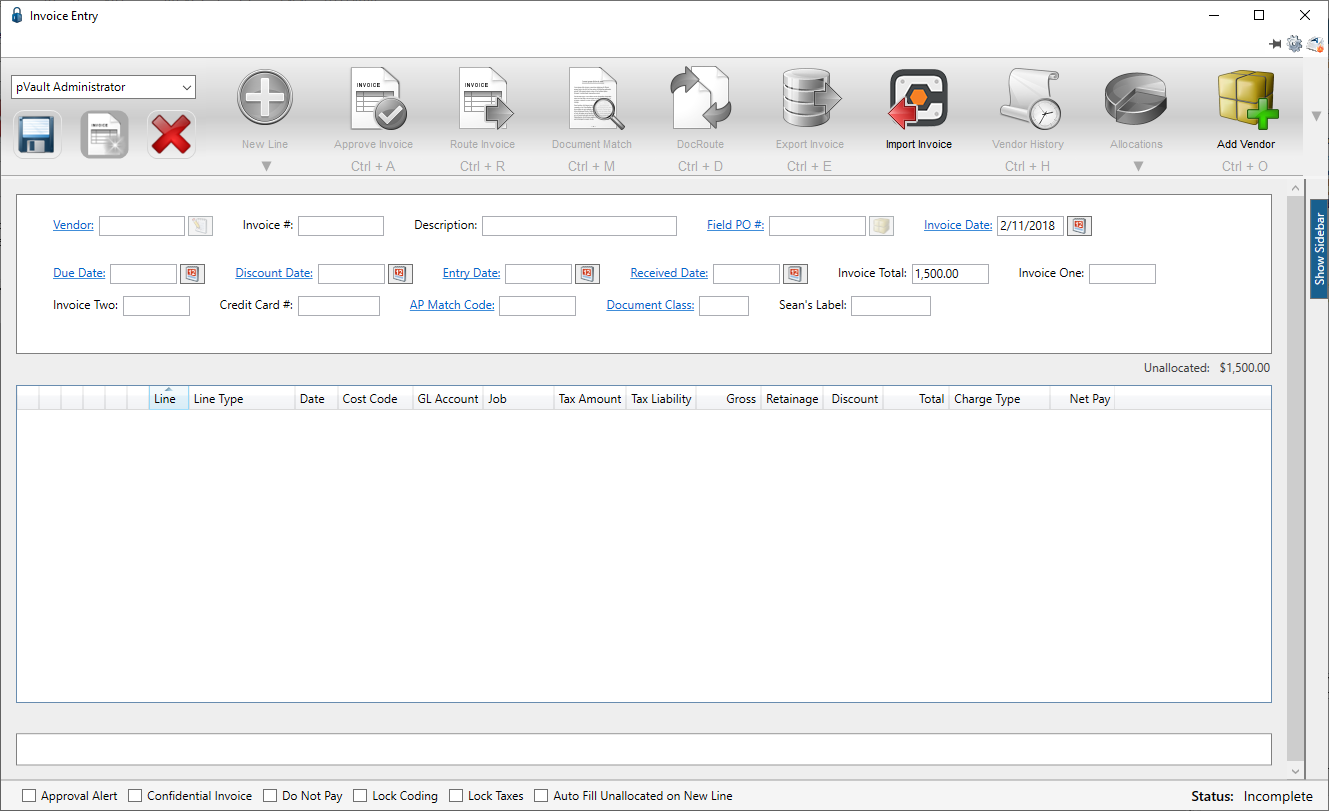
The Received Date field displays in the header pane similar to the following:

In Sage 300
The Received Date field will only display in pVault® if the Date received usage is set to Required or Not required.
If it is set to Not used, the Received Date field will not display in pVault®.
1.In the Accounts Payable module, from the ribbon toolbar, click File.
2.From the File dropdown menu, click Company Settings.
3.Click AP Settings.
The AP Settings window similar to the following displays:
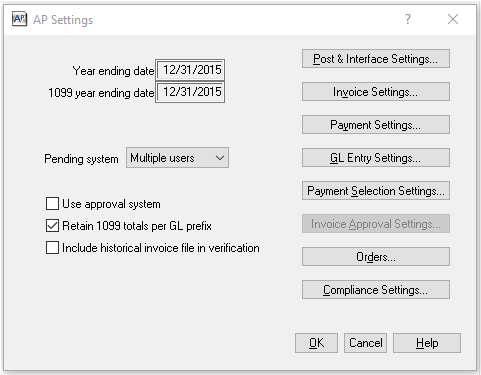
4.Click Invoice Settings.
The AP Settings - Invoice Settings window similar to the following displays:
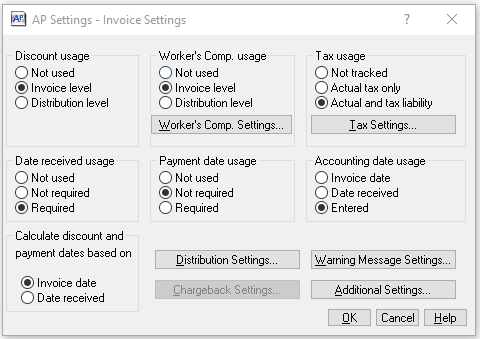
5.Look at the Date received usage box if the Date Received field is not displaying in pVault®.
Important: The Date received may also impact the discount and payment date calculations based on the selection made in the Calculate discount and payment dates based on box.