In pVault®
Setup
1.From the ribbon toolbar, click APFlow™.
2.Click Manage APFlow™,  .
.
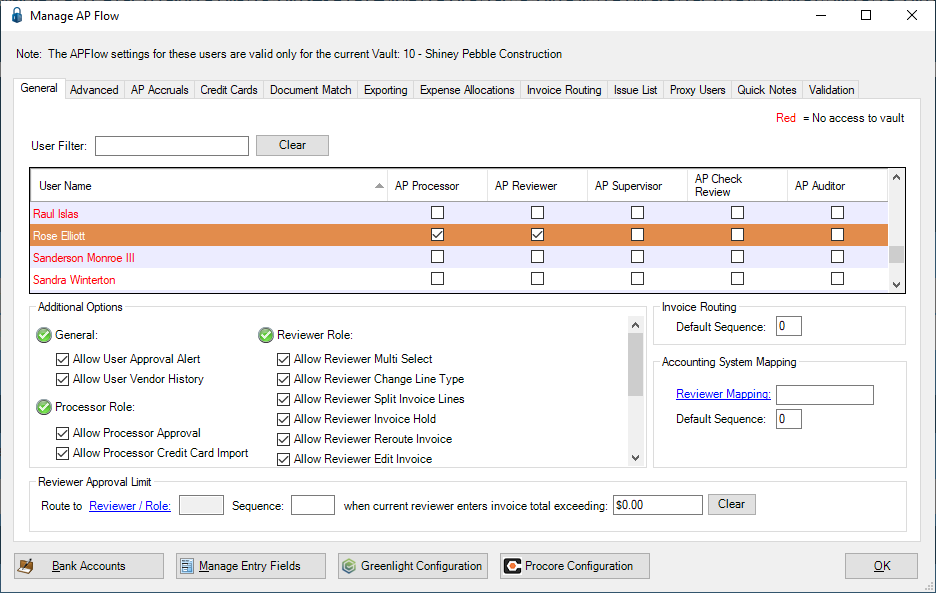
The following window similar to the following displays with the General tab active:
3.Click the Advanced tab.
The window similar to the following displays:
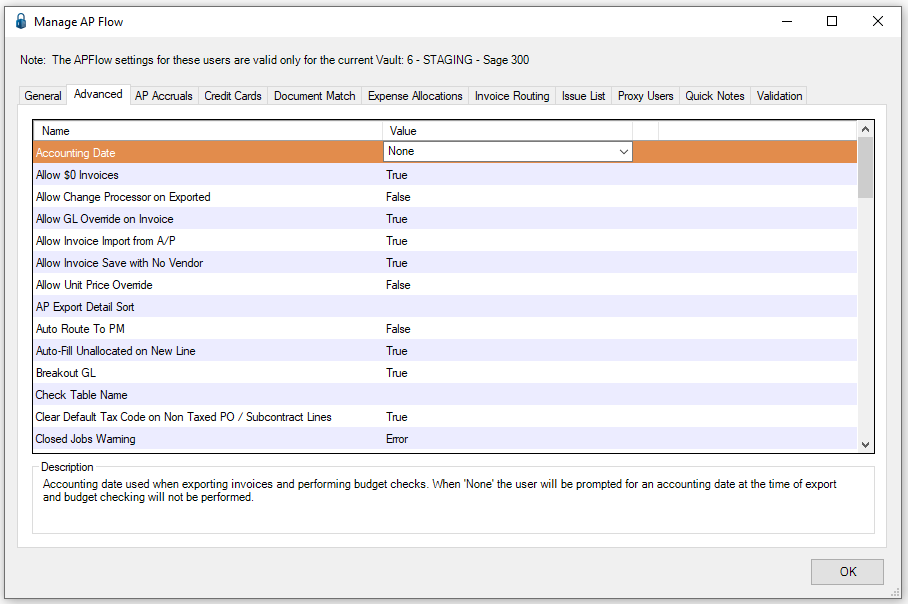
4.In the Enable AP Account entry, Value column, select True from the dropdown.
5.Click OK.
Invoice Entry
1.From the ribbon toolbar, click APFlow™.
2.Click Invoice Entry,  .
.
3.From the APFlow™ sidebar, click New Invoice or Edit Invoice.
The Invoice Entry screen similar to the following displays:
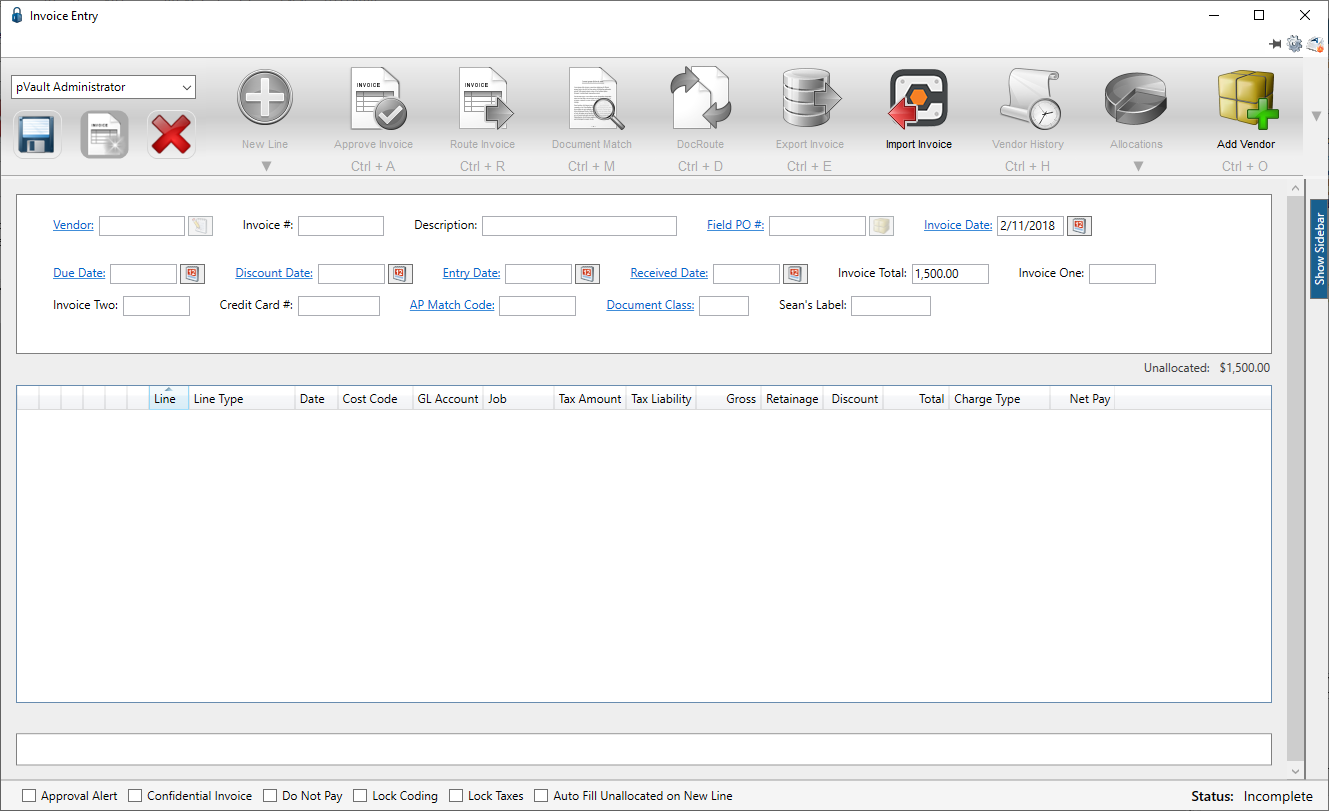
4.In the Vendor field, enter the vendor number or click the Vendor field label to access the Vendor lookup dialog box.
5.In the Invoice # field, enter the number of the invoice.
At any time after the Vendor and Invoice # fields are populated, the New Line icon,  , becomes active and line types may be selected from the dropdown to generate blank invoice lines.
6.From the New Line dropdown, select the appropriate line type.
When an invoice line displays in the middle pane, the associated invoice line grid displays and will resemble the following:
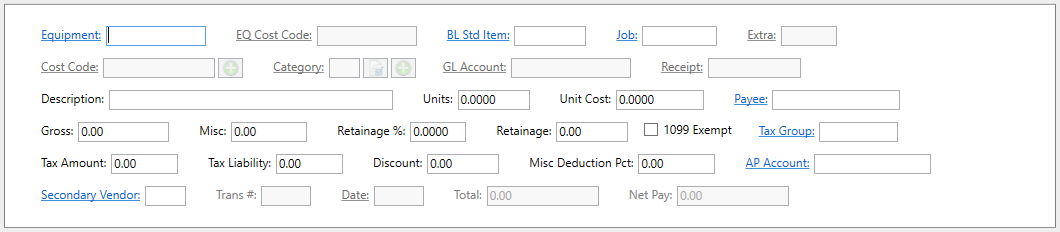
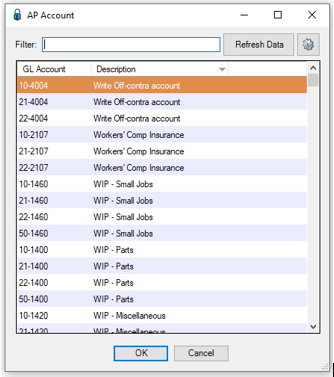
If the AP Account field is not populated, an AP Account lookup similar to the following displays by clicking the AP Account field label:
In Sage
1.In the Accounts Payable module, from the ribbon toolbar, click File.
2.From the File dropdown menu, click Company Settings.
3.Click AP Settings.
The AP Settings window similar to the following displays:
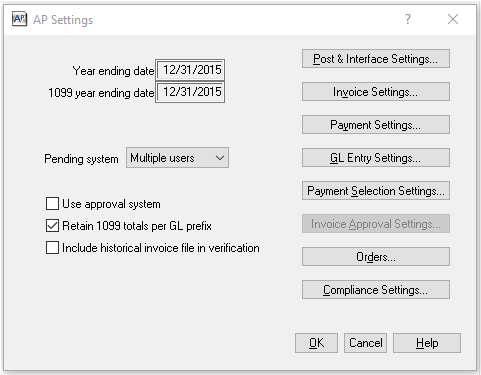
4.Click GL Entry Settings.
The AP Settings - GL Entry Settings window similar to the following displays:
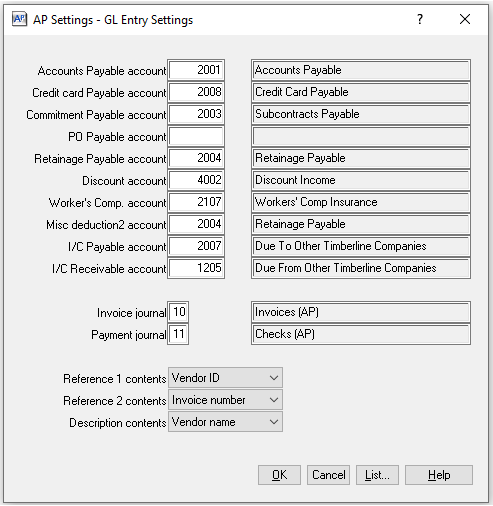
The 4-digit number in the Accounts Payable account field should match the 4-digit number in the pVault® AP Account field.
Note: The leading 2-digit number in the pVault® AP Account field generates from the Invoice journal field located on the AP Settings - GL Entry Settings window.