The following is an example of how to navigate through creating a new form based on an available template. Your Web Admin will determine what forms are appropriate based on your company's needs.
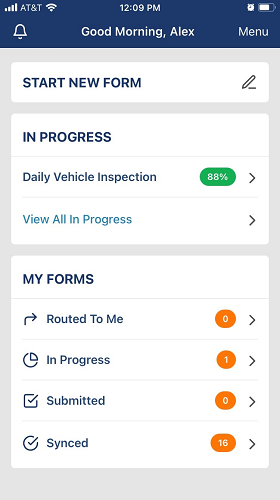
This is the dashboard main screen.

1.Click  .
.
When you click Start New Form, a screen similar to the following displays:
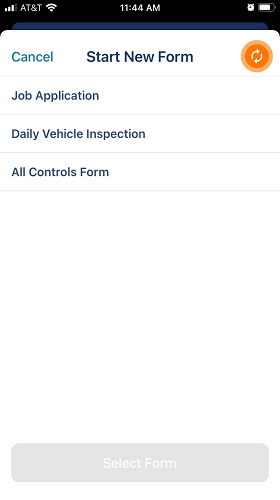
Note: Those form templates created by your Web Admin, to which you have access will be listed here.
2.Click the  icon.
icon.
The following screen displays:
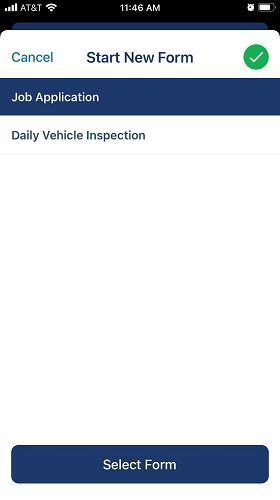
3.Click to highlight the form template.
You will be taken through all the fields necessary to complete whatever form template you select.
4.Click Select Form.
The following screen displays:
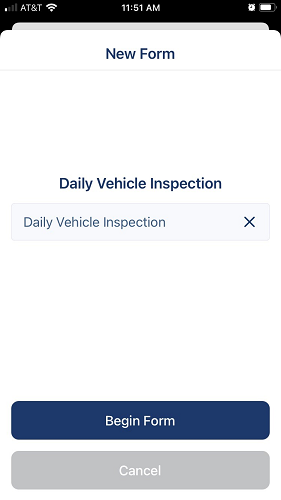
Note: In this instance, a new Daily Vehicle Inspection form is being created.
5.Click Begin Form.
The following screen displays:
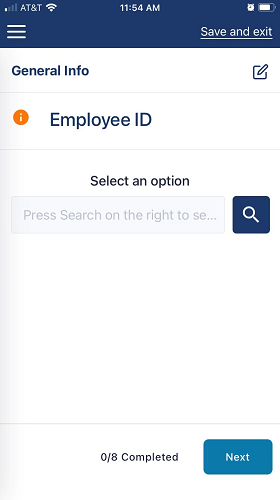
6.Click the  to access the lookup list.
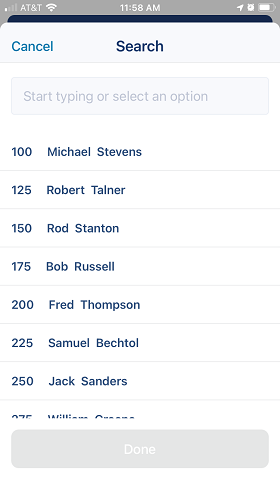
7.Once the lookup list displays, narrow down the list by typing in the Search field.
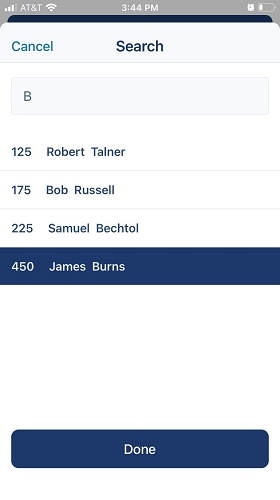
8.Narrow your search even more and then highlight the appropriate entry.
9.Click Done.
10.Click Next.
The Vehicle Information, Unit # screen displays:
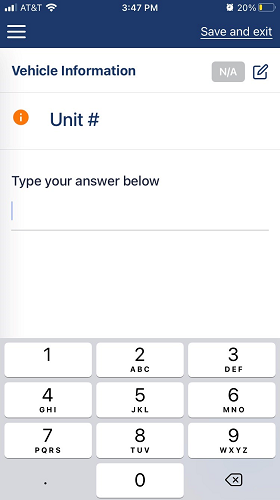
11.In the text field, enter the vehicle number.
Note: This is a numeric field only.
If your company does not assign unit numbers, click  to indicate that this particular category is not applicable.
12.Click Next.
The Week Ending screen displays:
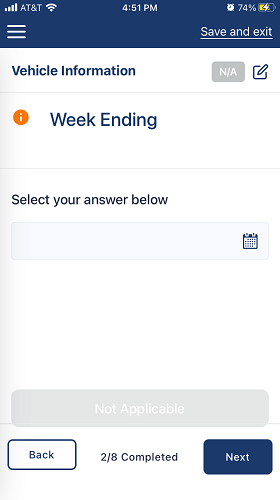
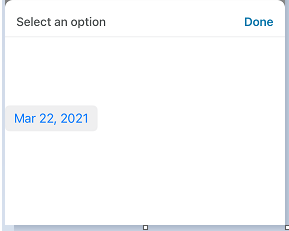
13.Click the calendar icon to display the current month. Select the appropriate Week Ending date.
If you click in the blank field, the current date will display in the space below the field similar to the following:
14.Click Next.
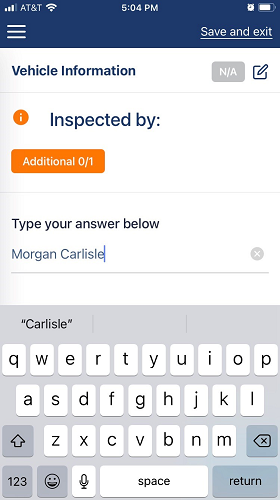
The Inspected by screen displays:
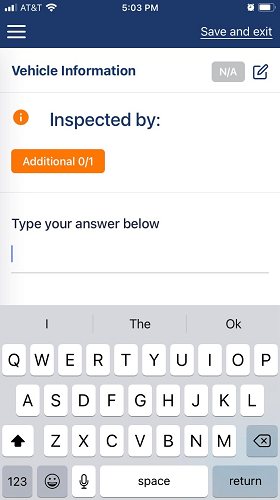
15.In the text field, enter your name or the name of the individual who inspected the vehicle.
16.If a signature is required, click Additional 0/1.
The following screen displays:
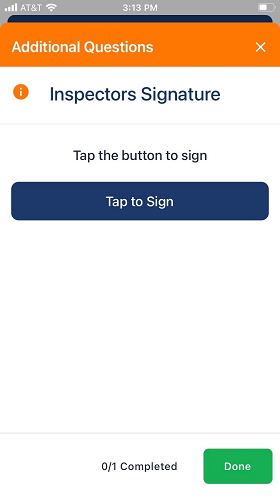
17.Click Tap to Sign.
The following screen displays:
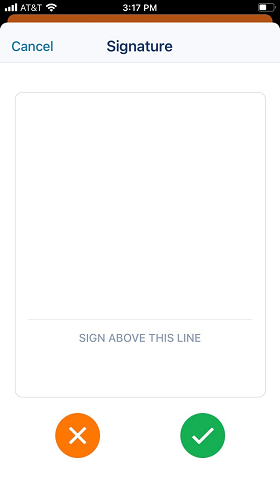
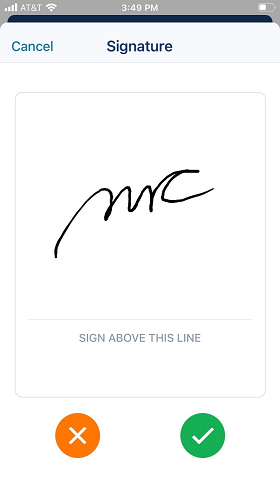
18.Sign in the space indicated.
The following screen displays:
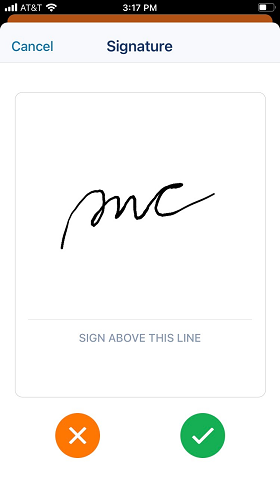
19.Click the checkmark.
The following screen displays:
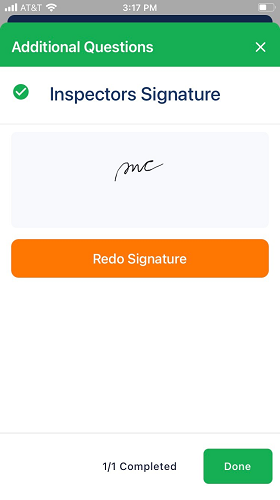
20.Click Done.
The completed Inspected by screen resembles the following:
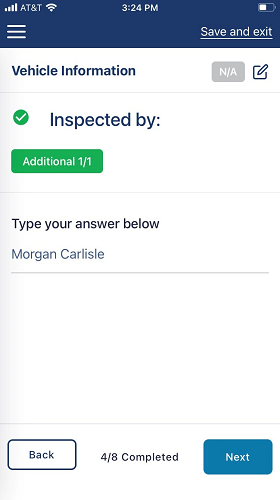
21.Click Next.
The Inspection Checklist, Unit Washed \ Interior Cleaned screen displays:
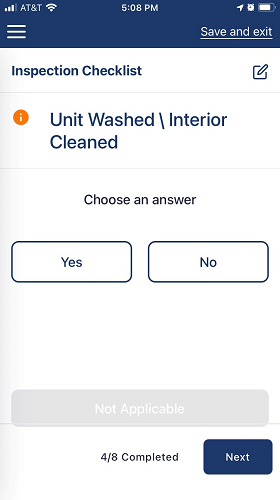
22.Click Yes or No, as appropriate.
23.Click Next.
The next inspection checklist screen displays:
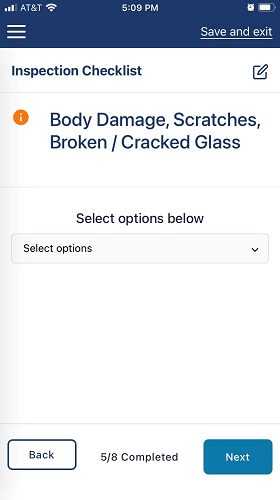
24.Make your selection based on the dropdown list:
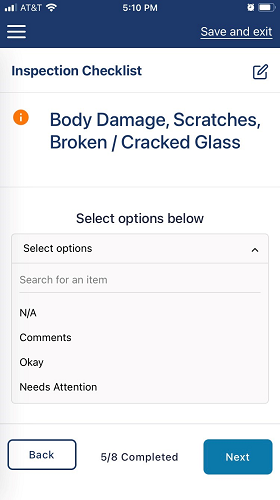
25.Click Next.
The following screen displays:
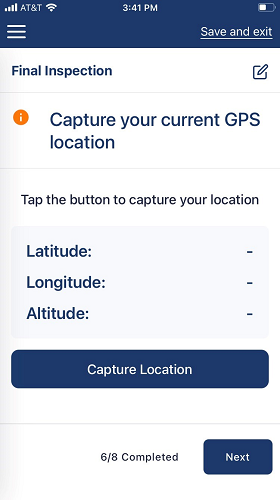
26.Click Capture Location.
The following screen displays:
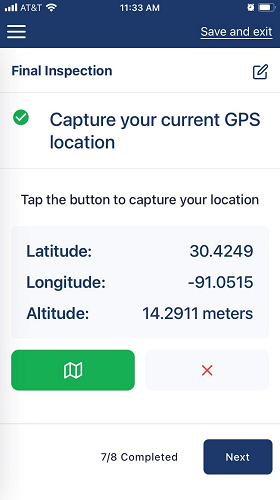
Note: To view a map of your location, click  .
.
27.Click Next.
A Final Inspection Signature screen displays:
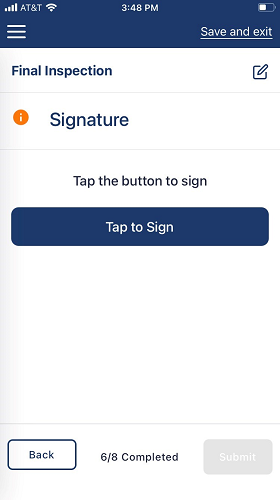
28.Click Tap to Sign.
The next screen displays:
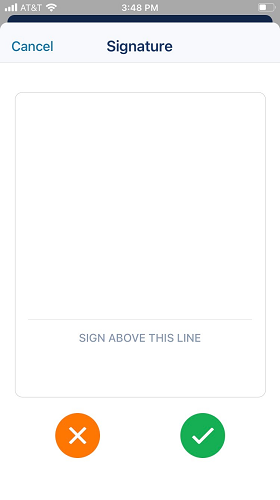
29.Sign in the space indicated.
The screen will resemble the following:
30.Click the check box.
The final screen displays:
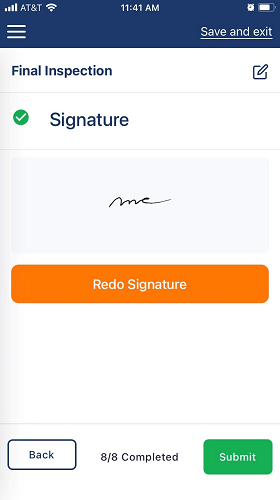
31.Click Submit.
The dashboard main screen will display:

32.Check out the MY FORMS grid. Note that there is one form In Progress (that form is identified in the IN PROGRESS grid). The form you just created and submitted, is indicated by the 1 in Submitted.
Note: The form is in the process of being synced if the following screen displays:
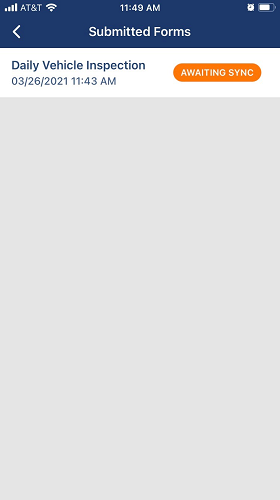
After the form is synced, this screen will be blank.
The following dialog box displays:
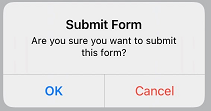
33.Click OK.
The newly submitted (and newly synced) form will be included in Synced.