Sage Paperless Construction document types have many more optional settings than are available in the Add New Document wizard.
1.From the ribbon toolbar, click Administration.
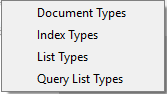
2.Click the Types dropdown,  .
.
3.Click Document Types.
A Document Types window similar to the following displays:
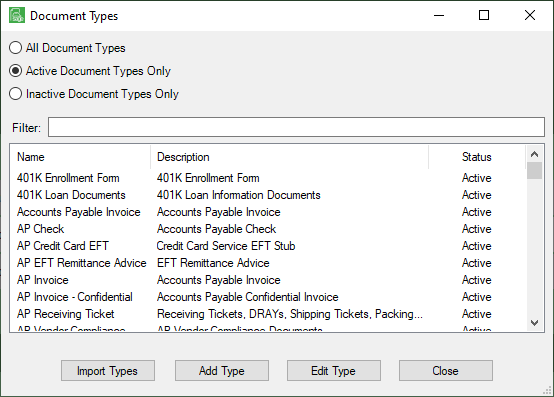
Note that there is a Filter text field where you can start to enter a document type to narrow the list.
4.Start typing in the Filter field to narrow the list similar to the following:
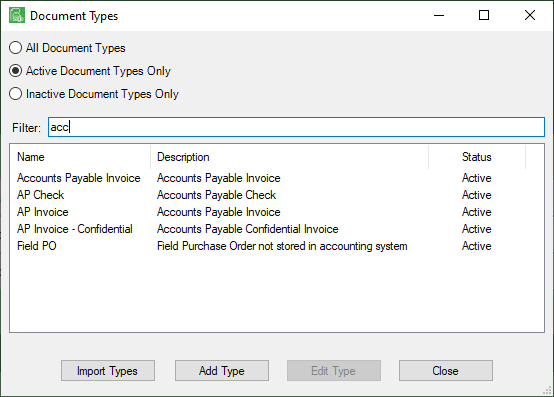
Not only can you filter on the Name column entries, but you can also filter on the Description column entries too.
5.Click Edit Type.
The General tab contains "general" information about the document type selected.
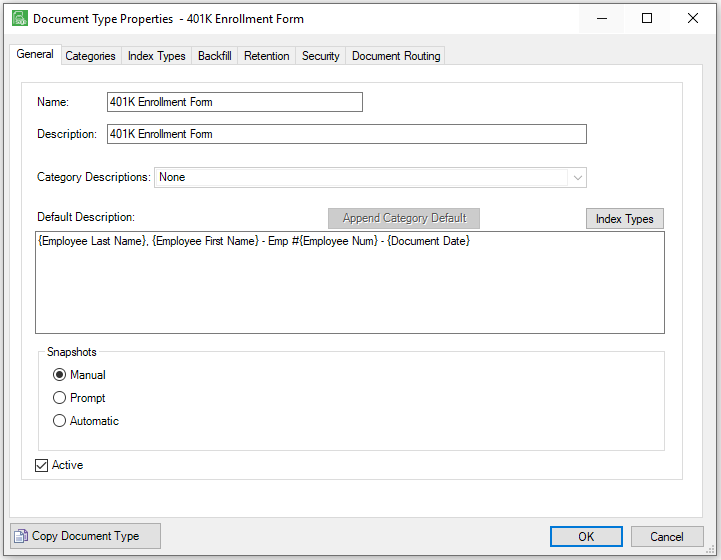
Name |
The name of the document type. |
Description |
A brief description of the document type. |
Category Description |
Administrators can set up "default" descriptions for a document category. Use this dropdown menu to select the document category from which to copy default descriptions. Once selected, place the desired position within the Default Description field. |
Append Category Default |
Insert the category default description text. |
Index Types |
A list of index variables that can be inserted into the Default Description field as placeholders for index information. |
Default Description |
Automatically assigned to the document when indexing and storing a document in Sage Paperless Construction. This ensures that all documents stored in Sage Paperless Construction are consistently named. The description can be built using static text, as well as values stored in index fields. |
Snapshots |
Select how to handle document snapshots for this document type. Copies of indexed documents made before new changes are saved. Used to keep a "revision" history of the document. For details on taking snapshots for archive purposes, click here. |
Manual (Snapshots) |
No need to select Manual. This is the default setting. Users must manually click the Take Snapshot icon to take a snapshot of the document currently being viewed. |
Prompt (Snapshots) |
Select Prompt to systematically prompt the user, asking if they want to take a snapshot every time an altered document is saved. The user must respond either Yes or No. |
Automatic (Snapshots) |
Select Automatic to systematically take a snapshot of the document every time an altered document is saved. No user intervention is necessary. |
Active |
Document Types cannot be deleted in Sage Paperless Construction but can be made inactive by deselecting this check box. This hides the inactive document type from any non-System Administrative users so they cannot inadvertently index new documents with this document type. A user can; however, continue to search and display inactive document types. |
Copy Document Type |
Use to make a copy of the current document type. (Refer to Copying a Document Type ) |
The Categories tab allows the current document type to be assigned to one or more document search categories. These categories are used to group "like" document types into a folder structure on the Search screen.
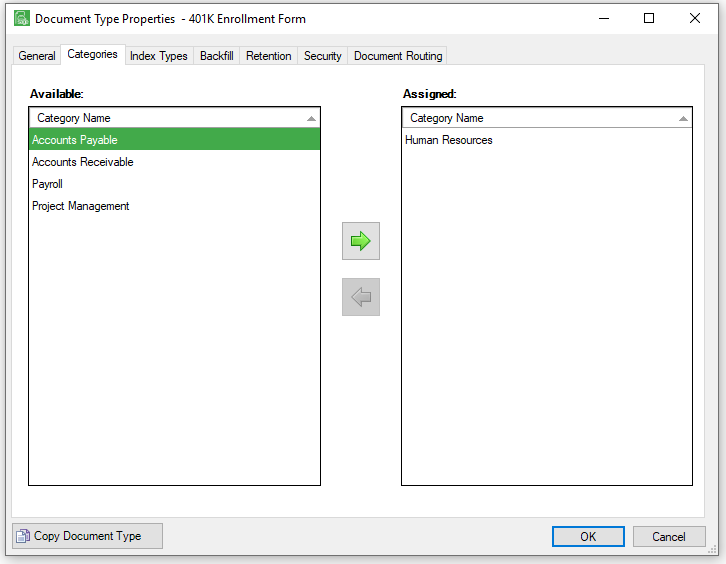
1.Highlight to select the category to assign the document type to in the Available column.
2.Click the  icon to move the category to the Assigned column.
Notes:
•A document type can be assigned to more than one category.
•Document types are always displayed under the "All Document Types" category, regardless if they are assigned to other individual categories.
The Index Types tab displays the associated index types for this document type. In addition to the Required, Active, and Multiple check boxes (explained below), more index types can also be added to this document type, or change the display order of the index types associated with this document type by clicking on their respective check boxes in this screen.
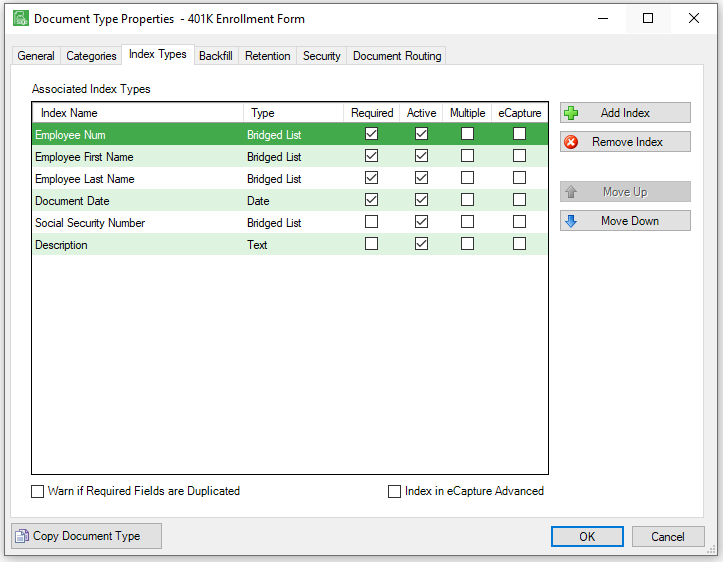
Index Name |
The name of the Index Value. |
Type |
The type of data that the index type is validated as. |
Text (Type) |
Index data is treated as text. |
Numeric (Type) |
Index data is validated as a numeric value. |
Date (Type) |
Index data is validated as a date. |
List (Type) |
Index data is pulled from a predefined list of values. |
Bridged List (Type) |
Index data is queried from the accounting system that is bridged to the vault. |
Query List (Type) |
Index data is queried from a custom query designed by the system administrator. |
Required |
If checked, signifies a user must enter a value for the index type to index a document of this document type. |
Active |
If checked, signifies that the index type is active and can be used to index a document of this document type. |
Multiple |
If checked, signifies a user can add multiple values in an index field. For example, an AP Check may pay for more than one AP Invoice; selected for the Invoice Number index type so multiple invoice numbers can be entered when indexing the check document. |
eCapture™ |
If checked, signifies that the index type identified in the Index Name column is indexed in eCapture™ Advanced. |
Add Index |
Displays the Index Types screen which lists the available index types that can be added to this document type. |
Remove Index |
Used to remove the currently highlighted index type from the document type. The system checks to see if there are index values currently stored for this document type and warns the user before the index type is permanently deleted. |
Move Up |
Used to move the currently highlighted index type up in the list of index values. Use this to change the order the index values displayed while indexing documents. |
Move Down |
Used to move the currently highlighted index type down in the list of index values. Use this to change the order the index values displayed while indexing documents. |
Warn if Required Fields are Duplicated. |
Check if system should check for the same document type with matching fields that are marked "Required". The system checks for a duplicate when the user clicks Index on the Indexing screen. If identified, the Duplicate Documents Detected screen displays. |
Index in eCapture™ Advanced |
If the document type should be indexed in eCapture™ Advanced, click the Index in eCapture™ Advanced check box. The default is unchecked. Note: This check box will only display if the client has an eCapture™ Advanced license. |
Create New |
Click to create a new, duplicate document. |
Replace |
Click to replace the original document with the document currently being indexed. |
Append |
Click to append this document to the end of the original document. |
Cancel |
Click to return to the Indexing screen. |
The Backfill tab is used to assign index “backfills” to the document type. Backfills are queries that return additional index values from Sage Paperless Construction, the bridged accounting system, or other external databases connected through a query list.
The query list is based upon certain “trigger” index values. (Refer to Backfills on configuring backfills details.)
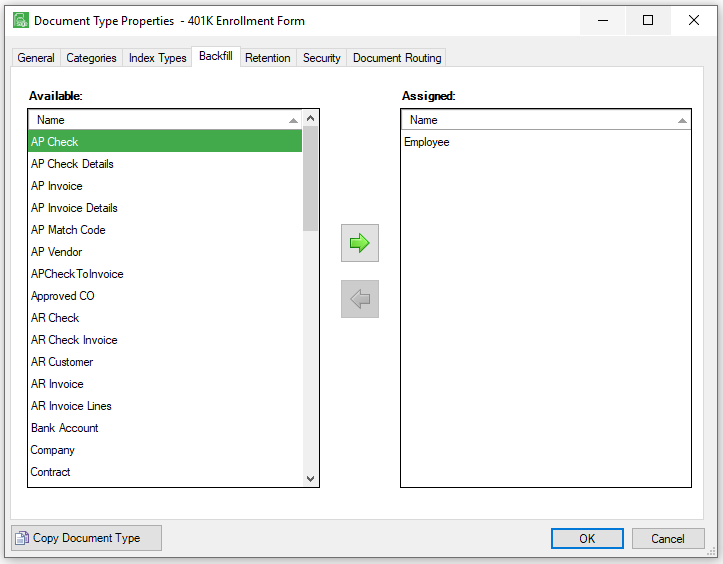
1.In the Available pane, select the backfill(s) to assign to the current document type.
2.Click the icon to move it to the Assigned pane.
The Retention tab allows viewing and editing of the Retention Period, Retention Type and Archive Period for a document type. These settings determine the period of time that must elapse before the purging process can delete the documents from primary storage.
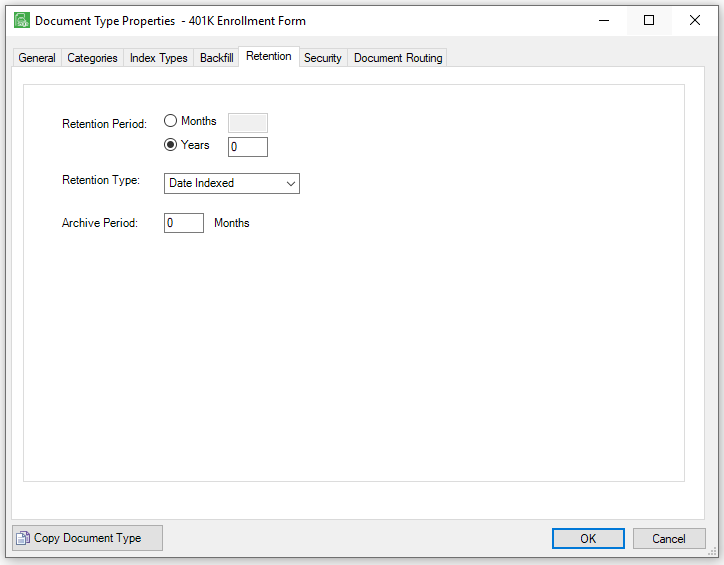
The Retention Period is based on the Retention Type.
The Archive Period refers to the length of time, in months, the image files should move from the production server to the archive media.
1.Based on the document type, select the proper Retention Type.
2.Enter the appropriate Retention Period amount, according to the following:
•Date Indexed (Months or Years radio buttons are active) – document can be purged once indicated months or years have passed since the document was indexed.
•Calendar Year (Years radio button active only) – document can be deleted once indicated years have passed since January 1st of the year in which the document was indexed.
•Fiscal Year (Years radio button active only) – document can be deleted once indicated years have passed since the first month of the fiscal year in which the document was indexed.
3.Enter the Archive Period for this document type in months. (Refer to Automatic Archiving )
The Security tab is used to assign vault groups that can access and work with the document type being viewed.
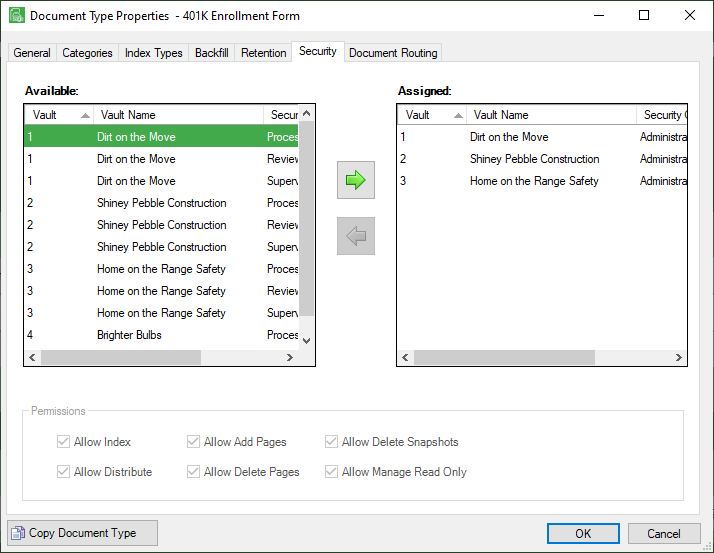
1.Assign groups that can work with this document type by selecting them from the Available pane.
2.Move them to the Assigned pane using the icon.
3.Assign security permissions to these groups by first choosing the security group(s) in the Assigned pane, then selecting the desired permissions.
Allow Index |
Allows user to index documents of this document type or change the indexes of a previously stored document. |
Allow Distribute |
Allows user to distribute documents of this document type (i.e. printing, emailing, or saving to a file). |
Allow Add Pages |
Allows users to add pages to existing documents. |
Allow Delete Pages |
Allows users to delete pages from previously indexed documents of this document type. |
Allow Delete Snapshots |
Allows users to delete document snapshots. |
Allow Manage Read Only |
Allows users to turn on or off the “read only” flag on documents. |
Note: Assign permissions to individual security groups by selecting them one at a time from the Assigned column. Shift – Click the groups to highlight more than one group.
4.Click Apply To Selected to apply the permissions to the selected groups, once permissions are assigned.
If the company purchased the Doc Route module, the Document Routing tab will be visible. This is where to assign a default subject line for this document type when it is routed to a user for review.

Design the Default Subject. Type in the appropriate text and then click the Index Types to insert index value place holders. When users quick route a document of this type, the quick route subject will default to settings established here.