
|
Save
|
This is disabled unless there are changes to save.
Note: User will still be prompted in a dialog box to save changes.
|

|
View Document
|
1.Click to see the current invoice.
2.Click Approve Invoices to return to Approve Invoices. |

|
Approve Invoice
|
1.Click to approve the current invoice.
Validation rules are run against the invoice.
All required coding must be filled in and must be valid.
If there is missing coding, a Validation Results dialog box similar to the following will display:
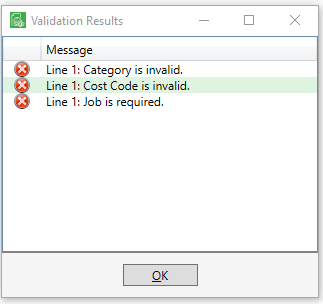
2.Update the invoice coding as required.
3.Click Approve Invoice again.
If the invoice passes validation, a dialog box similar to the following displays:
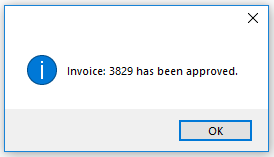
An invoice note is systematically created with the time stamp and invoice lines approved by the Reviewer.
The invoice then moves to the Reviewer’s Approved folder.
The invoice will remain there until it is exported by a Processor. |

|
Reset to Pending
|
By clicking Reset to Pending, a Reviewer can cancel the "approval" of an invoice currently in the Approved folder and move it back to the Pending folder.
1.In the Approved list, click to highlight an invoice that needs to be moved back to a pending status.
A Reset to Pending Reason note text box displays.
2.Type a reason for resetting the approved invoice back to a pending status.
3.Click Save.
The invoice will move out of the Approved folder and redisplay in the Pending folder. |

|
Reject Invoice
|
1.Click the Reject Invoice to return the invoice back to the Processor assigned to the invoice.
2.In the Pending list, click to highlight an invoice that needs to be rejected and returned to the Processor.
A Reject Reason note text box displays where the Reviewer must provide a reason for rejecting the invoice.
3.In the text box, provide information that will help the Processor take the appropriate action with the invoice. |

|
Place On Hold
|
1.Click Place On Hold to keep the invoice in the Pending folder, but with a “hold” status.
2.In the Pending list, click to highlight an invoice that needs to be put on hold.
An On Hold Reason note text box displays where the Reviewer must provide a reason why the invoice was placed on hold.
This required note allows the Reviewer to detail why the invoice was placed on hold.
3.Click Save to close the On Hold Reason text box without approving the invoice.
An invoice placed on hold can be approved by clicking Approve Invoice.
Note: This invoice will be included in the Non-Exported - Hold list. |
|
Document Match
|
1.Click this icon to open the Match Documents window.
2.View the invoice and any supporting documentation that the Processor attached to the invoice.
Note: To read more about Document Matching, click here. |

|
Invoice Info
|
1.Click this icon to display additional information about the invoice and the vendor.
An Invoice Information dialog box similar to the following displays:
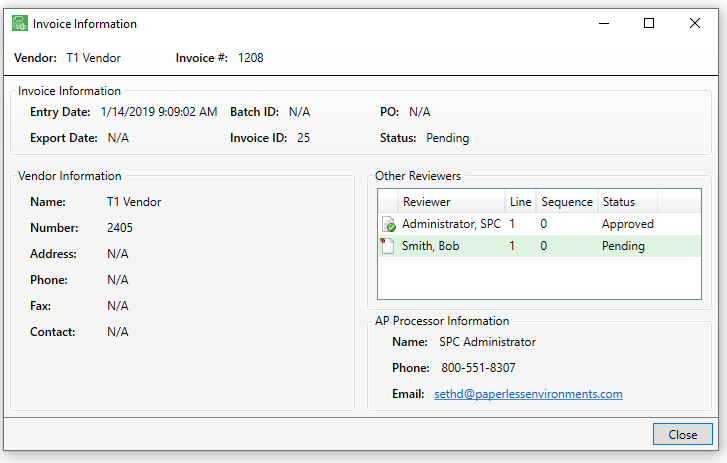
Here the Reviewer can view information concerning the vendor, other Reviewers and the Processor who assigned the invoice.
This provides more information should the Reviewer need to contact the Processor or another Reviewer before approving the invoice.
2.Click Close. |

|
Route Invoice
|
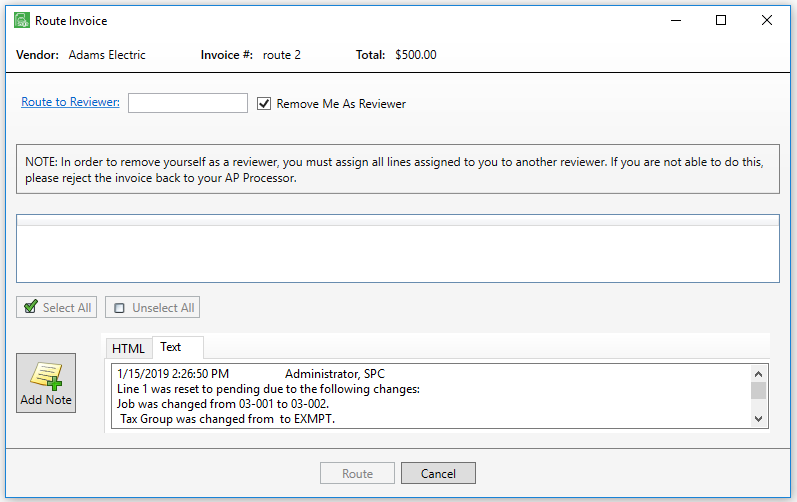
1.Click Route Invoice to route the invoice to other reviewers.
The following Route Invoice dialog box displays:
2.Click Route to Reviewer to access a Reviewers Lookup list similar to the following:
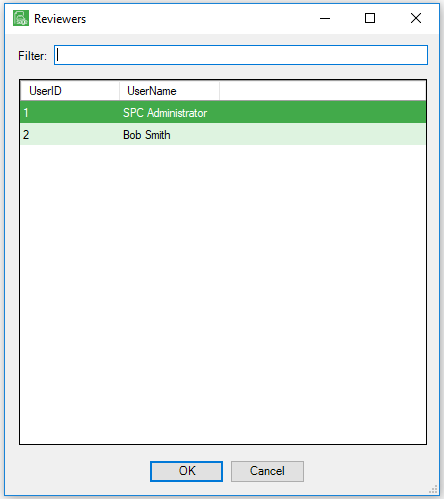
3.Click to select a reviewer from the list.
4.Click OK.
Important: If the current reviewer is trying to route the invoice to another reviewer because the invoice should not be approved by them, click to select Remove Myself as Reviewer.
Note: The routing rules are checked every time an invoice is approved or routed. If the current coding matches against a routing rule, the current reviewer will be put re-added on the invoice by the routing rule. For a Reviewer to truly remove themselves from an invoice review, change the coding information before routing to another reviewer.
|
Line information populates in the middle grid of the Route Invoice dialog box similar to the following:
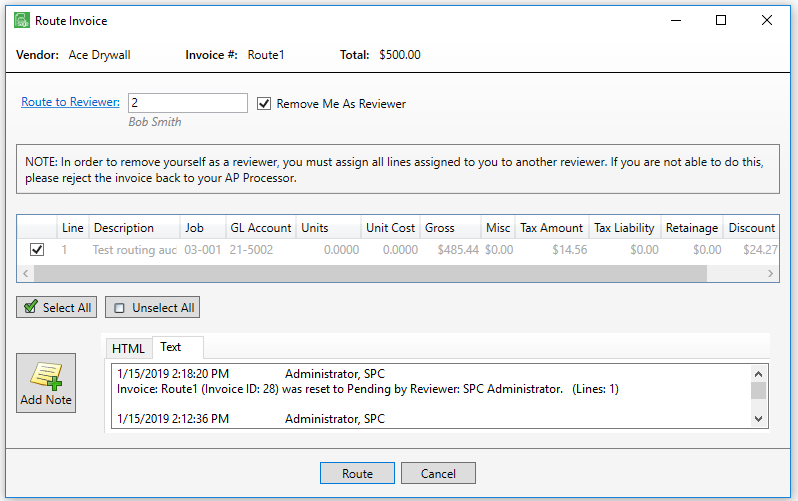
5.Click to select the lines to assign to the Reviewer.
6.Click Add Note,  to open the Invoice Notes dialog box similar to the following: to open the Invoice Notes dialog box similar to the following:
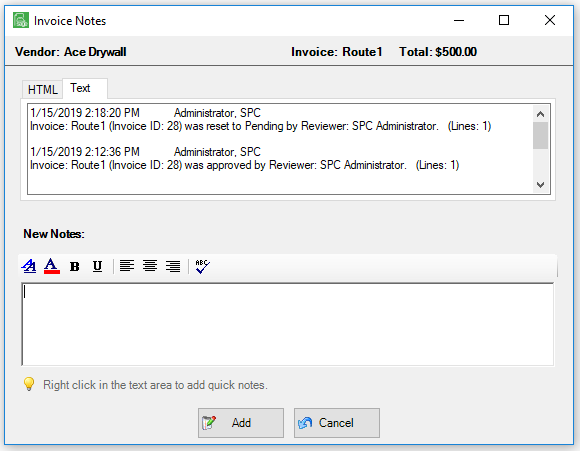
7.If appropriate, add a note in the New Notes text box.
Notes will display in the Text box on the Route Invoice dialog box.
8.Click Route to assign the Reviewer to the invoice.
The new reviewer will instantly see the invoice in their Pending folder. |

|
Vendor History
|
1.Click Vendor History to access the Vendor Invoice History dialog box similar to the following:
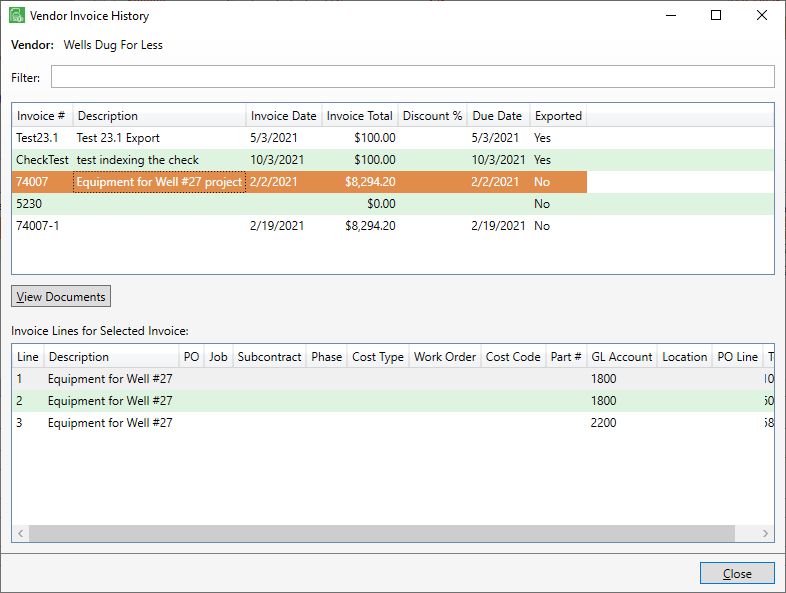
There is a Filter text field where you can start to enter an invoice number to narrow the list.
Not only can you filter on the Invoice # column entries, but you can also filter on the Description column entries too.
2.Click to highlight an invoice.
Invoice lines for the selected invoice display in the bottom pane (Invoice Lines for Selected Invoice).
3.Click View Documents to look at matching documents.
4.Click Close. |

|
Email
|
1.Click to access the Email Image dialog box.
Even if Allow Multi Select is not checked in the Manage APFlow™ screen, multiple invoices can be emailed simultaneously.
The selected invoices will display in the Image List.
2.Determine the Page Range and the Color Format.
3.Click Send.
An email window will display with the Subject Line referencing the invoice(s) and the invoice(s) attached. |

|
Print
|
1.Click to access the Print Preview dialog box.
Even if Allow Multi Select is not checked in the Manage APFlow™ screen, multiple invoices can be printed in rapid succession.
The selected invoices will display in the Image List.
2.Determine the Printer, Print Range and Print Options.
3.Click Print. |

|
Refresh
|
To refresh the Approve Invoices screen, click Refresh.
|