Prerequisites:
•A file to split must already be open in Sage Paperless Construction. A file can be a local file, a network file or a batch already saved in the system.
•The file must be in a support file format. Supported file formats: .BMP, .GIF, .JPG, .PDF, .PNG and .TIF
1.From the ribbon toolbar, click Utilities.
2.Click the Splitter icon,  .
.
The file loaded into Sage Paperless Construction displays on the left of the screen. The Splitter Utility displays on the far right.
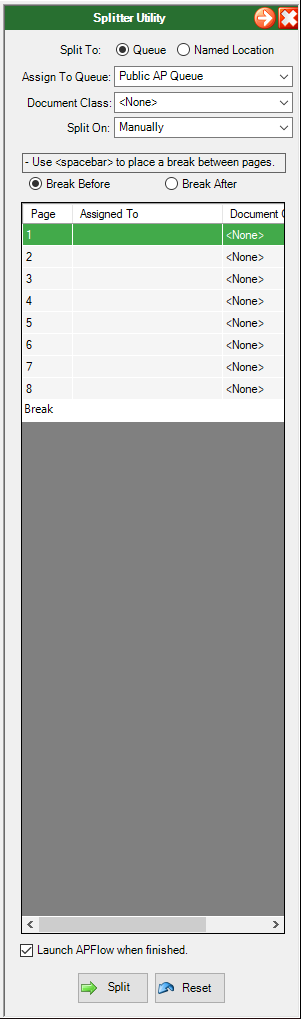
3.Verify that the Queue radio button is selected for the Split To.
4.In the Split On field, use the dropdown to select either Manually (which is the default) or any of the systematic page break choices (which is based on the number of pages in the file).
Systematic page break choices always include Every Page and Entire Page Range.
Systematic page break choices are based on the number of pages in the file or batch needing to be split.
Systematic page break choices are based on divisible numbers.
For example: If the file has 10 pages, systematic page break choices would include 2 and 5.
5.If splitting the file manually, click to select one of the following:
Break Before
Break After
This determines which pages will be included within a group of pages, either the selected page before the location or the selected page after the location of the page.
6.Move to the page by clicking a row in the sidebar grid or using the navigation arrows in the Viewer toolbar.
7.Press the space bar to perform the split.
Note: The file page displaying on the left of the screen correlates to the page highlighted in the Splitter Utility.
8.In the Splitter Utility window, in the Assign To Queue field, use the dropdown to select the queue where the first group of pages is destined.
Optional: Alternatively, click the Assigned To column within the page selection of the grid to have the dropdown display in place.
Important: Files can be split to any queue, even those queues to which the individual performing the split does not have access.
9.Use the dropdown to select the queue where the next group of file pages is destined or click on the Assign To Queue column within the selected row.
A dropdown will display allowing the pages within the selected group of pages to be assigned to a queue.
10.In the Document Class field, use the dropdown to assign a document class to the first group of pages, if appropriate.
Note: This field is optional.
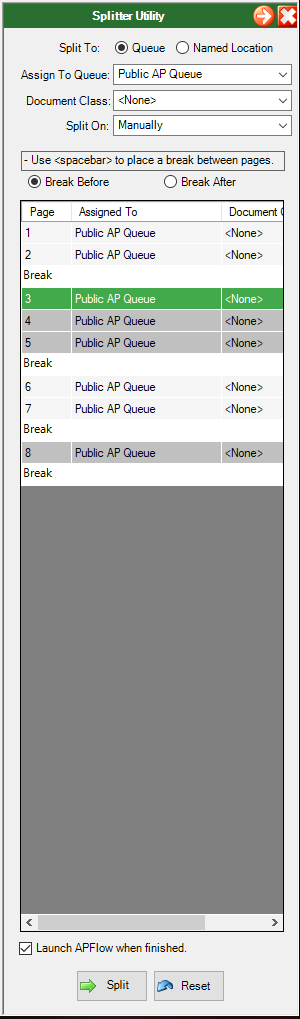
11.Continue splitting the file, assigning pages to queues and assigning pages to document classes (as appropriate) until all pages in the file are addressed.
Once all pages in the file are addressed, the Splitter Utility window similar to the following displays:
12.If appropriate, click to select Launch APFlow™ when finished.
APFlow™ will systematically open once all the pages are assigned and Split is clicked.
13.Click Split.
Note: If at any time the file needs to be returned to its original configuration, click Reset.
Splitting to Named Locations
Click here to read more.