On the Splitter utility, there are radio buttons at the top to split to a queue or to a named location. When choosing a named location you can choose a previously saved one or prompt for a new location. This functionality lets users split files to their machine instead of in Sage Paperless Construction.
Prerequisites:
•A file to split must already be open in Sage Paperless Construction. A file can be a local file, a network file or a batch already saved in the system.
•The file must be in a support file format. Supported file formats: .BMP, .GIF, .JPG, .PDF, .PNG and .TIF
For details on setting up the named location folders, click here.
1.From the ribbon toolbar, click Utilities.
2.Click the Splitter icon,  .
.
The file loaded into Sage Paperless Construction displays on the left of the screen.
The Splitter Utility sidebar similar to the following displays on the far right.
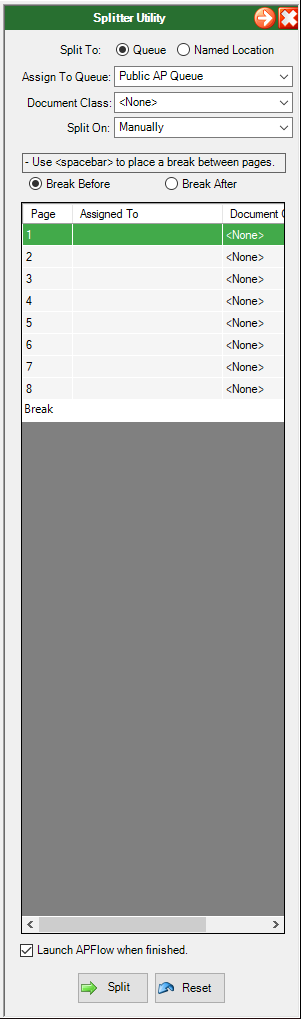
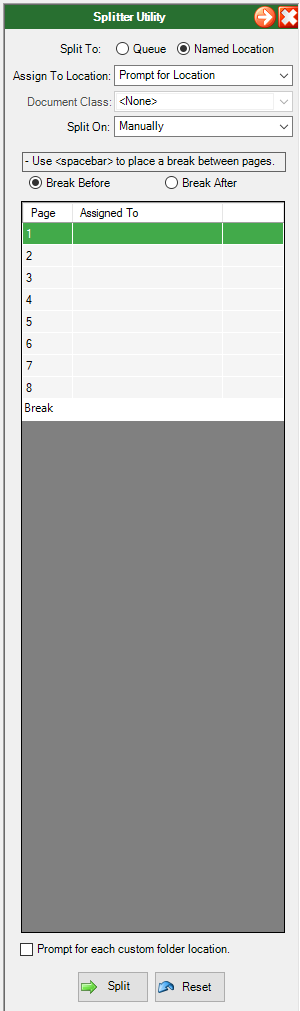
3.For Split To, click the Named Location radio button.
Note: Queue is the default.
The Splitter Utility sidebar redisplays with relabeled fields:
4.Split the document pages as appropriate.
5.If splitting the file manually, click to select one of the following:
Break Before
Break After
This determines which pages will be included within a group of pages, either the selected page before the location or the selected page after the location of the page.
6.Move to the page by clicking a row in the sidebar grid or using the navigation arrows in the Viewer toolbar.
7.Press the space bar to perform the split.
Note: The file page displaying on the left of the screen correlates to the page highlighted in the Splitter Utility.
8.With the first row of a section highlighted, click the dropdown in the Assign To Location field and select the location.
9.Repeat step 5 for each section.
10.Click to select the following:
Prompt for each custom folder location.
There are pre-configured named locations, but there is a "named location on the fly" option available by clicking to select the Prompt for each custom folder location.
When this function is selected, any Prompt for Location portion will display a dialog box so the user can identify to where that document portion should be saved.
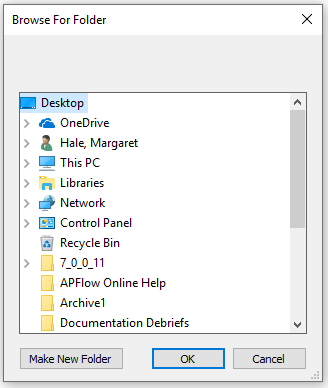
If this function is not selected, the Prompt for Location dialog box displays only once (no matter how many Prompt for Location portions exist), so the user can identify to where all Prompt for Location portions should be saved.
11.Click Split.
If the split documents were a batch, a dialog box similar to the following displays:
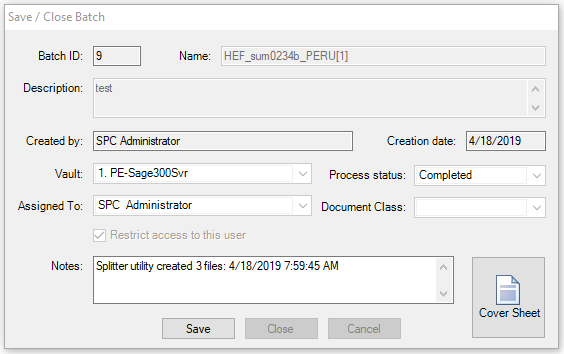
12.Click Save.
The following dialog box may display:
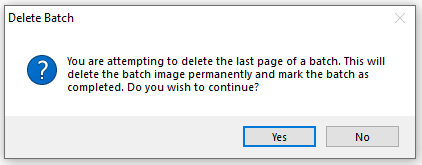
13.Click either Yes or No as appropriate.