After you have captured the document, that document is temporarily stored in a queue. This is where you will index it.
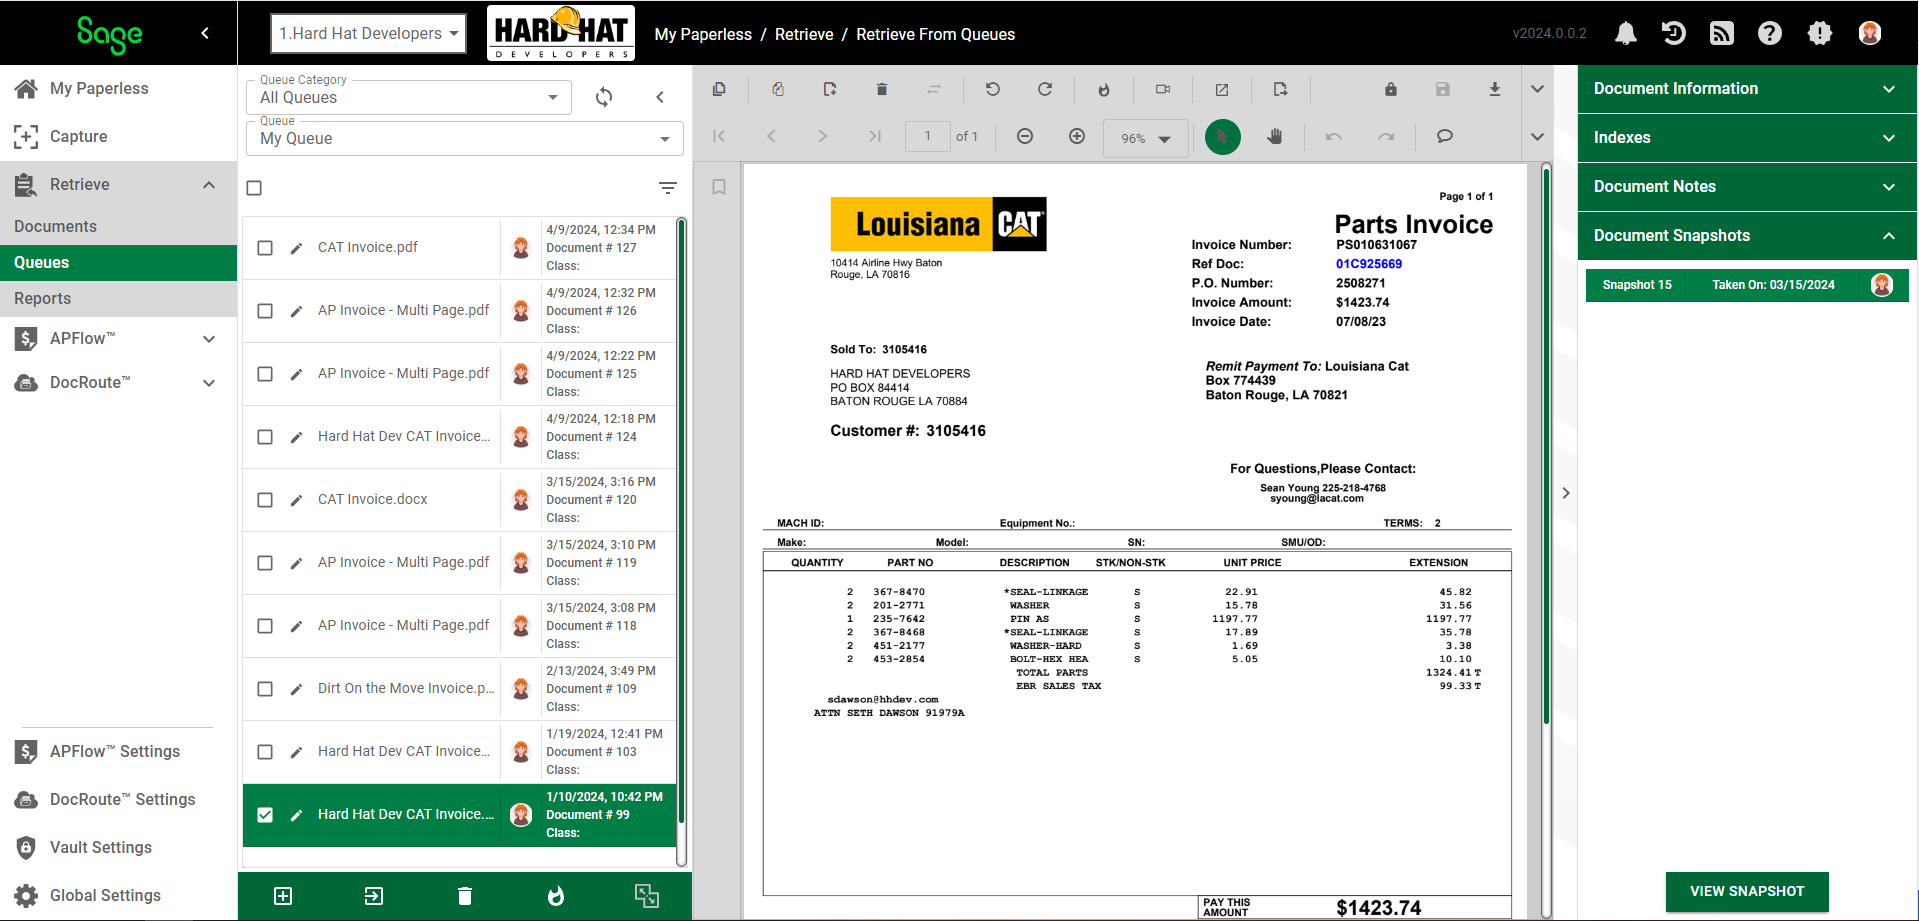
1.From My Paperless, click Retrieve.
2.From the Retrieve navigation bar, click Queues.
3.In the Document Information sidebar, click the Indexes header to expand it.
This is where you will index your document.
4.The Page Options grid, Option field will default to Entire Document. This is the default. If you need to index a single page of a multi-page document, click the dropdown arrow.
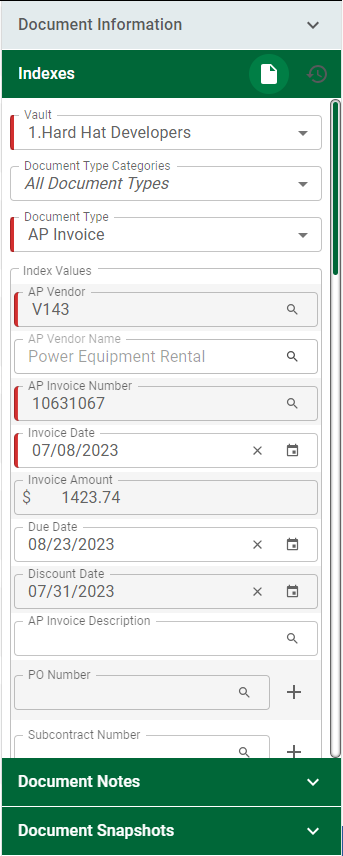
5.The Vault field defaults to the current vault. Click the dropdown arrow to change vaults, if applicable.
6.The Document Type Categories field defaults to All Document Types. Click the dropdown arrow to select the appropriate document type.
The Index Value fields that display are based on the Document Type category selected.
Note: To add or modify Document Categories and their associated Document Types, go to Global Settings. In the Global Settings navigation bar, click the Documents dropdown and click Document Categories. For details, click here.
The Index Values grid displays. In this example, Accounts Payable is the Document Type Category and AP Invoice is the Document Type.
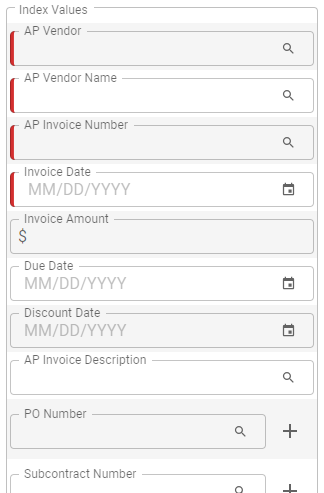
7.Enter Index Values in the fields that display. This is the information you will search if you want to view the document once it is stored.
Important: The blank check boxes in front of each Index Values field are there to speed up your data entry. This series of check boxes is where you can set up session defaults. For example, if you have a series of documents from the same vendor (or company name) that you need to index, enter the company name as you index the first document. Click the associated check box. When you bring up the next document to index, the Company Name field will be system-populated with the company name you entered previously. The session defaults will be in place until you 1) remove the checkmark or 2) you log out of Sage Intacct Paperless.
8.In the Notes text box, if you have information to enter concerning the document being indexed, enter that information in this text box.
9.Click  , located in the Indexes header of the Document Information sidebar, to index the document.
•For details on accessing stored documents, click here.