Cost Codes and Categories can be entered that are not currently set up for a specific job.
Important: The same functionality exists for both Cost Codes and Categories. Similar dialogs generate.
Prerequisites
• Sage 300 Accounting only
• Advanced Bridge Setting, Cost Codes on the Fly, must be set to True.
1.In the ribbon toolbar, click APFlow™.
2.Click Invoice Entry.
3.From the APFlow sidebar, click New Invoice.
A blank Invoice Entry screen displays:
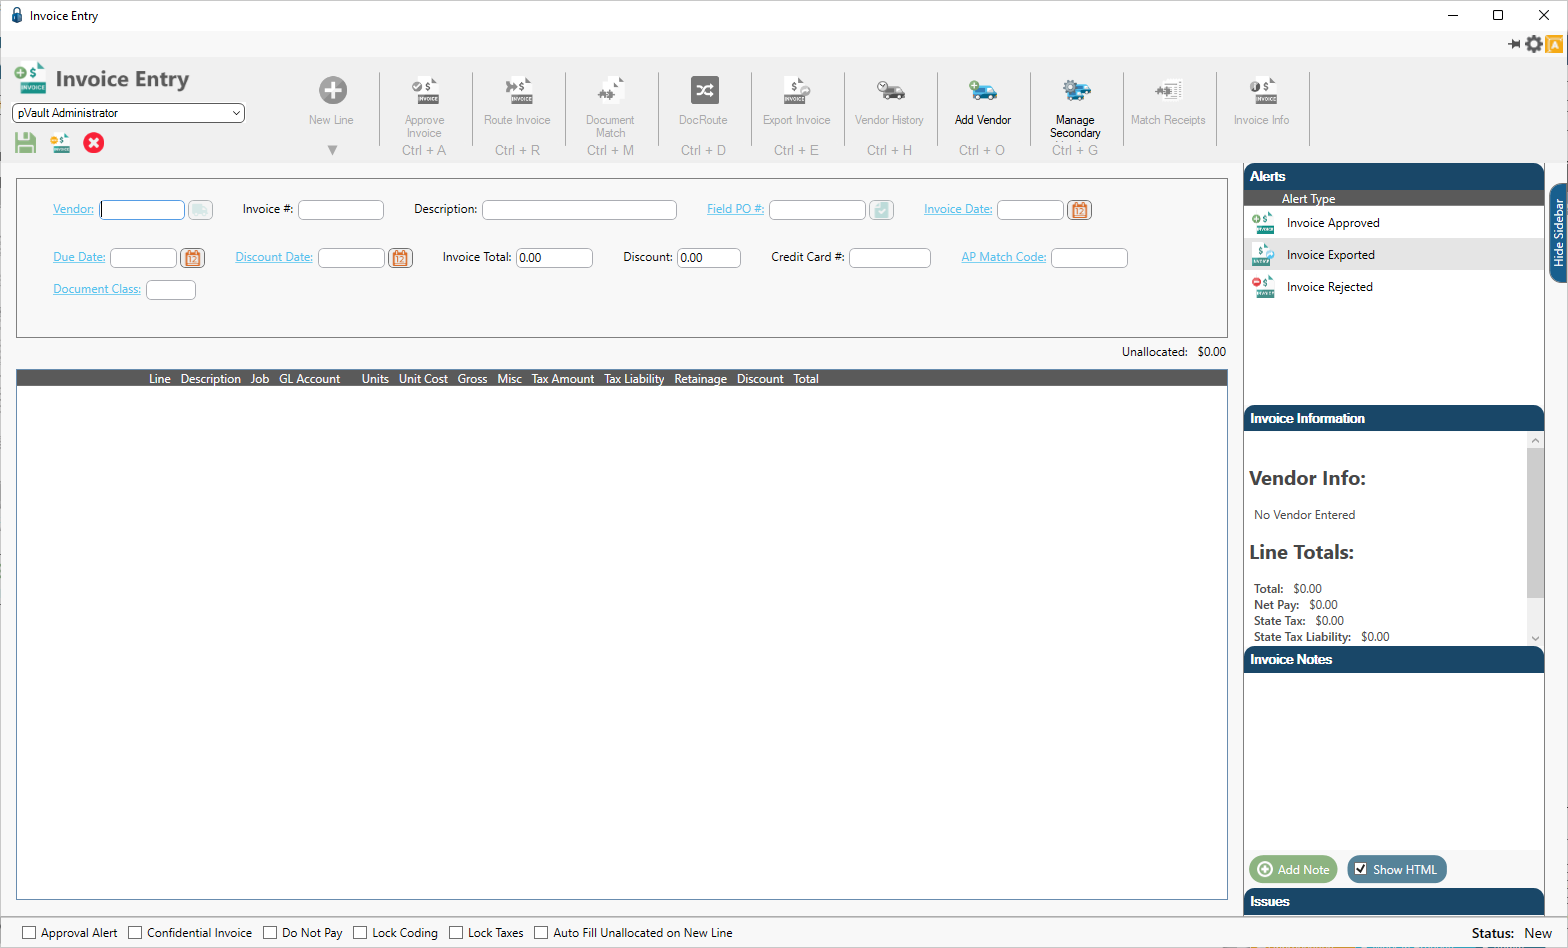
4.In the Vendor field, use the lookup or type in a vendor number.
5.In the Invoice # field, enter the associated invoice number.
6.Enter available information in other fields.
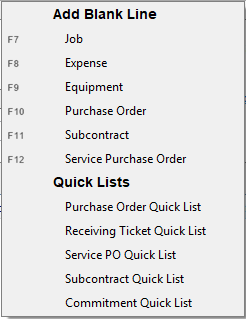
7.Click the New Line dropdown.
8.Click one of the Add Blank Line items, (except Expense).
The Invoice Entry screen resembles the following:
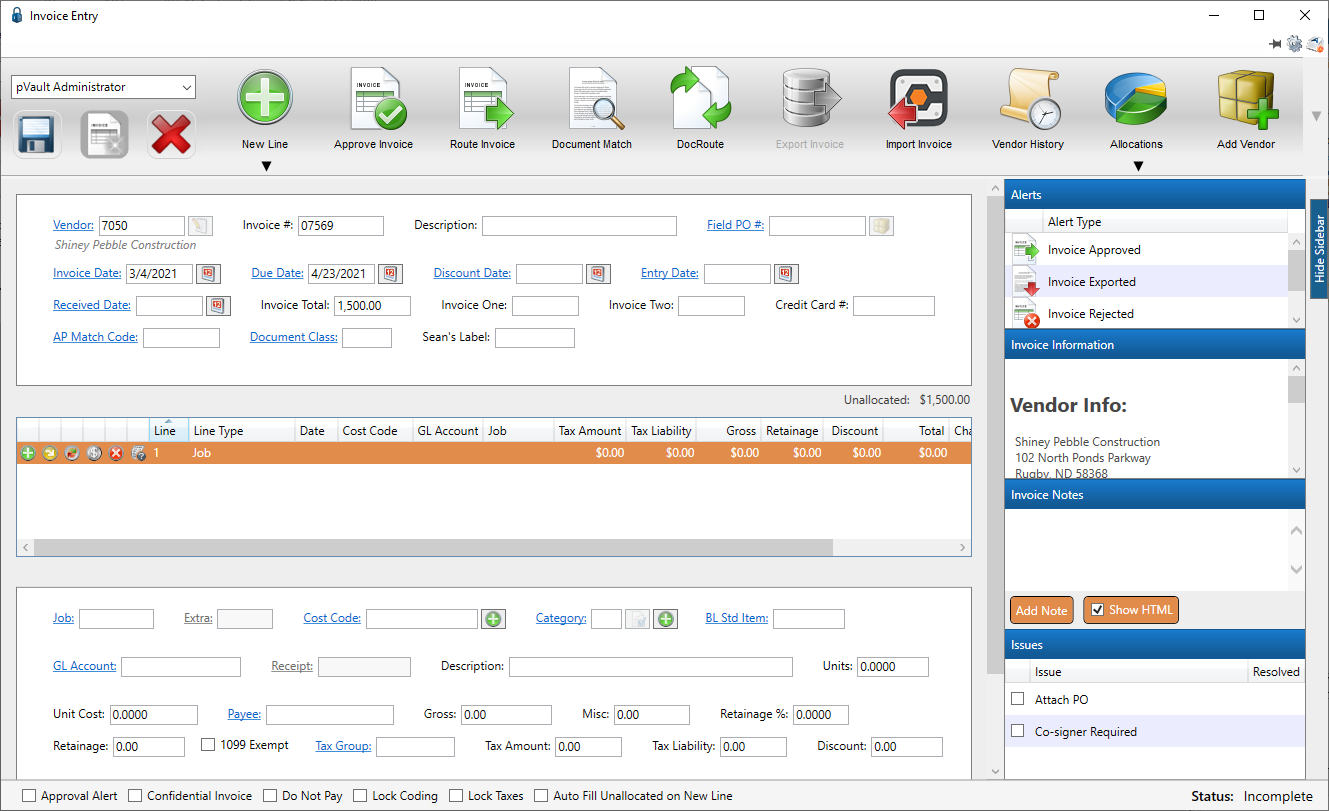
9.Click the Job field label to access the lookup and click to select the appropriate entry.
Important: The Cost Code (and the Category, if applicable), must be associated with a job.
10. In the Cost Code field, click the  .
.
The Standard Cost Codes dialog similar to the following displays:
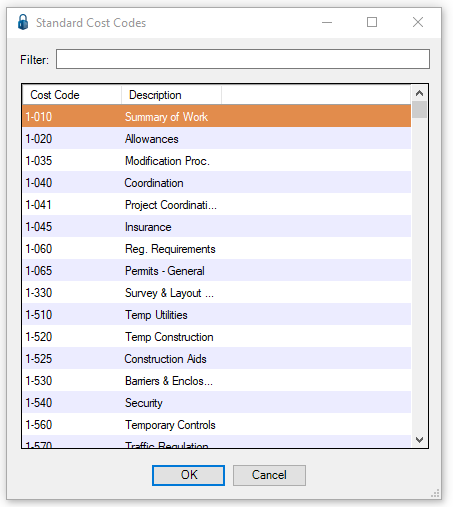
11. Click to select a cost code.
12. Click OK.
If a cost code is selected that is already associated with the job, the following dialog displays:
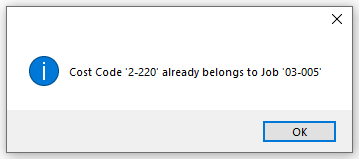
Click OK.
If a cost code is clicked in the Standard Cost Codes dialog, and it has not previously been associated with the job, a dialog similar to the following displays:
13. Click OK.
Note: If a cost code is entered in the Cost Code field directly after referencing the Standard Cost Codes dialog, a dialog similar to the following displays:
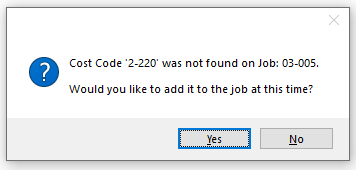
Click Yes.
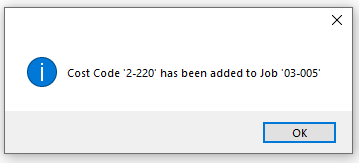
Then the dialog similar to the following displays:
Click OK.
A cost code must be entered before entering a category. If there is no cost code entered in the Cost Code field, the following dialog displays:

Click OK.