In all three views (In Route, Inbox and Recalled) there is a CREATE button to create a new route.
1.To create a new route, click CREATE.
The page similar to the following displays:
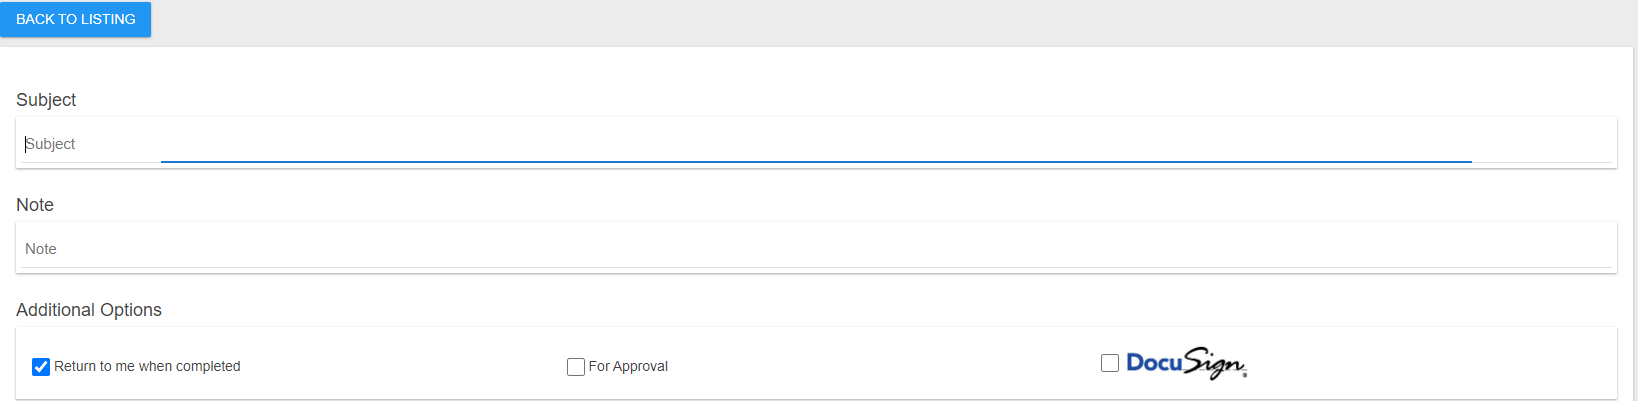

2.In the Subject grid, enter text similar to a traditional email subject line.
3.In the Note grid, enter pertinent information.
4.In the Additional Options grid, click to select one or more of the following:
Return to me when completed (checked by default)
For Approval
DocuSign
Note: If DocuSign is selected, the columns in the Recipients grid change, removing the Due Date and Allow Document Add columns and adding an Is Signer column.
For more information concerning the DocuSign process, click here.
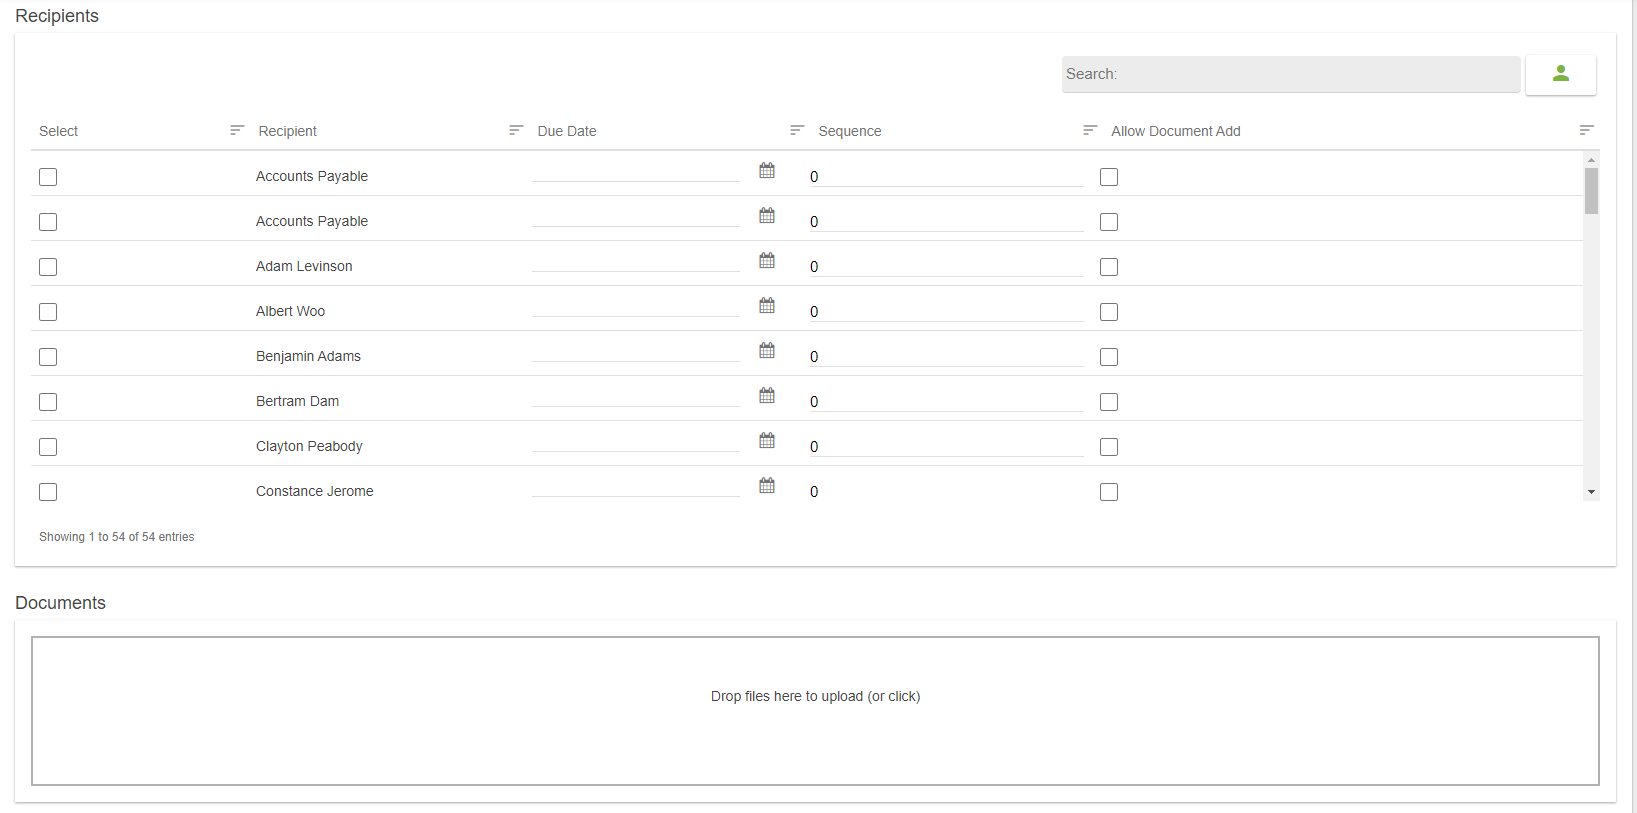
5.In the Recipients grid, perform the following tasks:
Click to select each recipient.
Click the Due Date field to access a calendar.
Click within the calendar to select a date that systematically populates that field.
In the Sequence column, use the arrows to determine in what order each recipient should receive the document or manually change the number that displays in the field.
Click to select Allow Document Add if the recipient may add documents to the route.
6.In the Documents grid, click in the grid to access files to upload or drag and drop files.
If a file is brought in, the Documents grid resembles the following:

7.Click the pencil icon to add an index for the file.
Click the trashcan icon to delete the file.
8. If the icon is clicked to add an index for the newly uploaded file, a dialog similar to the following displays:
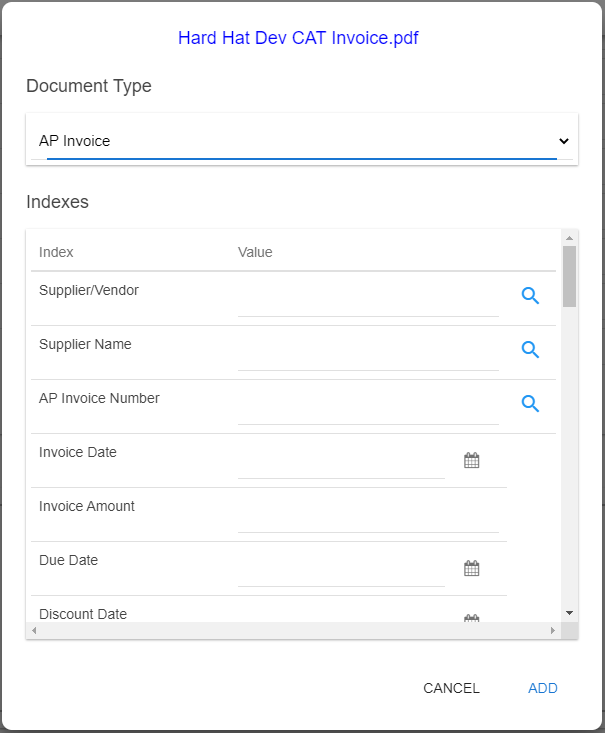
Note: The Document Type displays the last document type selected.
9. Use the dropdown to select a different document type if applicable.
10. Enter information in the Index fields.
These fields differ, depending on the selected document type.
11. Click ADD.
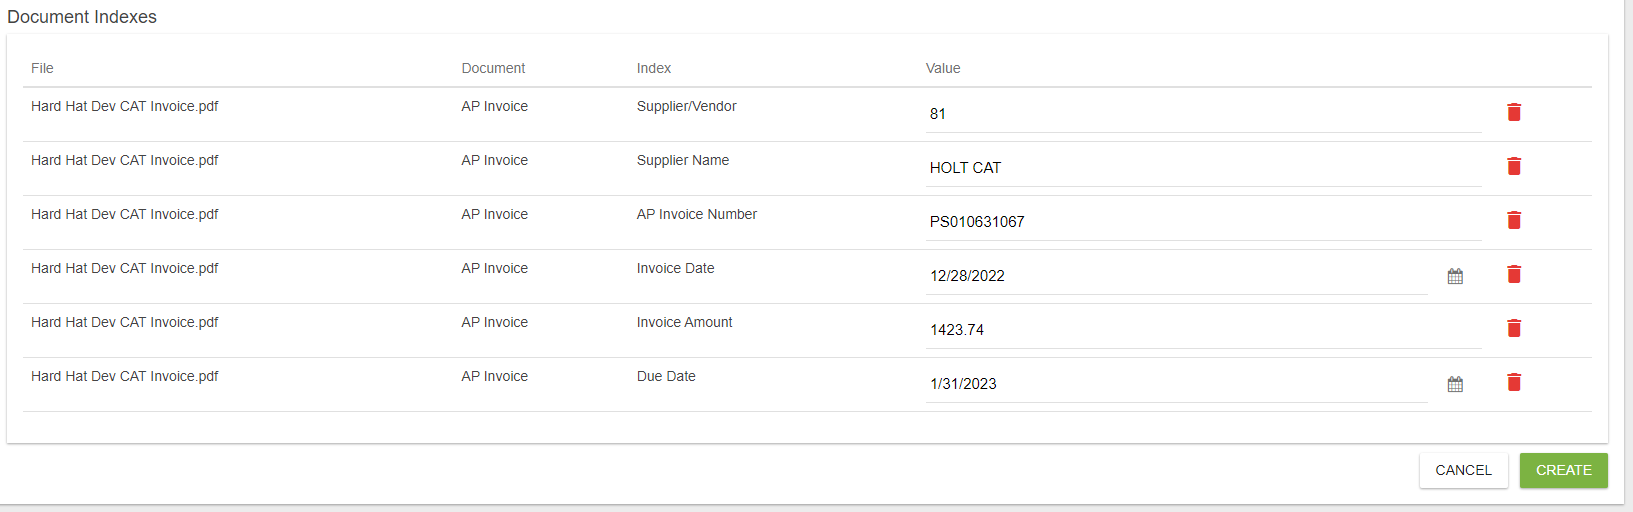
The Document Indexes grid includes all Index fields and resembles the following:
12. Click CREATE.
The newly created route displays in the In Route view, at the top of the list.