You have the option to generate Commitments in Greenlight CM™.
1.From the ribbon toolbar, click Greenlight.
2.Click Greenlight.
The main screen displays with the Dashboard tab active:
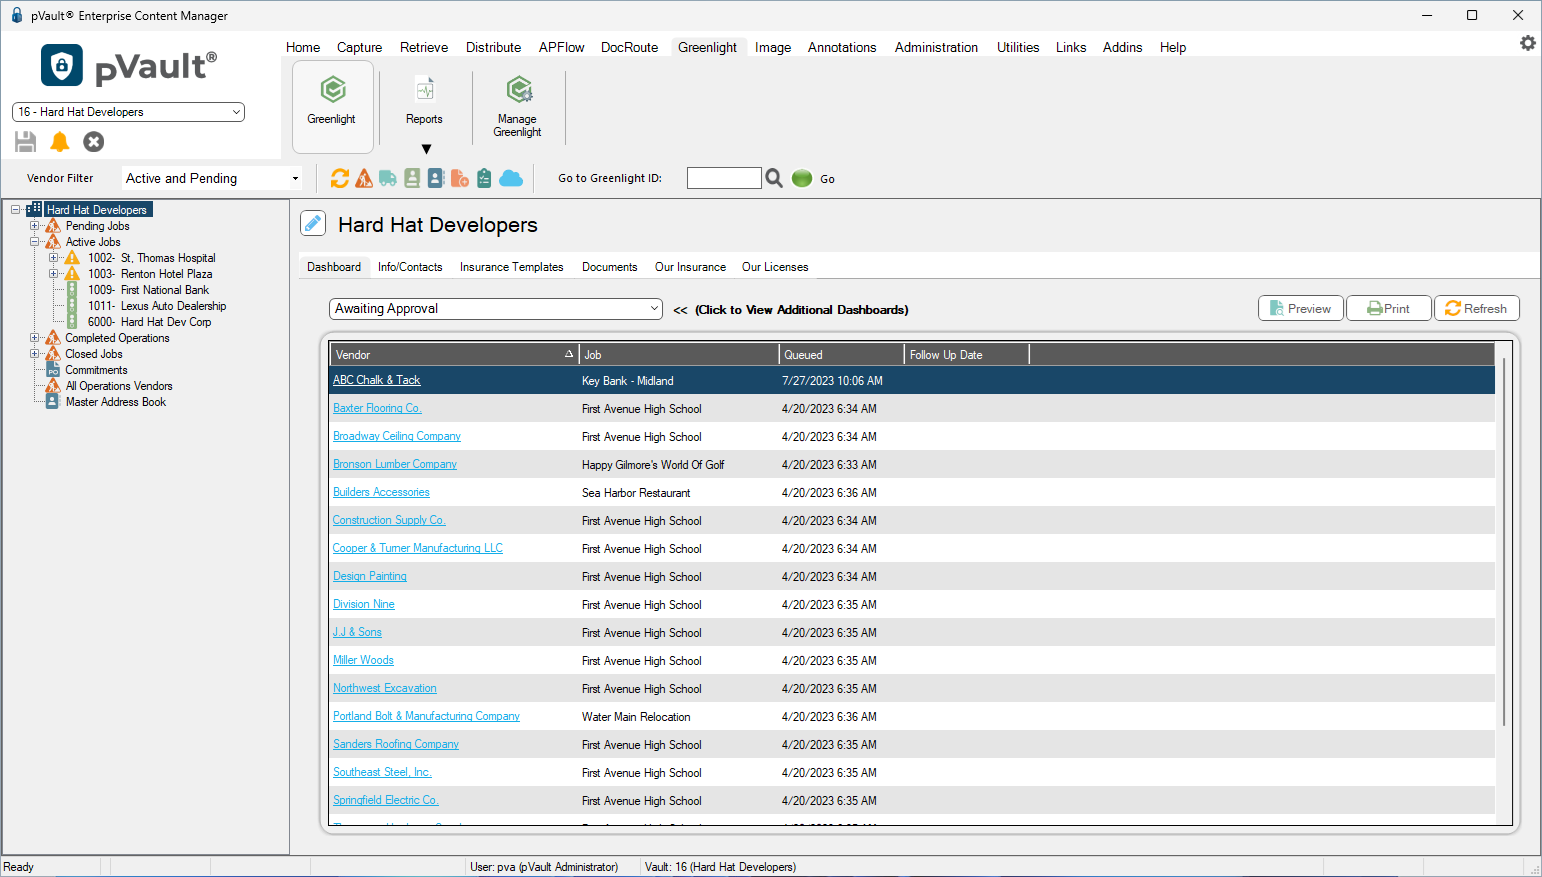
3.In the left navigation bar, click Commitments.
The following screen displays:
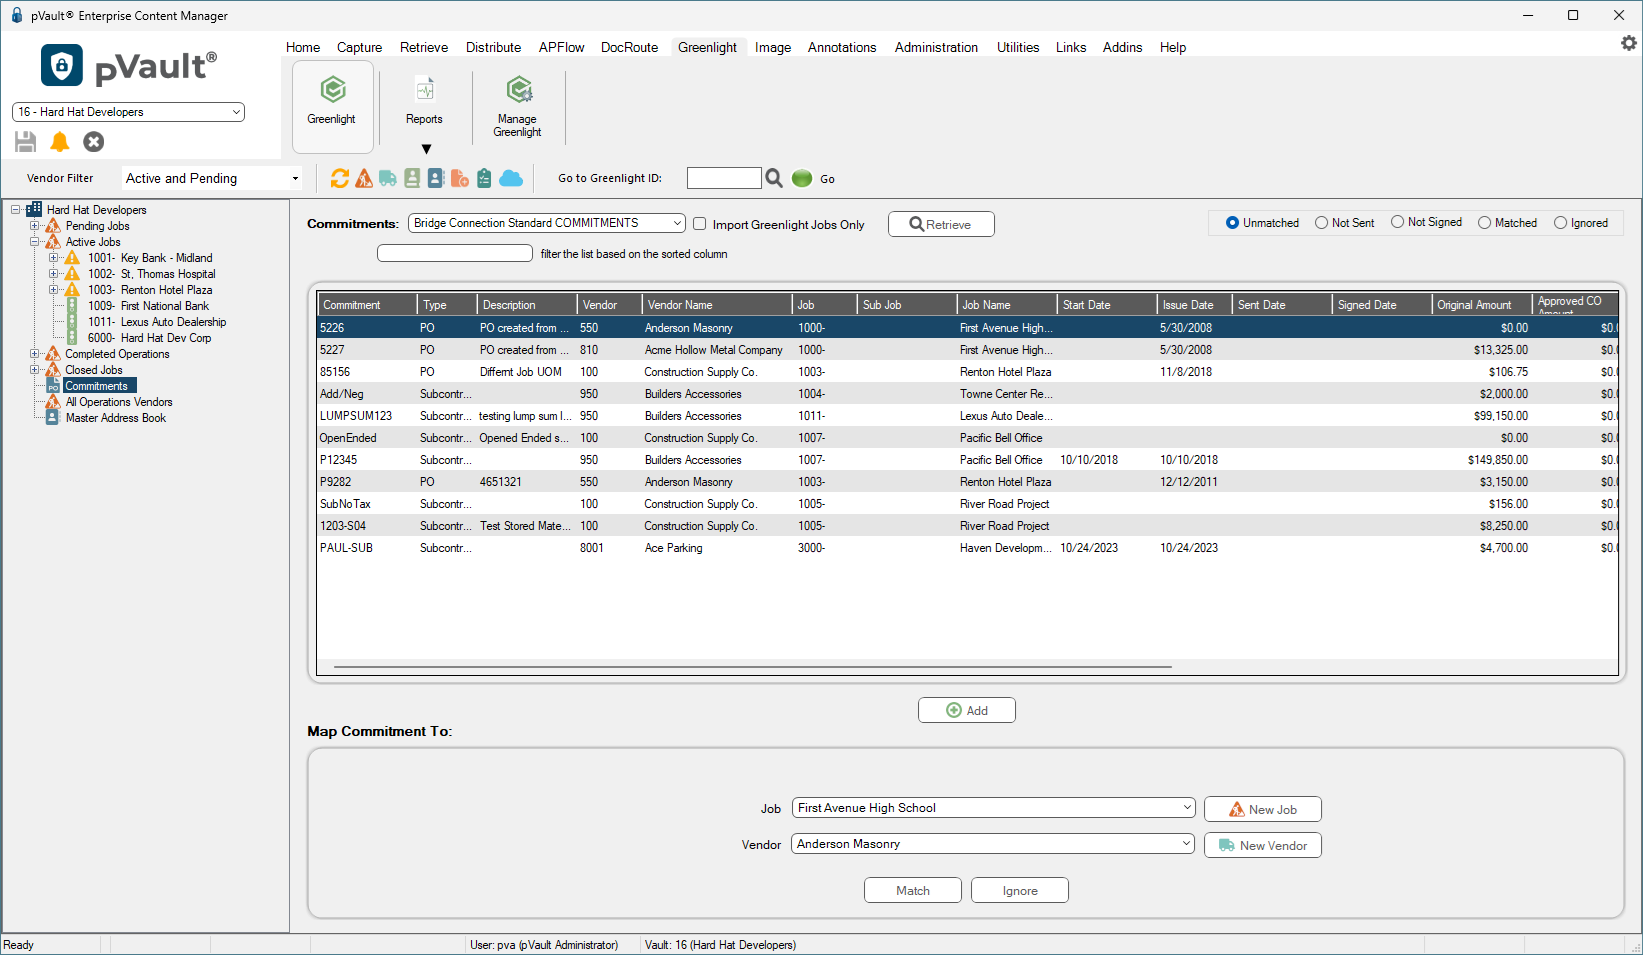
Filtering Options for different views. These filtering options exist so that commitments are not retrieved where there are no associated job matches in Greenlight CM.
4.Select one of the radio buttons. This modifies the Commitment entries that display in this table.
Unmatched - These are commitments neither matched nor ignored.
Not Sent - These are commitments with no Sent Date.
Not Signed - These are commitments with no Sign Date.
Matched - These are commitments that are already matched.
Ignored - These are commitments already marked as Ignored. You can reset this status to Unmatched.
5.Then, to narrow the Commitment entries that display in this table, click a column heading from the table (Commitment, Type, Description, etc.).
6.In the filter the list based on the sorted column text box, enter text through which to filter table entries. The table updates to display those entries based on the radio button you selected and match the text you entered.
7.Click Add.
The Add / Import Commitments to Company dialog displays:
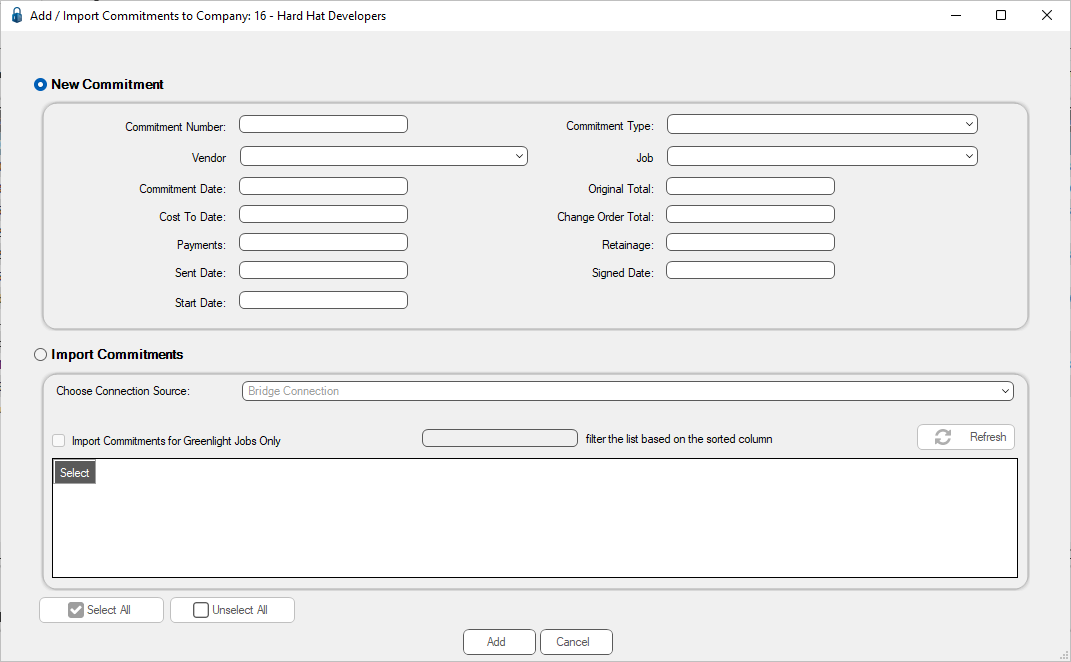
The New Commitment radio button is selected by default.
Note: Date, Total and editable field displays may vary based on your accounting system.
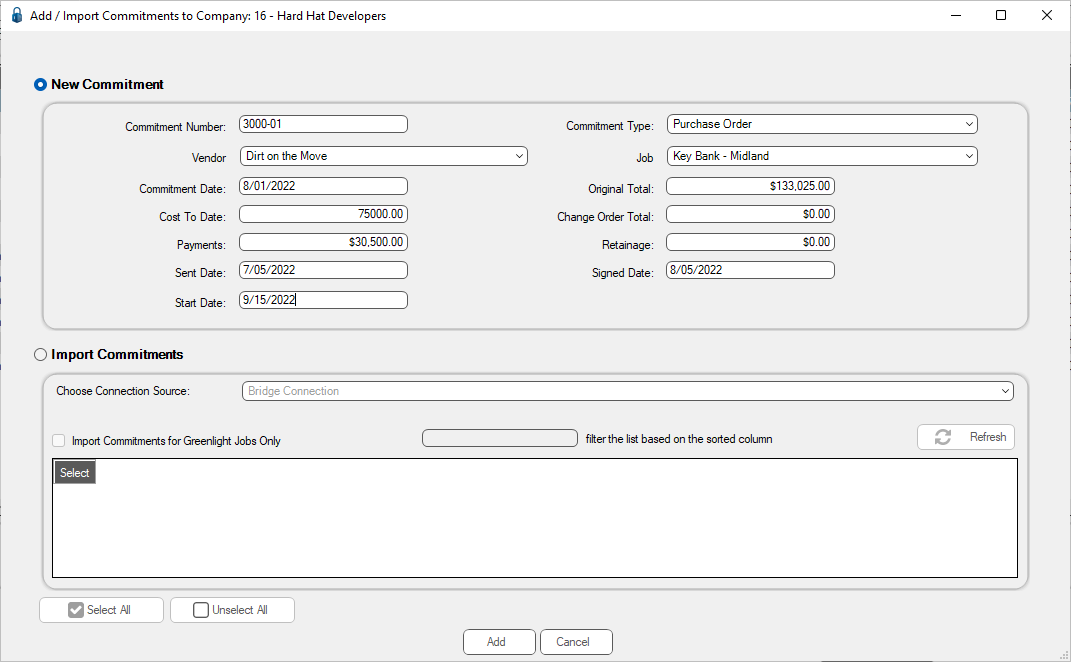
8.In the Commitment Number field, add the number for this commitment.
9.In the Vendor field, use the dropdown to select the vendor.
10. In the Commitment Date field, enter the appropriate date.
The date format is MMDDYYYY. You do not need to add the slashes (/).
11. In the Cost To Date field, enter that amount.
12. In the Payments field, enter the payment amount.
13. In the Sent Date field, enter the date the commitment was sent.
Note: This field cannot be systematically populated.
14. In the Start Date field, enter the start date.
Note: This field cannot be systematically populated.
15. In the Commitment Type field, use the dropdown to select from Purchase Order, Subcontract, Other or leave the field blank.
16. In the Job field, use the dropdown to select the job.
17. In the Original Total field, enter that amount.
18. In the Change Order Total field, enter that amount.
19. In the Retainage field, enter that amount.
20. In the Signed Date field, enter the date the commitment was signed.
There is direct compliance checking against the commitment, based on the Signed Date. This is configurable as the Company level and checks can be configured (No Signed Date Required, Subcontract Signed Date Required, PO Subcontract Signed Date Required, Both Signed Dates Required).
Note: This field cannot be systematically populated.
The completed dialog resembles the following:
21. Click Add.
The commitment vendor is added to the left navigation bar under the associated job.
22. Click to highlight the commitment in the grid and click the Match button to add the commitment to the vendor on a specific job.