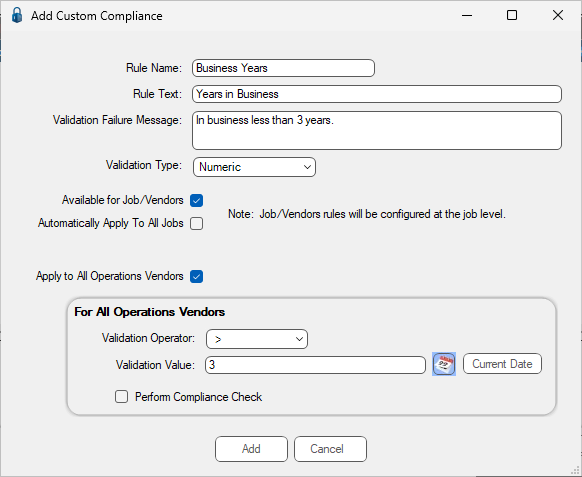
With this validation type, the rule checks to see if the entered numeric value was exceeded. This would identify that the custom compliance rule exceeded a predetermined limit.
In this example, the following check boxes / fields may or may not be selected as necessary.
•Available for Job/Vendors check box
On a job-by-job basis, clicking this check box makes the custom compliance rule available to jobs.
This rule is configured at the job level.
•Automatically Apply To All Jobs check box
Clicking this check box immediately adds the custom compliance rule to all jobs. It does not need to be selected on a job-by-job basis.
Newly created jobs systematically have this custom compliance rule defined.
This rule is configured at the job level.
•Apply to All Operations Vendors check box
Note: When a new All Ops vendor is created, it automatically adds any All Ops Vendors.
When you click this check box, the For All Operations Vendors pane fields are active.
This creates rules which are automatically applied to All Ops vendors.
oValidation Operator field
Use the field dropdown to select the appropriate function.
oValidation Value field
This is the value you want to compare against.
oPerform Compliance Check check box
When this check box is selected, Greenlight performs compliance checking.
Note: If this rule is being used for tracking purposes only--and not for compliance checking--leave this check box blank.
Be sure to click Add.
Preview
Once the rule is created, there is a Preview section at the bottom of the screen. What displays is based on the highlighted Custom Compliance rule.
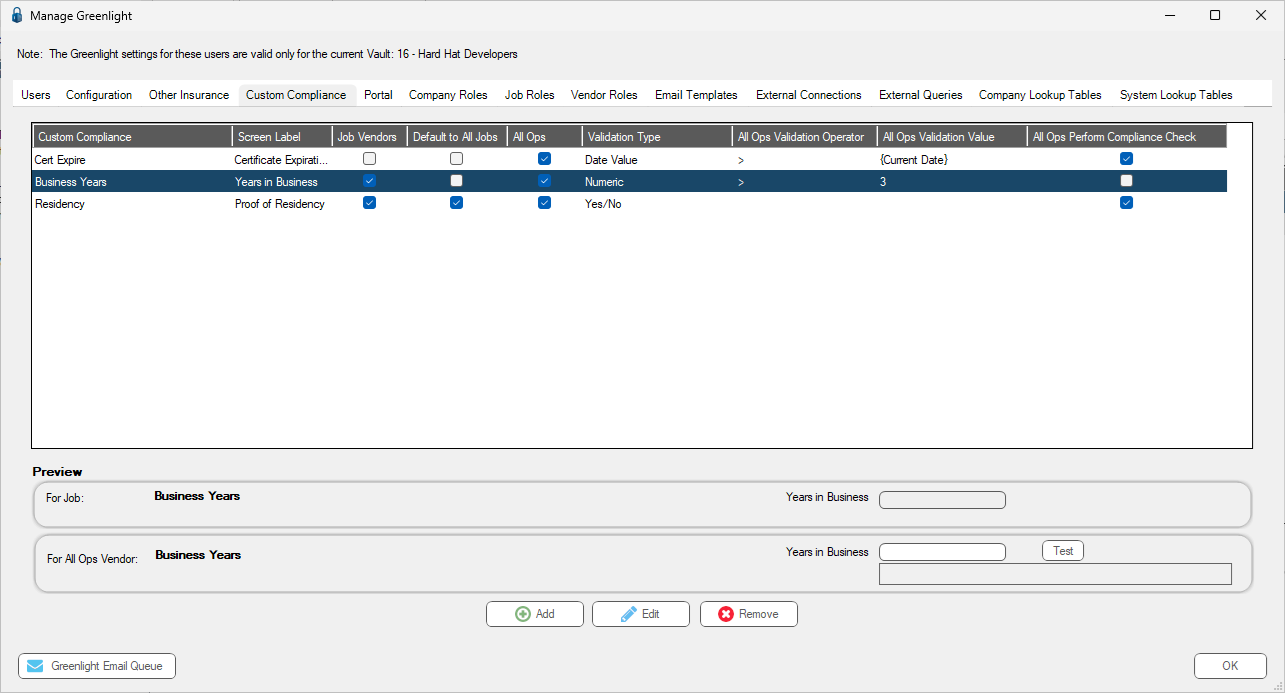
•If Apply to Job/Vendor was selected, then For Job preview displays.
The preview offers an idea of what it looks like on the screen.
•If Apply to All Operations was selected, then For All Ops Vendor displays.
Click Test to verify the rule is validating correctly. You should see your custom failure message display in the case where the test evaluates a failure condition.