1.From the ribbon toolbar, click APFlow™.
2.Click Credit Card Importer.
The Credit Card Import dialog similar to the following displays:
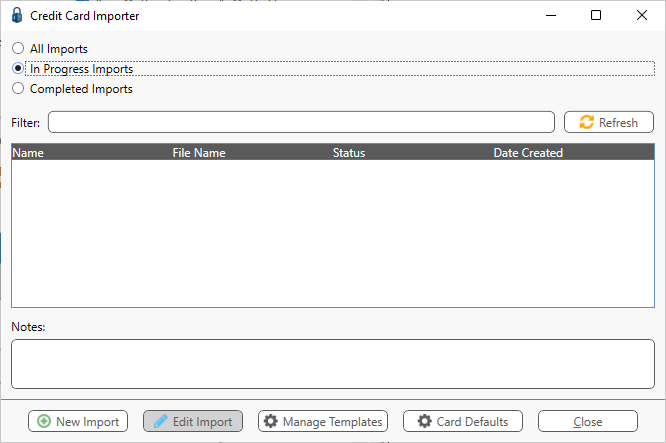
3.Highlight an existing import.
4.Click Edit Import.
Note: For details on creating a new import, click here.
The Credit Card Importer main screen similar to the following displays:
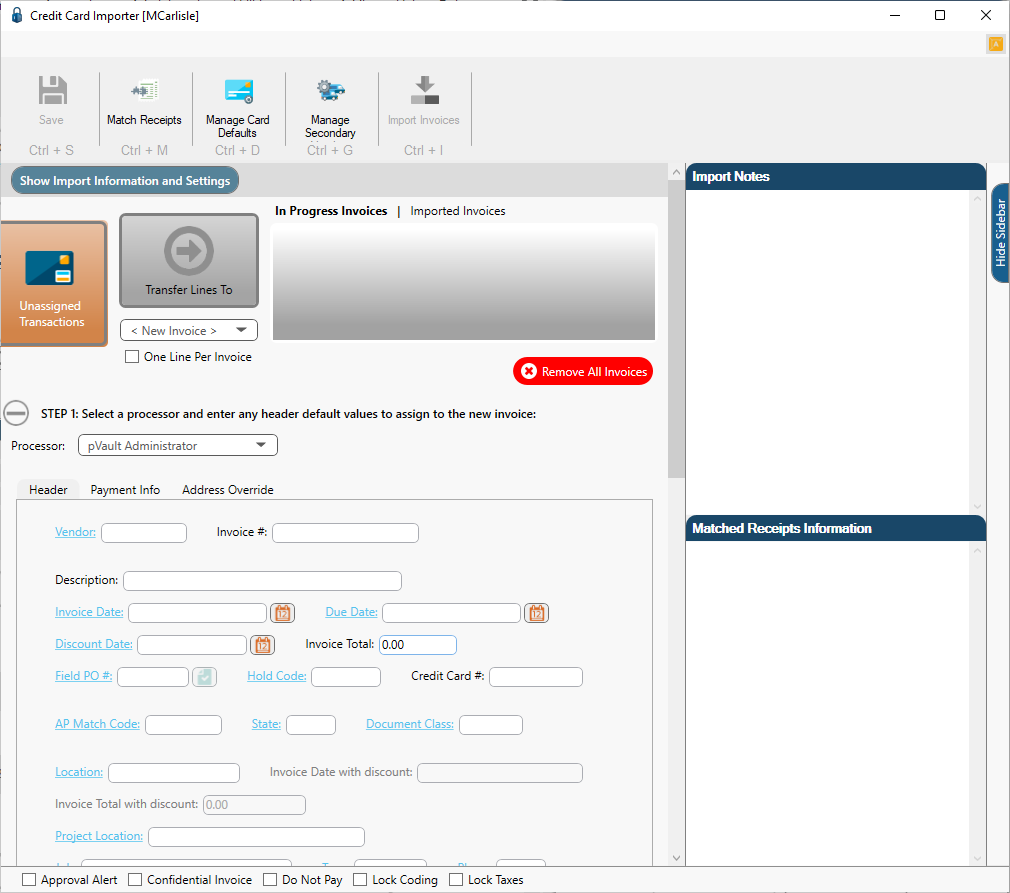
5.Immediately below the ribbon toolbar, click the Show Import Information and Settings bar.
The dialog similar to the following displays:
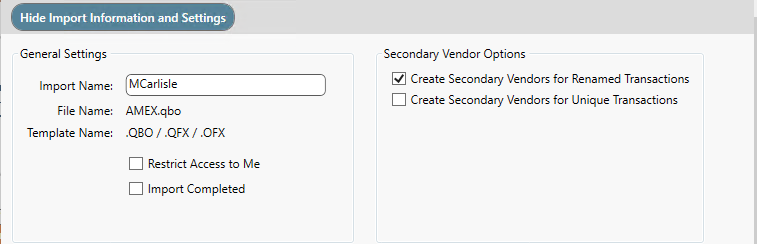
Modifications may be made to the active fields.
6.If necessary, change the name of the import in the Import Name field.
7.If the import should only be visible to the person who imported it, click to select Restrict Access to Me.
Important: Individuals with Supervisor access are also able to view a restricted import.
8.As part of invoice creation associated with an import, an optional final step of Import Completed may be selected.
The selections can be reset for a new or existing import; however, once the import is marked complete, information cannot be changed.
By selecting Import Completed, database space housing temporary images in the importer is freed up.
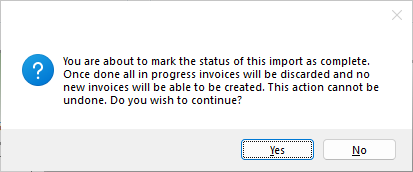
The following dialog displays to verify that this step was intended:
Note: Click here to read more about the invoice process, including the process of marking Import Complete.