This is the first Add User Wizard window:
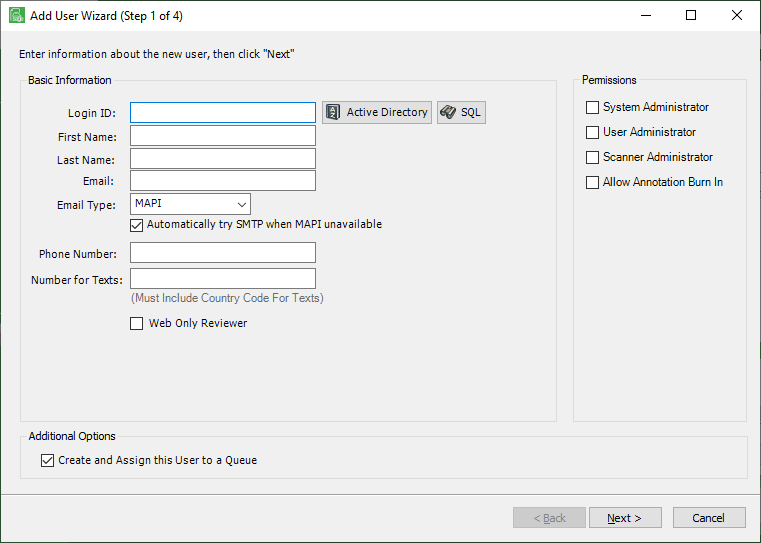
1.To set up a Windows Authenticated user, click Active Directory,  .
.
An Active Directory Users window displays, listing all window users.
2.Scroll through the list to locate and highlight the user name.
3.Click OK.
The first Add User Wizard window re-displays with the user's first name, last name, email address and phone number systematically populated.
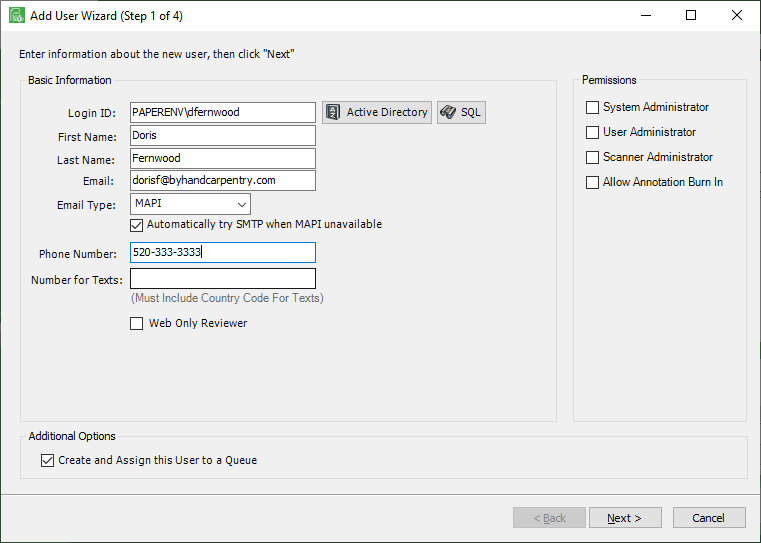
4.Verify that the following fields were systematically populated:
First Name
Last Name
Email
Phone Number
5.In the Email Type field, MAPI is the default. MAPI is appropriate if the company uses a MAPI-compliant email client such as MS Outlook.
If the company uses an external web-based email client such as Yahoo or Google Mail, select SMTP from the dropdown.
Note: SMTP email settings are located in the Administration screen, SMTP Configuration menu.
6.The Automatically try SMTP when MAPI unavailable check box should already be selected as the default. If not, click the check box so the system will attempt to email SMTP if the local email client cannot be reached.
7.In the Number for Texts field, type the cell phone number of the user to take advantage of the text option in the Document Alerts feature.
8.Click the Create and Assign this User to a Queue check box to create a User Queue for this user.
Note: This check box should already be selected as the default.
9.If the newly added user will be a web only reviewer, click the Web Only Reviewer check box. Otherwise, leave this check box blank.
10. In the Permissions column, the following optional permissions may be assigned to the user as appropriate:
System Administrator - Gives the user full system administrator access. Warning: Limit this permission to users who should have full security rights to every option in the system.
User Administrator - Gives the user permission to create new users within the vaults to which the User Administrator is also the Vault Administrator. Click here to read more about it.
Scanner Administrator - Allows the user to edit or set up scanner profiles for locally attached scanners.
Allow Annotation Burn In - Allows the user to "burn in", or make permanent, annotations to documents.
11. Click Next.
The second Add User Wizard window displays:
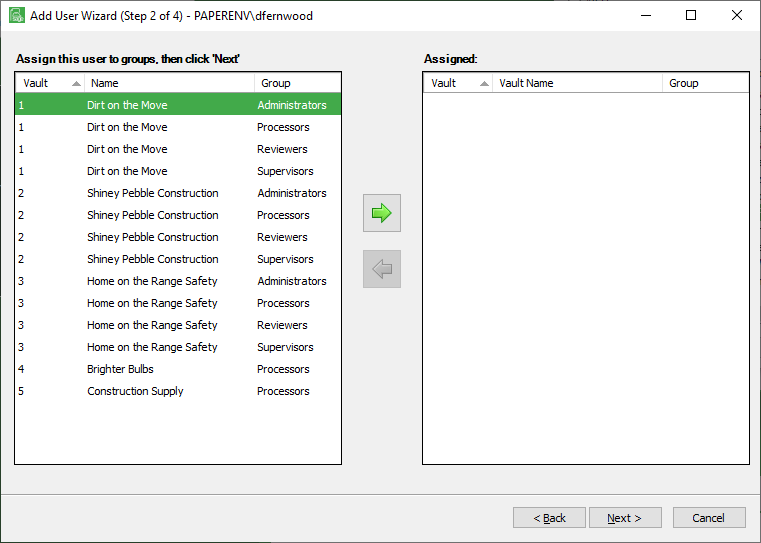
Important: Every user must be associated with at least one Security Group.
12. Highlight the group(s) to which the user should be assigned.
13. Click the  icon to assign the user to the group(s).
A completed Add User Wizard (Step 2 of 4) window will resemble the following:
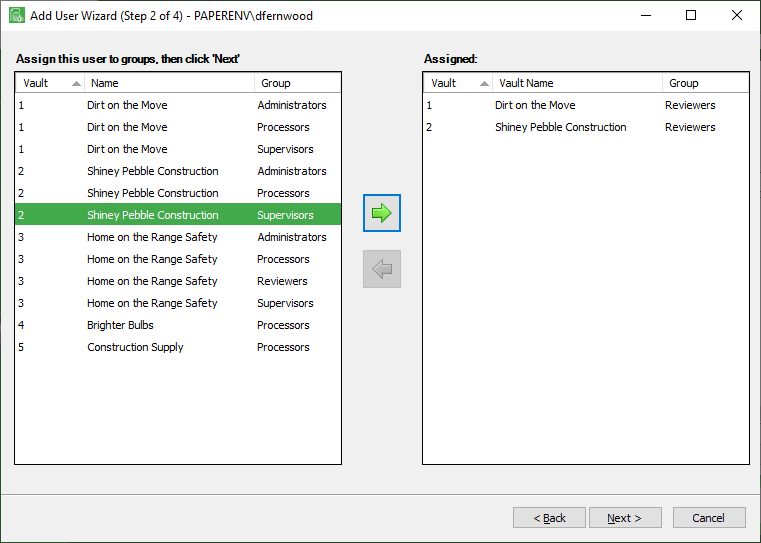
14.Click Next.
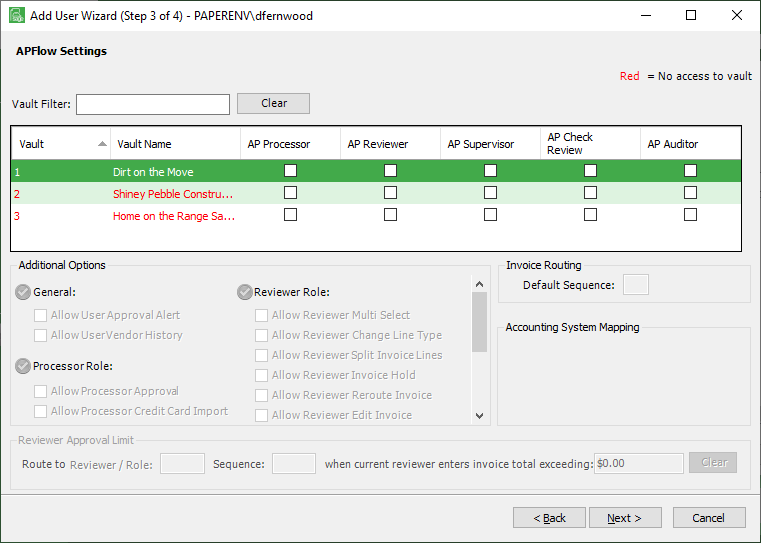
The third Add User Wizard window displays:
Notes:
If the APFlow™ Accounts Payable Invoice Workflow module was purchased, the APFlow™ Settings setup screen will displays.
This is where APFlow™ roles and permissions are assigned for the new user. Refer to APFlow™ Module for details.
If the APFlow™ Accounts Payable Invoice Workflow module was not purchased, this window does not display and the Add User Wizard consists of three screens.
Vault Filter |
To locate a particular vault, begin typing the vault number or name in the Vault Filter field. This list of vaults displaying in the grid will reflect the numbers or letters entered in this field. |
AP Processor |
Users assigned to this role enter and route accounts payable invoices to Reviewers for approval. Each Processor is considered the "owner" of the invoice with work queues that track invoice status until invoices are exported to the bridged accounting system. |
AP Reviewer |
Reviewers have access to Approve Invoices where they view and approve invoices routed to them by AP Processors. |
AP Supervisor |
AP Supervisors can access the APFlow™ setup screens which include the Manage AP Flow setup screen as well as routing rule setup and Invoice Manager. AP Supervisors also have access to all AP Processor queues. |
AP Check Reviewer |
This role gives a user rights to the AP Check Review module where AP checks and associated invoice information can be reviewed. |
AP Auditor |
Reserved for auditors of the APFlow™ system. Anyone assigned to this role is granted read-only access to the Invoice Manager screen. This allows the auditor to access the APFlow™ system for auditing purposes but does not allow information to be changed. |
Depending on the role(s) assigned to the user, there are additional permissions which may be granted. These options are located at the bottom of the screen.
Each Additional Options section heading includes this icon: 
If the user should have permission to perform all the options listed under a specific section, click the icon for that section. All the options in that section will be selected.
If the user should have permission to perform some of the options listed under a specific section, you must click the desired options manually.
To remove options, you must manually click each option checkbox individually to remove the checkmark.
Note: A section, including the corresponding icon, will be disabled if the highlighted user does not have permission for the options displaying in that section.
General |
Allow User Approval Alert |
This allows Processors to add an Approval Alert to an invoice. |
Allow User Vendor History |
This allows a Processor access to view all documents in Vendor History for this vault. This permission is user-specific and vault-specific. it is not vendor-specific or APFlow™ role-specific. |
|
Processor Role |
Allow Processor Approval |
Gives a Processor the permission to approve an invoice without routing it to Reviewers. An audit note will systematically be added to indicate that the invoice was "approved for xyz reviewer by abc processor". If a Processor does not have this access, all invoices must be routed to the appropriate Reviewer(s) for approval. |
Allow Processor Credit Card Import |
Gives a Processor or Supervisor access to the Credit Card Importer. Only Processors with this security right can import credit card transactions files to add the line items to an invoice that can then be coded and routed for approval and finally exported to their respective accounting systems. |
|
Allow Processor Export |
Gives a Processor access to the Export tab in the APFlow™ sidebar. Only Processors with this security right can export approved invoices to their respective accounting system. |
|
Allow Processor Reset For Edit |
This controls whether or not the Reset For Edit button is enabled on the Invoice Manager screen. |
|
Allow Processor Override Route Group |
Gives a Processor the ability to choose an alternative routing group or to turn off the default routing rules and route an invoice manually. |
|
Allow Processor Delete Invoice |
Gives a Processor the ability to delete an invoice that is still in the system and not yet exported. |
|
Allow Processor Add Vendor |
This allows Processors to add a vendor into their accounting system from the Invoice Entry screen. Not all systems support this functionality. |
|
Allow Processor DocRoute™ |
If selected, the DocRoute™ icon displays on the Invoice Entry toolbar. If not selected, the DocRoute™ icon is not visible on the Invoice Entry toolbar. |
|
Reviewer Role |
Allow Reviewer Multi Select |
Allows a Reviewer to select more than one invoice in their queue at a time and approve or take other action on the selected invoices all at once. If this option is not allowed, the Reviewer must take action on each invoice individually. |
Allow Reviewer Change Line Type |
Allows a Reviewer to change the line type of an invoice in Approve Invoices. In Approve Invoices, Reviewers can click the Change Line Type icon, This feature allows a Reviewer to change any line type to any other available line type. |
|
Allow Reviewer Split Invoice Lines |
In Approve Invoices, Reviewers can click the Split Line icon, Use this function to "break out" invoice line amounts into additional lines than were originally assigned. The amount of the invoice sent to the Reviewer by the Processor must be allocated fully before any changes can be saved. |
|
Allow Reviewer Invoice Hold |
Gives the Reviewer the ability to place an invoice on hold through the Place On Hold icon, This is based on the bridged system. |
|
Allow Reviewer Reroute Invoice |
Enables the Route Invoice icon, |
|
Allow Reviewer Edit Invoice |
Gives the Reviewer the permission to make changes to an invoice. The Edit Invoice button, |
|
Allow Reviewer Invoice Manager |
Gives the Reviewer Invoice Manager permissions without having to give Processor permissions. |
|
Auto-Open Main Viewer |
Systematically opens an image in the main viewer every time an invoice is highlighted. |
|
Auto-Open Document Match |
Opens the Document Match screen every time a new invoice is highlighted. This way, the Reviewer always sees the invoice and the Document Match window without having to click on the Document Match icon. |
|
Invoice Routing |
Invoice Routing Default Sequence |
The number entered here identifies in what sequence the document should be reviewed. This would be the default. The lowest number gets the invoice first. |
Accounting System Mapping |
Must be a Reviewer. Uses the accounting system routing rules option in some accounting systems. (Advanced bridge setting must be set.) Follows the accounting system routing and displays it in Sage Paperless Construction. |
|
Reviewer Approval Limits |
This identifies a specific Reviewer selected in the associated Lookup Utility. The number (1 in the example) reflects the arbitrary number that the Reviewer was assigned when originally added to the Reviewer list. The Reviewer's name displays below the number. The Sequence number (4 in the example) indicates in what order the Reviewer should see invoices. Any invoice with a total exceeding the entered dollar amount ($10,000.00 in the example) will systematically be routed to the identified Reviewer. |
|
 , located on the invoice line needing to be changed.
 , located on the invoice line needing to be split.
 , located on the
  , in
, in  , displays on the
15. Click Next.
The final Add User Wizard window displays:
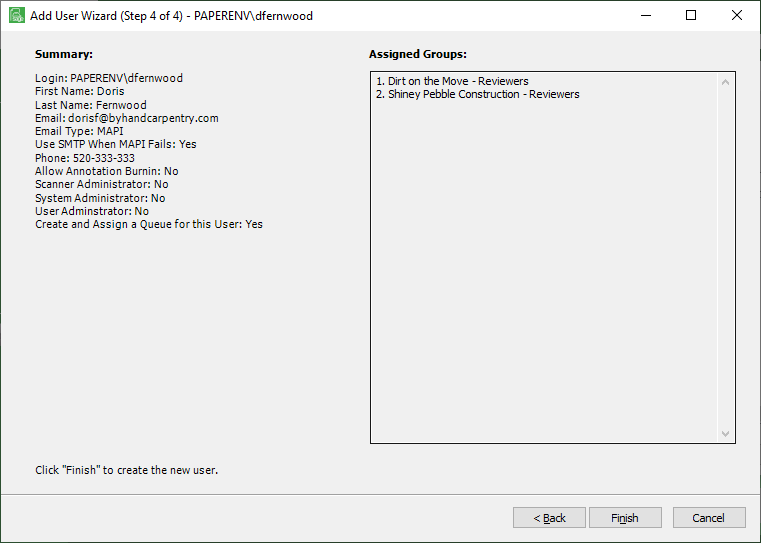
This window displays a summary of all the settings selected or entered during the Add User Wizard setup.
16. Review the information in the Summary portion of this screen.
17. If any of the information is incorrect, click Back to make necessary corrections and then return to this screen.
18. Click Finish to create the new Sage Paperless Construction user.