Integrate with DocRoute™ and use your existing DocuSign account to route documents to external parties for approval and to capture electronic signatures.
If you have external recipients who need to approve Sage Paperless Construction documents, complete the Document Route Configuration window as you normally would and click DocuSign. Then, when you click Route, a series of dialog boxes display taking you through the initialization of DocuSign Services.
Once in DocuSign, there are various DocuSign editor screens to guide you through the document preparation for electronic signatures. When the document (as a DocuSign envelope) is sent to the designated recipient(s), the document is listed in the In Route folder in Sage Paperless Construction. As the DocuSign envelope containing your document moves through the process, you can watch the Route Sequence pane status move from Pending to Signed. Once all recipients have signed where you indicated, the signed documents are returned to the Sage Paperless Construction system with a routing certificate from DocuSign. This certificate is sent to the originator's email. A copy of the completed document is attached to that email. You can view the original document as well as the signed document as snapshots. There you can replace the fully signed versions of the documents routed through DocuSign.
Important: To use DocuSign, you must have the DocRoute™ module and a DocuSign account.
There are a number of ways to integrate with DocuSign in Sage Paperless Construction.
Note: Web Services on the Server Dashboard must be running for DocuSign to work with DocRoute™.
1.From the ribbon toolbar, click DocRoute™. 2.Click Quick Route, |
 .
.
1.From the ribbon toolbar, click DocRoute™. 2.Click Document Routing, 3.From the Document Routing sidebar, click Route, |
 .
.
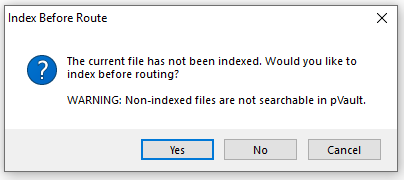
1.Select a file to drag and drop into Sage Paperless Construction. 2."Drop" the file on Route. 3.Click Yes and the Index Document window displays. |
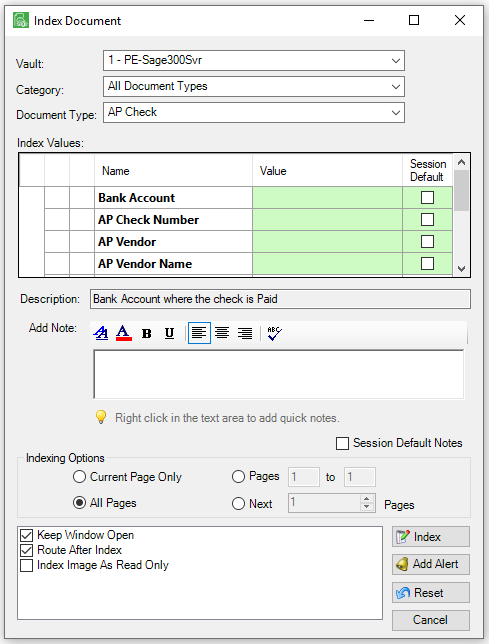
1.From the ribbon toolbar, click Capture. 2.Click the Indexer icon, 3.Click to select Route After Index. 4.Click Index, |

 .
.
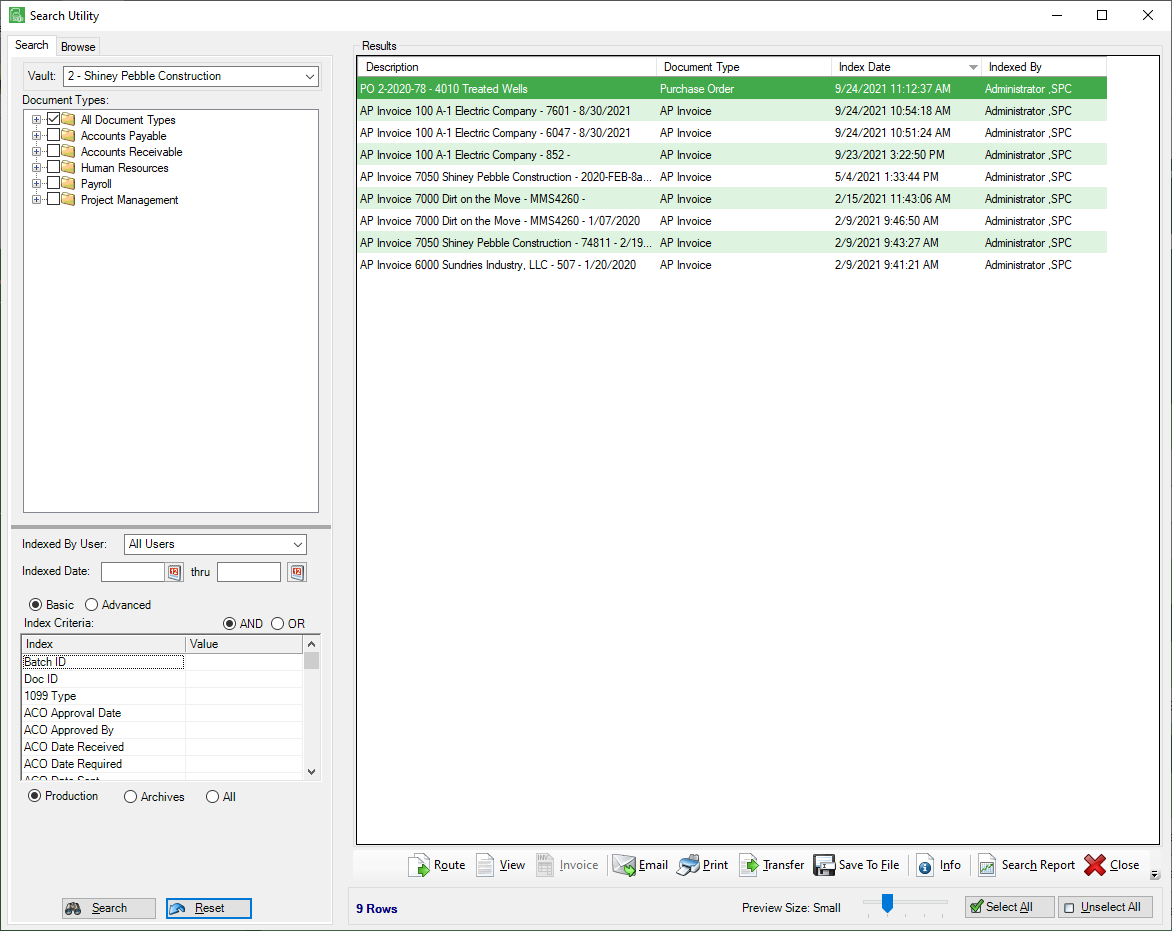
1.From the ribbon toolbar, click Retrieve. 2.Click Search, 3.In the Document Types pane, click to select the appropriate document type(s). 4.Click Search. 5.From the Results pane, click to highlight the appropriate document. 6.Click Route. |
 .
.
No matter how it is generated, the Document Route Configuration window resembles the following: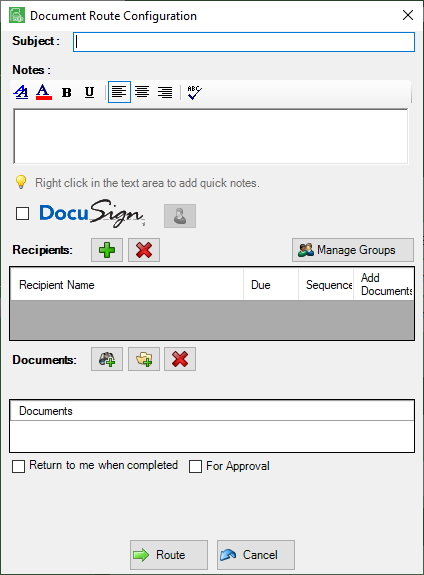 |
1.In the Subject field, type a reference line similar to an email subject line.
2.In the Notes pane, add a note if appropriate.
3.Click to select DocuSign.
In the middle pane, any predetermined recipients will be listed.
4.If no recipients are listed or if additional recipients are needed, click the plus,  .
.
An Add Recipients dialog box displays:
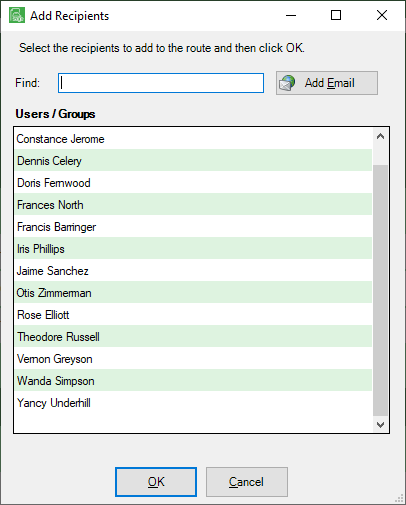
5.Scroll through the list, clicking to highlight the selected recipients.
6.If an external user or group is not listed and needs to be added, click Add Email.
The following Add External User dialog box displays:
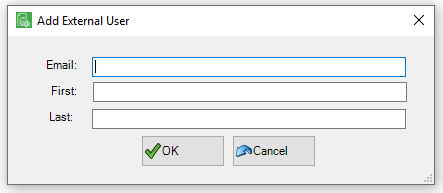
7.In the Email field, type the new external user's email address.
8.In the First field, type the new external user's first name.
9.In the Last field, type the new external user's last name.
10.Click OK.
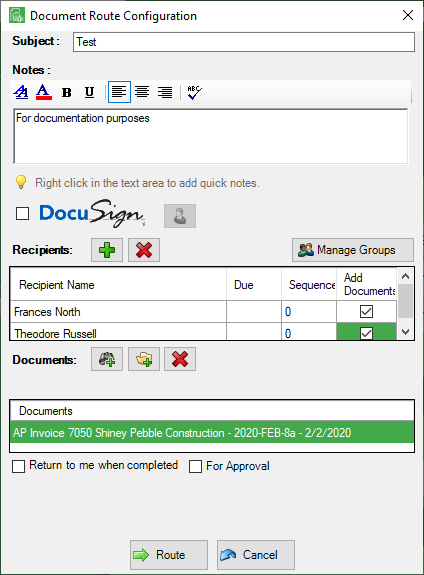
The Document Route Configuration window redisplays:
11.If any recipients need to be removed from the list, click to highlight the name displaying in the middle pane and click  .
.
Important: The recipient is not deleted from the Add Recipients list, just from the route recipient list for this specific DocuSign envelope.
12.To view the individuals included in a selected group, click Manage Groups.
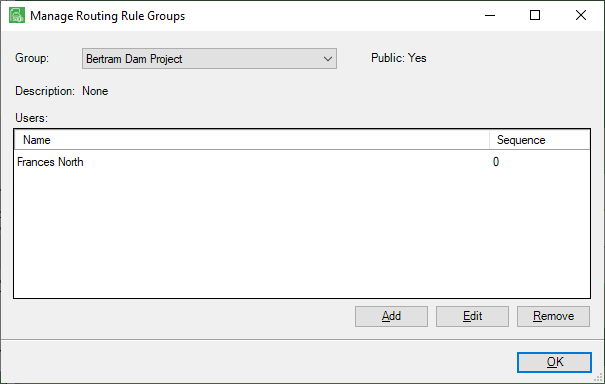
13.Click Add, Edit or Remove as appropriate, to manage the individuals listed within the selected group.
14.Click OK to close the Manage Routing Rule Groups dialog box.
15.Once all recipients (both individuals and groups) are identified and selected, verify that the documents listed in the Documents pane are correct and no other documents need to be added.
To search for documents already residing in Sage Paperless Construction, click the document search icon to access the Search Utility,  .
.
To search for documents located in files on a PC or the network, click the file search icon,  .
.
To remove any documents already listed in the Documents pane, click  .
.
16.Once the documents are verified, click Route,  .
.
The first in a series of dialog boxes similar to the following displays:
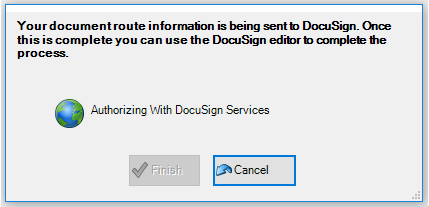
The first time the originator routes a document through DocuSign, the following window displays: |
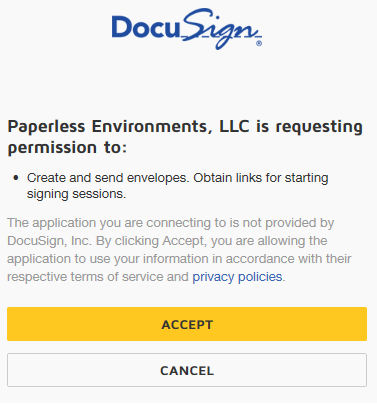
If not already logged in, a modified DocuSign login screen displays requiring that the sender's DocuSign password be entered.
The remaining series of dialog boxes similar to the following display:
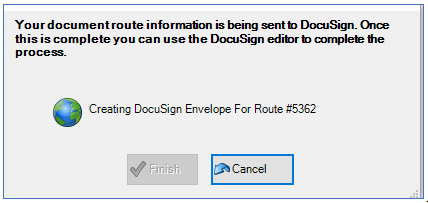
The following final dialog box in the series displays:
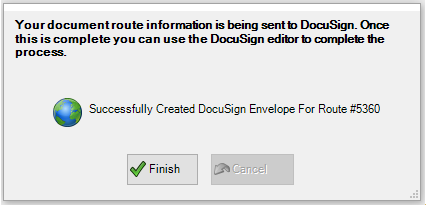
17.Click Finish.
The document moves to the In Route folder and remains there until the executed document/DocuSign envelope returns
In the Route Sequence pane of the Document Routing sidebar, the Status displays as Pending.
A confirmation screen displays.
18.Click CLOSE.
19.Continue through the various DocuSign editor screens to prepare the document for signatures, etc.
The document is then sent, as a DocuSign envelope, to the recipient(s).
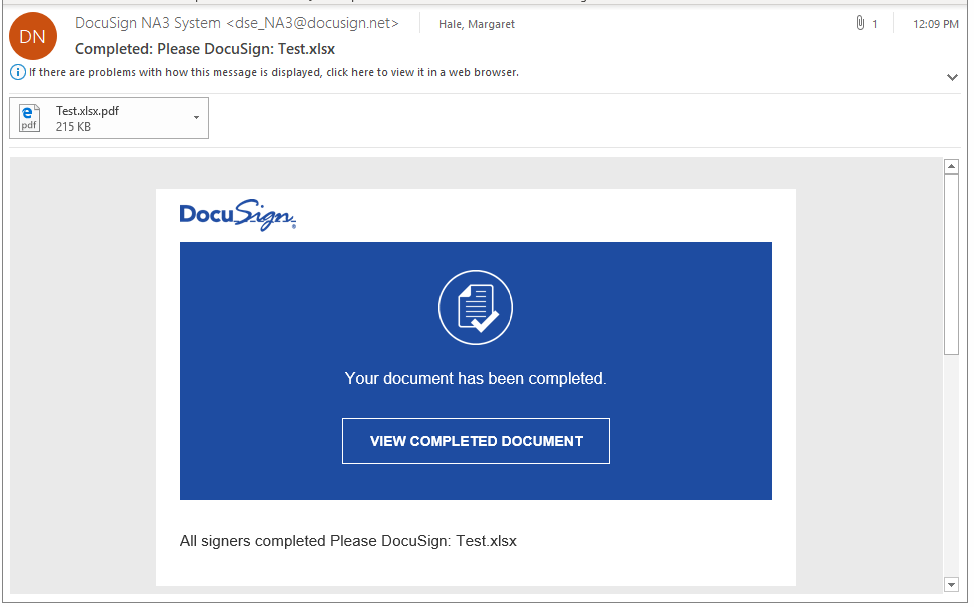
Once the recipient(s) sign/initial where indicated, the originator receives an email confirmation.
The email confirmation includes a copy of the completed document, along with a cautionary note advising not to share the confirmation email as it contains a secure unique link to DocuSign.
The email resembles the following:
Within Sage Paperless Construction, once the document is fully executed and routed successfully, the document displays in the Inbox and the Status in the Route Sequence pane displays as Signed.
20.With the document highlighted, click Release,  , in the Document Routing sidebar toolbar.
Important: The original document as well as a copy of the executed document can be accessed through View Snapshots. Click here to read more about View Snapshots and DocuSign.