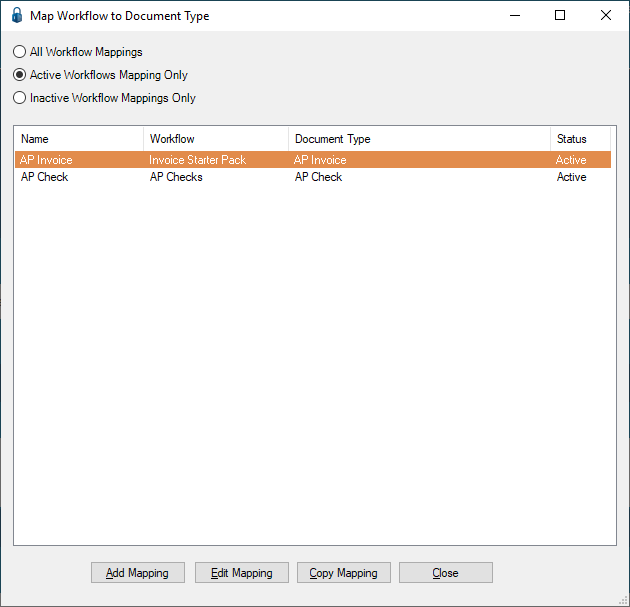
OCR Workflow Mappings
Your OCR Workflow defines what fields are going to be captured from each document. You will need to map each captured OCR field to a specific index on a document type or to specific Invoice Entry field. You can set up multiple mappings per workflow.
Add Mappings
A blank Workflow Mapping window will display:
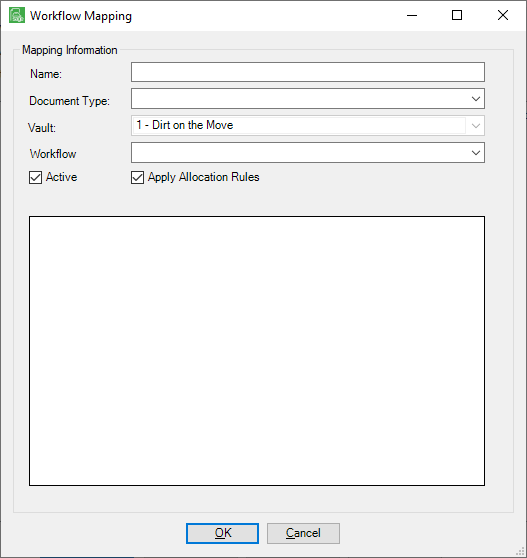
Name field |
In the Name field, enter a unique name for this workflow mapping. |
Document Type field |
In the Document Type field dropdown, select the appropriate document type. Selecting AP Invoice will populate the grid with a list of entry fields displaying on the Invoice Entry screen. All other document types will populate the grid with the index types defined on the selected document type. |
Accounting System field (Only enable for Invoice Document Types) |
In the Accounting System field dropdown, select the accounting system to which your company is bridged, in scenarios where more than one accounting system has been configured. |
Workflow field |
In the Workflow field dropdown, select any of the available workflow templates. The available workflows are limited to those workflows created during your installation. |
Active check box |
The Active check box is selected by default. If this mapping is not active, click to remove the checkmark. |
Apply Allocation Rules check box |
The Apply Allocation Rules check box is selected by default. This checkmark indicates that allocation rules based on header invoice values will apply. If allocations rules should not be applied, click to remove the checkmark. |
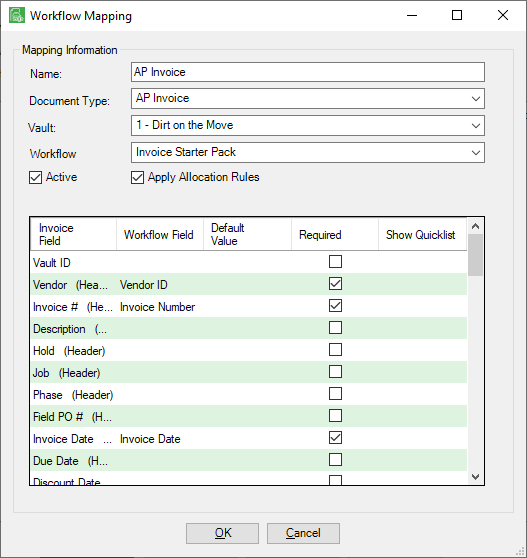
AP Invoice Document Type |
|
Invoice Field column |
All available Invoice Entry fields display in this column. |
Other Document Types |
|
Index Type column |
All Sage Paperless Construction Index Types defined on the selected document type display in this column. |
Workflow Field column |
A dropdown list of all OCR fields for the selected workflow displays in this column. Use the dropdown to assign the Capture field to the index or invoice field in Sage Paperless Construction. |
Default Value column |
You can enter any free form value here to provide a static default value for the Index or Invoice field. No Workflow OCR should be selected and if so, it will be overwritten by this default. Entries displaying here are hard coded. |
Required column (Only applicable for non-Invoice Document Types) |
If a check box is selected in this column, on return from OCR, a value must be populated in this column via OCR or Sage Paperless Construction backfills for the document to save. If any field is missing, the document will remain in the queue to be processed manually. As non-invoice documents return from OCR, backfills are automatically run so this functionality can be used to prevent saving a document into the system that did not backfill successfully. |
Show Quicklist column |
You can select a quick list to automatically open when the invoice is first accessed. If a value has been captured by OCR, the quicklist will display the appropriate commitment lines and pre-select all to facilitate quickly adding the commitment to your invoice. For any commitment (subcontract or purchase order), if the invoice total captured by OCR equals the commitment total, then the commitment lines will be systematically added and the invoice auto-routed. Note: If PO lines are added but missing the PO line number, OCR logic will determine the PO line number based on an exact unique match on the Material/Inventory Item field. |
Edit Mapping
Select Edit Mapping if there are revisions needed to the existing mapping.
1.In the Map Workflow to Document Type window, click to highlight an existing workflow entry.
2.Click Edit Mapping.
The Workflow Mapping window similar to the following displays:
3.Make whatever revisions are appropriate to the selected mapping.
4.Click OK.
Copy Mapping
1.In the Map Workflow to Document Type window, click to highlight an existing workflow entry.
2.Click Edit Mapping.
The Workflow Mapping window similar to the following displays:

3.In the Name field, enter a name for the newly copied workflow.
4.Make whatever revisions are appropriate to the selected mapping.
5.Click OK.
Important: There is no way to delete a workflow. Instead, click the Active check box to remove the checkmark. This marks this workflow as inactive.